Additional IDEs
IDE's (Integrated Development Enviorments) are programs that are created to assist computer programmers in the writing and developing of code. Most IDE's allow for a user to manage whole projects programmed in a certain language and allow for easy package management. While Dr. Java is the main IDE taught in this class, there are many other IDE's that have their own upsides and downsides that can be used in its place. Below, I will show how to set up 3 of the most popular IDEs for Java developers. All of these are free to everyone.
Eclipse
Net Beans
BlueJ
Eclipse Instructions
Visit the Eclipse Homepage
Windows Setup
- Download the latest eclipse IDE from the eclipse website above.
- Unzip the zip file to the location you wish to keep the eclipse folder. (i.e. C:\eclipse)
- Navigate to this folder, and double-click the eclipse.exe icon to start ecliipse
- You will than be presented to select a workspace. Your workspace folder will be where all your source code and compiled code will reside. NOTE: You can select a new workspace each time you open eclipse if you dont check the checkbox, this allows you to create multiple workspaces for each class that might require coding.
- After opening eclipse.exe, you will be presented with a screen similar to the following:
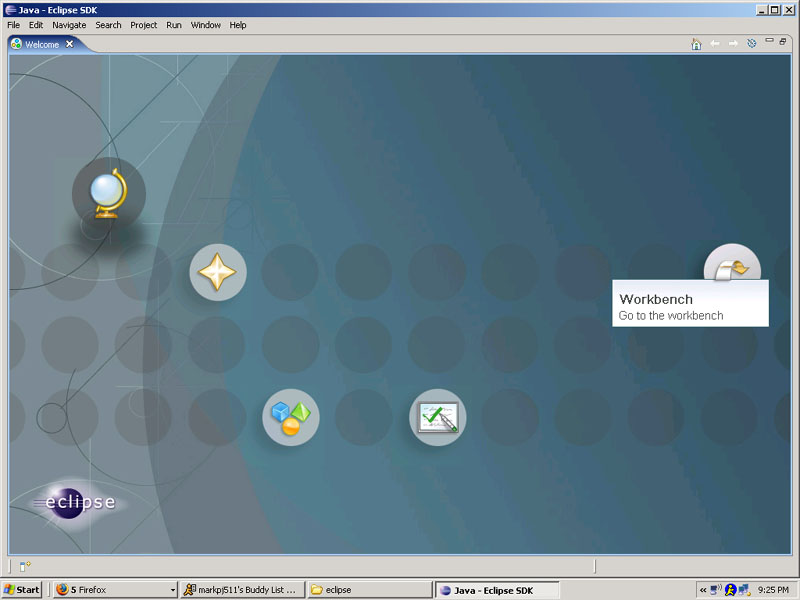
Click on the workbench link on the far right.
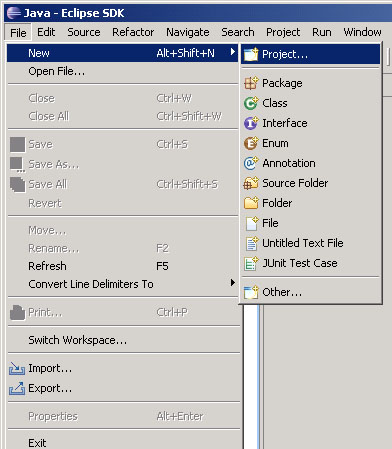
- We will now start a new project, which you can do by using the file menu on the top bar, than do new, and lastly, project. This is shown below:
- Select "Java Project" from the list and click the Next button
- Type a project name in the box and click the Next button
- At the "Java Settings" page, click "REMOVEDk Additional Source Folders"
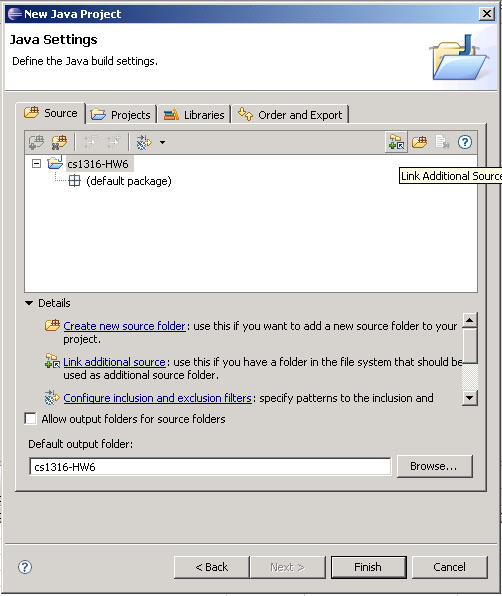
- Using the browse button, find the "java-source" folder downloaded from the cs1316 website, and click OK, than finish.
- Use the "REMOVEDk Additional Source Folders" button again to add the "jMusic/inst" folder. NOTE: You must click on the project name to for the button to become active again
- Than use the "Create a new Source Folder for the Project" button located next to the "REMOVEDk Additional Source Folders" button. Give this folder a name and click Finish
- Next, click on the libraries tab, your screen should look like the following:
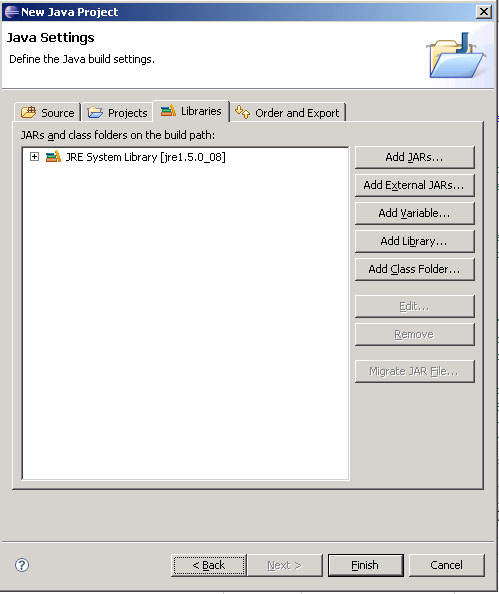
- Use the "Add External JARs" button and browse to the jmusic.jar file and click Open.
- Click Finish to create the project.
- To create a new java class, right click on the source folder you create (not java-source or jmusic/inst), and select new, than Class.
- You will now be presented with a Class creation screen, give this class a name, and click finish
- You are now set to code in eclipse
Net Beans Instructions
Visit the Net Beans Homepage
Windows Setup
- Download the latest Net Beans IDE from the website above.
- Install Net Beans onto your computer
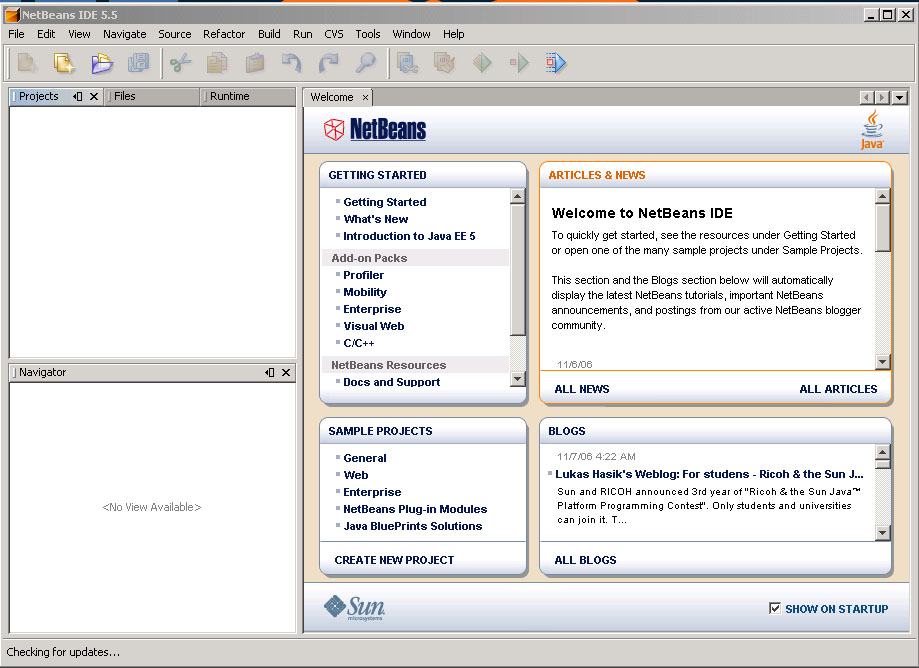
- Use the icon installed on the desktop to start Net Beans, you should receive a screen similiar:
- Click the New Project button in the upper left hand corner (or ctrl+shift+n)
- You will now see a screen similar to this:
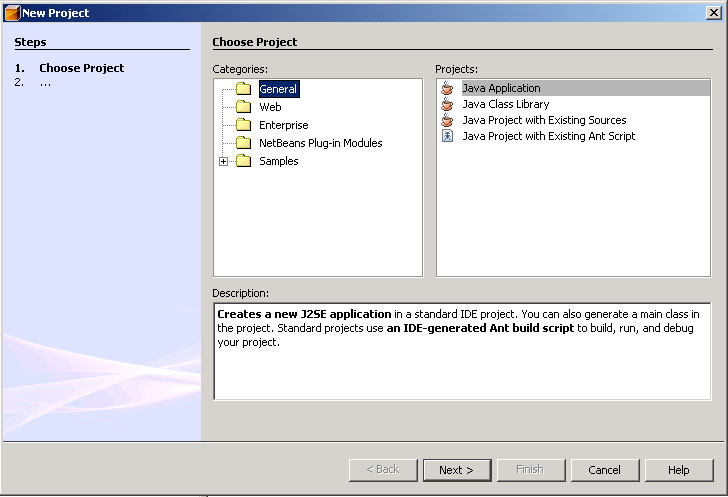
Select Java Application from the General folder and click Next
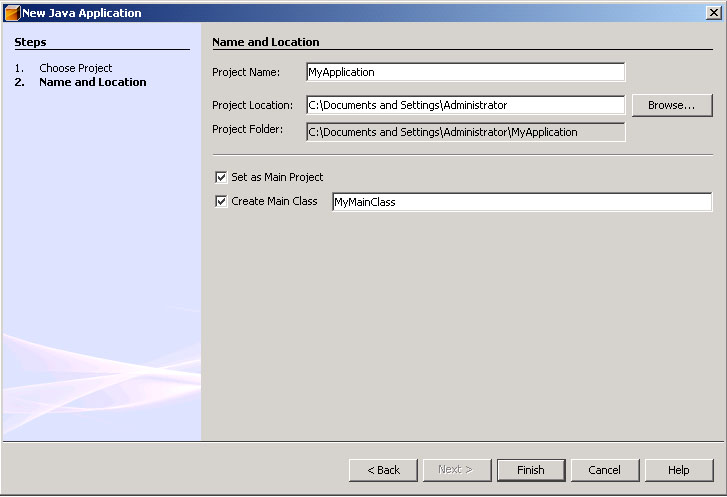
- Type a name for this project in the provided field.
- Set the project location to the desired location on your Hard Drive.
- In the field "Create Main Class", you should see <your-project-name>.Main, Erase this field and type the name of the class which will contain the method, main NOTE: If you do not erase your project's name before the class in this field, you will create a package other than the default package, and will need additional imports for your project to work.
Your Screen should now look similar to this:
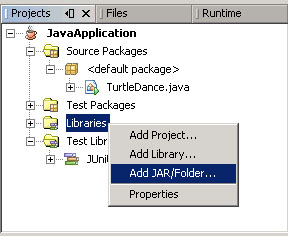
- After your project has been created, locate your new project folder in the upper left corner. Right click on the folder named "Libraries" and select "Add Jar/Folder..." as shown below:
- Select the location of the "java-source" folder downloaded from the cs1316 website
- repeat the steps above for the jmusic/inst folder and jmusic.jar file
- You are now ready to use Net Beans to code java
BlueJ Instructions
Visit the BlueJ Homepage
Windows Setup
- Download the latest BlueJ IDE from the website above
- Install BlueJ on to your local Hard Drive
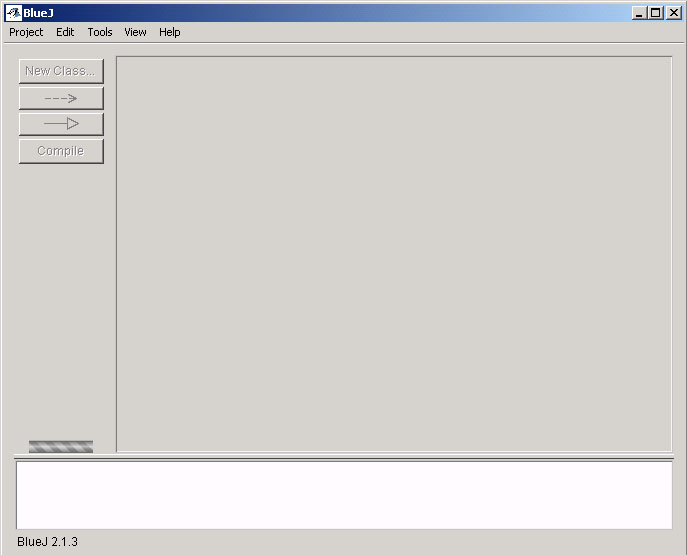
- Start BlueJ using the icon placed on your desktop, you will be greeted with a screen similar to this:
- Use the Project menu and select "New Project"
- Select a location and give your project a name and click Create
- Use the Tools menu and select "Preferences" (Or ctrl+comma)
- Select the "Libraries" tab at the top, you should be at a screen similar to this:
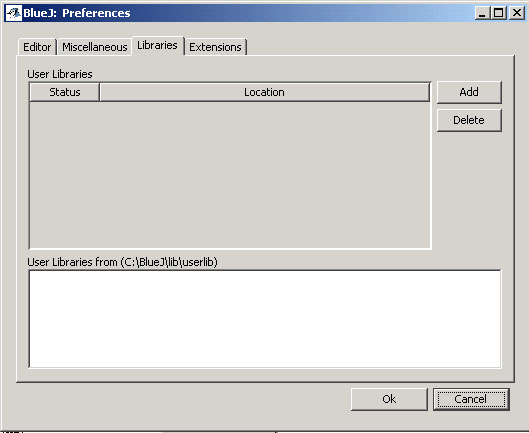
- Click the Add button and choose the location of the "java-source" folder downloaded from the cs1316 website
- Repeat the step above for both the jmusic/inst folder and jmusic.jar file.
- Click OK to confirm these changes, than OK again for the popup dialog box.
- To create a class, use the New Class button on the left hand side.
- You will see a dialog like the following:
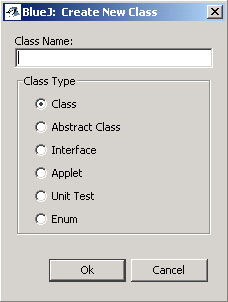
Type the name of the class you wish to create, and select the type of class it will be
- A new box will appear in the project display window with the name of the class you created
- To edit this class, double click the class box
- You are now ready to code java in BlueJ's IDE
Links to this Page


