Problem Set 8: HoosHungry.com
- Bring in to class a stapled turn-in containing your written answers to Questions 1, 2 and 3 by 3:30pm Monday April 13th. Each partner must separately submit a writeup. Your writeup must include your UVA ID (e.g., mst3k) in big block letters at the top. If you have a partner, your writeup must also include your partner's ID in big block letters.
- There is no automatic adjudication for this problem set.
Collaboration Policy - Read Carefully
For this assignment, you make work either alone or with a partner of your choice.You may consult any outside resources, including books, papers, web sites and people, you wish except for materials from previous CS150 courses. You may consult an outside person (e.g., another friend who is a CS major but is not in this class, or a CS prof, etc.) who is not a member of the course staff, but that person cannot type anything in for you and all work must remain your own. That is, you can ask general questions such as "can you explain recursion to me?" or "how do lists work in Scheme?", but outside sources should never tell you what to type. If you use resources other than the class materials, lectures and course staff, define a sources list to indicate what you used and what you learned — as in this example:
(define sources (list "seymour cray, my roommate, explained parallelism"
"I found the shortest-path algorithm on Wikipedia"
"I asked Professor Robins about divide and conquer"))
You are strongly encouraged to take advantage of the Structured Lab Hours, Staffed Lab Hours and Office & Lab Hours for this course.
Purpose
The primary goal of this assignment is to give you some experience with a dynamic web application before you build your own web application for Problem Set 9. In addition, this assignment should help you:
- Understand how a web application is designed and implemented.
- Gain confidence that you can learn new languages on your own.
- Gain experience with some useful languages (Python, SQL, HTML, and JavaScript) for making web applications.
- Build your own web community.
- Satisfy late night cravings with yummy Python Burgers and Lambda Cakes.
Background
In 1990, Tim Berners-Lee, wrote a program called WorlDwidEweb for editing hypertext (text with embedded links to other documents) and developed the HyperText Transfer Protocol (HTTP) for allowing clients (browsers) and servers to talk to each other, Universal Resource Locators (URLs) for naming objects, and the HyperText Markup Language (HTML) for describing hybertext documents. With these pieces in place, anyone could set up a web server and start publishing their own hypertext documents. The web grew exponentially throughout the 1990s, with the number of web sites increasing from a few hundred in 1991 to 215.6 million sites in February 2009 and many fortunes were won and lost.For this assignment you will understand and complete the implementation of a web application that aims to provide a restaurant guide for hungry Hoos. When you are done, you will have produced a dynamic web application that integrates with a map and a database.
To build this, we used several languages:
- HTML (Hypertext Markup Language) — the language used to describe web pages. See the Schemer's Guide to HTML.
- Python — a universal programming language that can be incorporated into web pages and is evaluated by the web server when a page is requested. See the PS7, the Course Book Chapters on Interpreters and the Web, and the Schemer's Guide to Python.
- SQL (Structured Query Language) — a language for manipulating and extracting information from a database similar to the procedures you used in PS5. See the Schemer's Guide to SQL.
- JavaScript — a client-side programming language that is incorporated into generated web pages and evaluated by the web browser. We use JavaScript to interface with the Google Maps client application. (There is no guide provided to JavaScript, since you are not expected to modify any of the JavaScript code.)
Getting Started
Some amount of setup work will be required before your website is up and running.To get a feel for the web application, open a web browser to https://church.cs.virginia.edu/150/hooshungry/. Click on Register New User to create an account for yourself. You should receive an email message with your password. Once you have logged in, you will see an additional option to Add Restaurant. Also try clicking on the markers on the map, and the links that pop-up after you click on a marker. Try adding a restaurant, reviewing a restaurant, and looking at the restaurant reviews.
- Create a directory hooshungry inside your public_html directory. On ITC Lab Machines (e.g., Small Hall), you would be creating J:\public_html\hooshungry, but the drive letter may be different on different machines.
- Download ps8.zip and unzip it into your public_html\hooshungry\ directory.
- You will not be able to try out your website until you have set up the database and the Google maps API, however.
Database
Because HTTP is a stateless protocol, all information that needs to persist between web requests must be stored somewhere. We use a database to store everything (except for user login information with is stored in a cookie, see below). The Schemer's Guide to Structured Query Language gives a brief introduction to the SQL language we will use to manipulate the database.The University of Virginia will provide you with your own personal MySQL database, hosted on dbm1.itc.virginia.edu. You will have to sign up and activate your database, and then create and manage the appropriate tables on it.
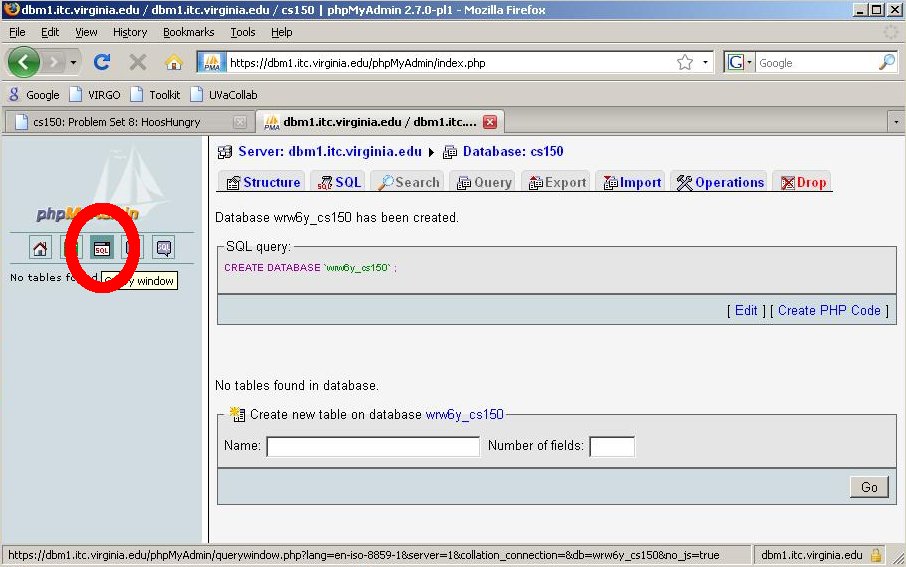
First, you need to create a database. Follow the directions in the SQL Guide to create your own MySQL database. If your UVA id is mst3k, create the mst3k_cs150 database, as shown below (click to enlarge):

After creating your database, edit the db.py file. You can find it in public_html\hooshungry\db.py. Change the values assigned to userName, password and dbName to match those for the database you created.
Users
Since we want to only allow legitimate users to add restaurants and post reviews, we need a table for managing users.You will create a table in your database named users with fields for storing the name, email address, last name, first names (all names except the last name), encrypted password and cookiecounter for each user (managing cookies and passwords is tricky and error prone). In later lectures we will explain more about why the way it does things is semi-secure.
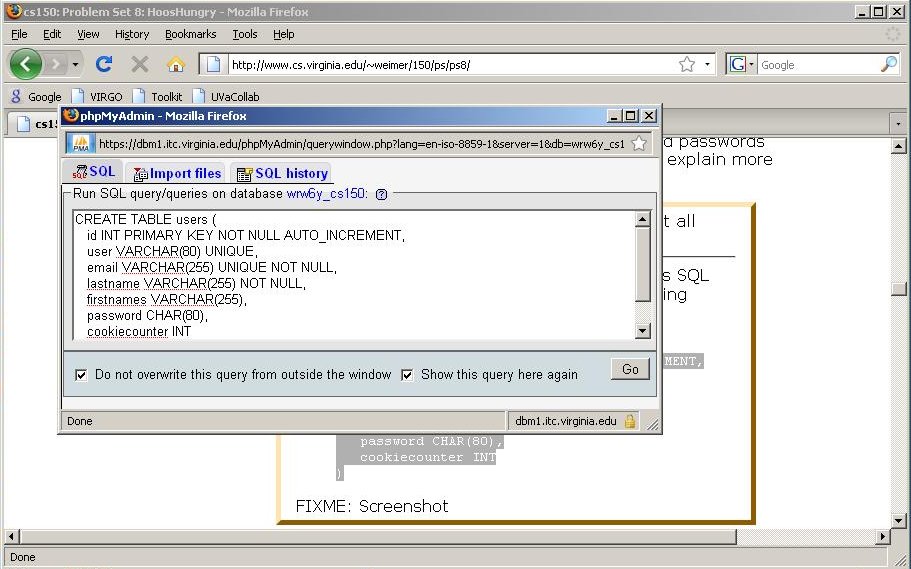
You can create the users table by issuing this SQL command:
To enter SQL commands using phpMyAdmin, click on the SQL button in the tab on the left:CREATE TABLE users ( id INT PRIMARY KEY NOT NULL AUTO_INCREMENT, user VARCHAR(80) UNIQUE, email VARCHAR(255) UNIQUE NOT NULL, lastname VARCHAR(255) NOT NULL, firstnames VARCHAR(255), password CHAR(80), cookiecounter INT )
That will bring up a window with a blank text field for entering SQL queries:
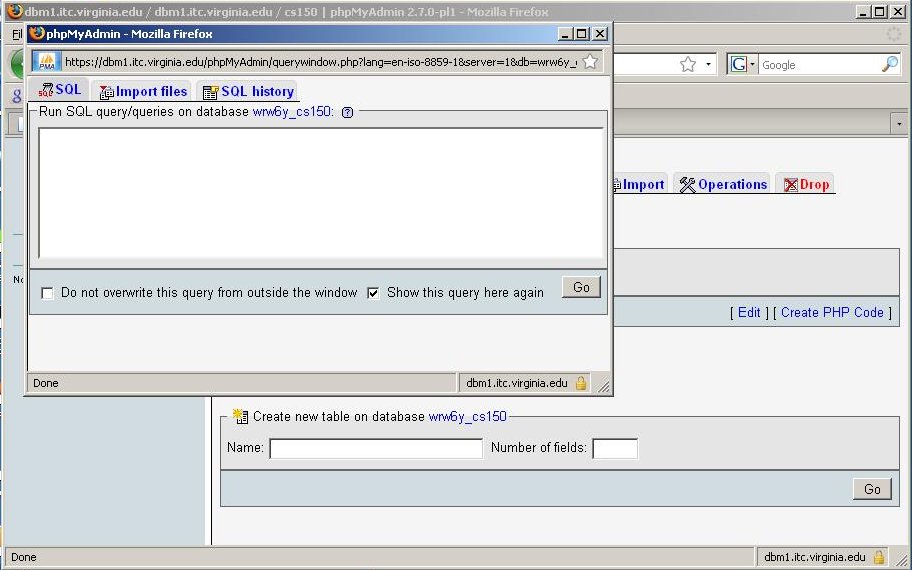
Copy and paste the text of the SQL query into the window and click Go:
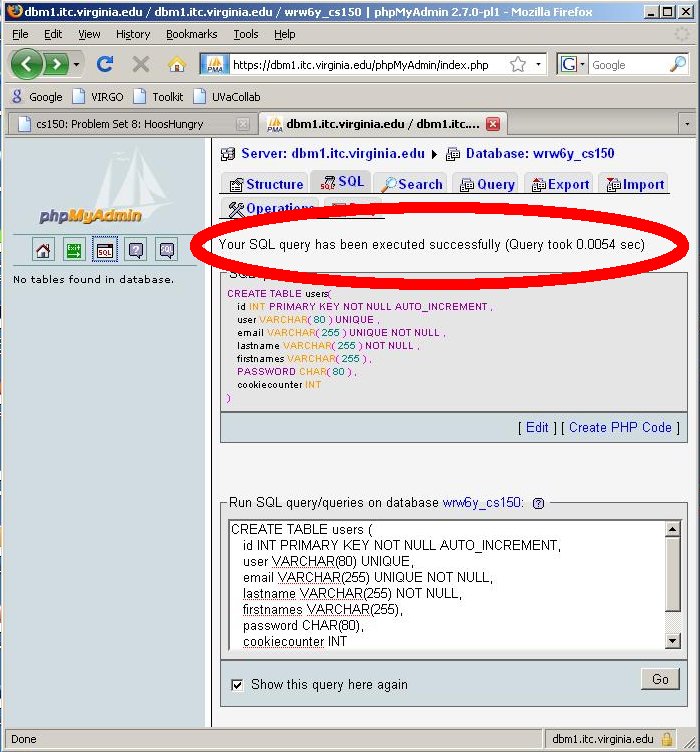
If it works, you will see the text "Your SQL-query has been executed successfully":
Note that each field has a name and a type. The id field is a unique identifier for each user. Since it is labeled AUTO_INCREMENT, the database will give it a value automatically that is one more than the previous entry. The user and email fields have type VARCHAR(num) which means they are a string of up to num characters. They use the UNIQUE and NOT NULL modifiers to indicate that all table entries must have different user names and emails, and that every entry must have a value for these fields.
Now that you have created a table, insert an entry for yourself in the table. For example, I would do this by running the SQL query,
INSERT INTO users (user,  email, lastname, firstnames)
           VALUES ('weimer', 'weimer@cs.virginia.edu', 'Weimer', 'Wes')
(Don't forget the quote (') marks.)
At this point, your users table should contain one entry corresponding to yourself. Use Browse to check this is the case, and issue the necessary SQL commands to repair it if it is not.
After running the insert command, you should be able to see one entry in your table. You can view the whole table by clicking on Browse. Note that the id field has been automatically assigned a value, but the password and cookiecounter field values are blank (NULL). The Browse link shows you the result of the query, SELECT * FROM users which means to select all fields for all entries in the users table. Note that SQL's SELECT command is very similar to the table-select procedure you defined in Problem Set 5, but there are a few differences: see the SQL Guide for details on SELECT.
Restaurants
We also need a database table to keep track of the restaurants. We will use the restaurants table for this, and create it using this SQL command.You should issue this SQL command for your database in phpMyAdmin:
CREATE TABLE restaurants (
   id INT PRIMARY KEY NOT NULL AUTO_INCREMENT,
   user VARCHAR(80),
   name VARCHAR(80),
   cuisine VARCHAR(40),
   lat DECIMAL(54, 30) NOT NULL,
   lng DECIMAL(54, 30) NOT NULL,
   notes TEXT
)
Reviews
We want to be able to collect reviews for the restaurants. This requires a new table, reviews, which will store the restaurant reviews. We want to be able to associate reviews with the restaurant they are describing, so we include a field in the reviews table that is a restaurant identifier. It is the number of the id field of the corresponding restaurant in the restaurants table.
Create your reviews table by issuing this SQL command in phpMyAdmin:
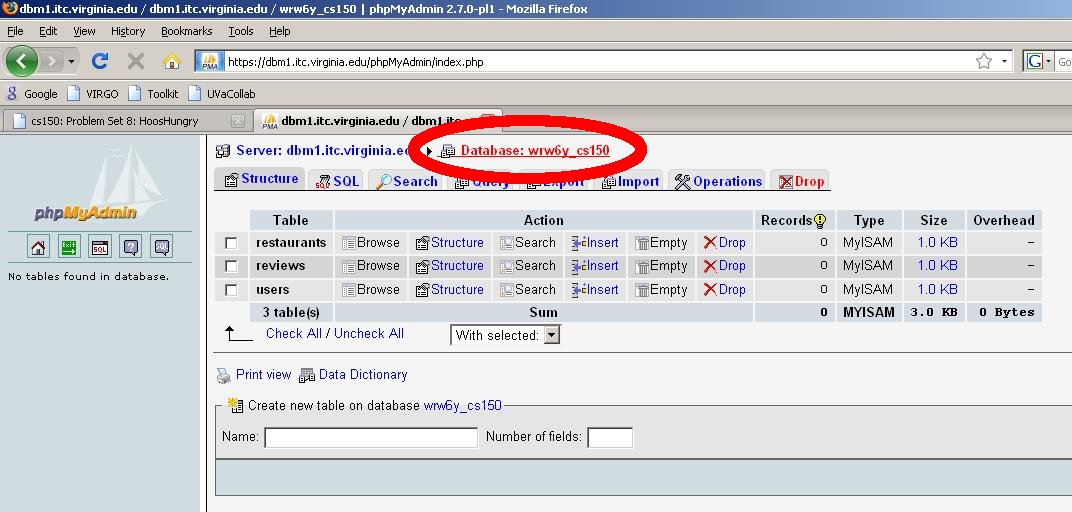
When you have created all three tables, click on the Database: mst3k_cs150 link in the upper right corner for a summary. You should see all three tables listed:CREATE TABLE reviews ( restaurantid INT NOT NULL, user VARCHAR(80), stars INT, comments TEXT )
Google Maps
Our web application uses the Google Maps API to display maps. An "API" is an Application Program Interface, a set of definitions that allow programs to interact with each other. In this case, the Google Maps API is a set of procedures you can use to interact with the Google Maps application that Google provides for displaying and manipulating maps. It provides procedures for controlling the map, putting flags and lines on the map, and obtaining user clicks on the map.
To use the Google Maps API, you need to obtain a Google Maps API key. Follow the directions here: http://www.google.com/apis/maps/signup.html. Note that keys are associated with the URL of the web page where the map is hosted, so you will need to enter your URL as http://www.people.virginia.edu/~your_user_id/hooshungry/ for the web page that will host the map. (If you expect to get more than 50,000 page views per day for your PS8, you need to contact Google to get permission first. This will probably not be a problem for you unless you add some extra features to your site!)
After you signed up for a Google Maps API key, you will see a page like this:
Copy the key into the file gmap.py, replacing the provided key.Thank you for signing up for a Google Maps API key. Your key is:
ABQIAAAA2kcJjN_en3sWPySRiYQfaRQfZCebFK1Jdo5rele1j7cYODPsohTttyMK5pkDuJP3SW94RIpDRwPBSw...
At this point, you should be able to see the web application by opening a web browser to http://www.people.virginia.edu/~your_uva_id/hooshungry/. You should see a welcome page including links to Register New User and Display Restaurants, plus a map of Charlottesville.
Managing Passwords
When you created your user entry in the table, you did not provide a value for the password field. This is because we don't want to store actual passwords in the database. This would be dangerous since anyone who breaks into the database (or just steals the disk it is stored on and starts looking at bits on the disk) would be able to learn everyone's password. Even though you would be foolish to put anything highly confidential on this site, people often use the same password for security-critical and non-security critical websites, so it is important to never store passwords in cleartext.Instead of storing actual passwords in the database we will store encrypted passwords. There are some tricky issues in how to do this that we will discuss in a later lecture, but the basic idea is to store Encrypt(password) in the database, and then when a user logs in check that the value calculated by encrypting the entered password matches the stored password.
To activate your account, you will need to reset the password.
Reload your main page (http://www.people.virginia.edu/~your username/hooshungry) and click on the Reset Password link.
Understanding SQL
- Insert a user into your users table with user name alyssa, email aph@cs.virginia.edu, last name Hacker and firstnames Alyssa P..
- Insert a user into your users table with user name ben, email bb@cs.virginia.edu, last name Bitdiddle and firstnames Ben.
- Select the lastname of all users in your table. The
response should be a table like this (of course, your result will be
different because you put yourself in the table instead of me):
lastname Weimer Hacker Bitdiddle - Select the lastname and firstnames of all users
in your table in alphabetical order by firstnames. The
response should be a table like:
firstnames lastname Alyssa P. Hacker Ben Bitdiddle Westley Weimer - Select the email address of all users in your table with
lastname matching Hacker. The response should be the
table:
email aph@cs.virginia.edu - Delete all entries from your table whose id does not equal the id for your entry. Note that the MySQL interface will give you a confirmation on DELETE commands, since a mistake could remove all the records you want from the table. It is a good idea with DELETE commands to use a LIMIT n as part of the query to make sure only the right number of entries are deleted. For example, for this question you would do DELETE FROM users ... LIMIT 2 to ensure that no more than 2 entries are deleted.
Turn in: Write down (or print out) and turn in the correct SQL commands.
Restaurant and Review Information
You should now be able to add some reviews and see them on the restaurant pages. The index page has a link to Display Reviews which links to the show-reviews.cgi file. This file is not complete in your implementation.If you click on a marker on the map, and then click on the restaurant name, you should get a page with more information on the restaurant. With the provided implementation, however, you instead get an error since the code for lookup in restaurants.py is not complete.
Turn in: Take a screenshot of the restaurant information screen in your browser after you have fixed restaurants.py and include it in your written write-up. The screenshot should show all relevant information, including the URL in the browser location bar (which must be your website and not church.cs.virginia.edu).
- For full credit, you must have at least two separate reviews by two different reviewers for the given restaurant.
- Write out or print out the new c.execute ("") line from restaurants.py (either on your screenshot or elsewhere on your writeup).
Turn in: Take a screenshot of the Display Reviews page in your browser after you have fixed the code and include it in your written write-up. The screenshot should show all relevant information, including the URL in the browser location bar (which must be your website and not church.cs.virginia.edu).
- For full credit, you must have at least two separate restaurants, each of which much have at least two separate reviews.
- Write out or print out the new c.execute ("SELECT * FROM reviews") line from reviews.py.
- Print out all of show-reviews.cgi.