Colab Tutorial
What is Colab?
-
Colaboratory is a Google research project created to help disseminate machine learning education and research. It’s a Jupyter notebook environment that requires no setup to use and runs entirely in the cloud. (from Google Colab Notebooks page)
-
It allows you to use virtual machines with a GPU (or TPU) to accelerate machinelearning workloads for up to 12 hours at a time.
-
It is free to use! There is a paid option called Colab Pro which gives access to faster GPUs, more RAM, more CPU cores, more disk space, and longer runtimes, those won’t be necessary for this course.
Steps to use Colab
Each assignment will consist of several notebook files (with a .ipynb extension) and several normal Python files (with .py) extension.
The notebooks will serve as the driver of the assignments.
They will direct you to implement functions and classes in the .py files, which you will then import into the notebook to perform computation.
This requires a bit of setup, but we’ll walk you through it step by step, using A1 as an example.
Upload assignment to Colab (top)
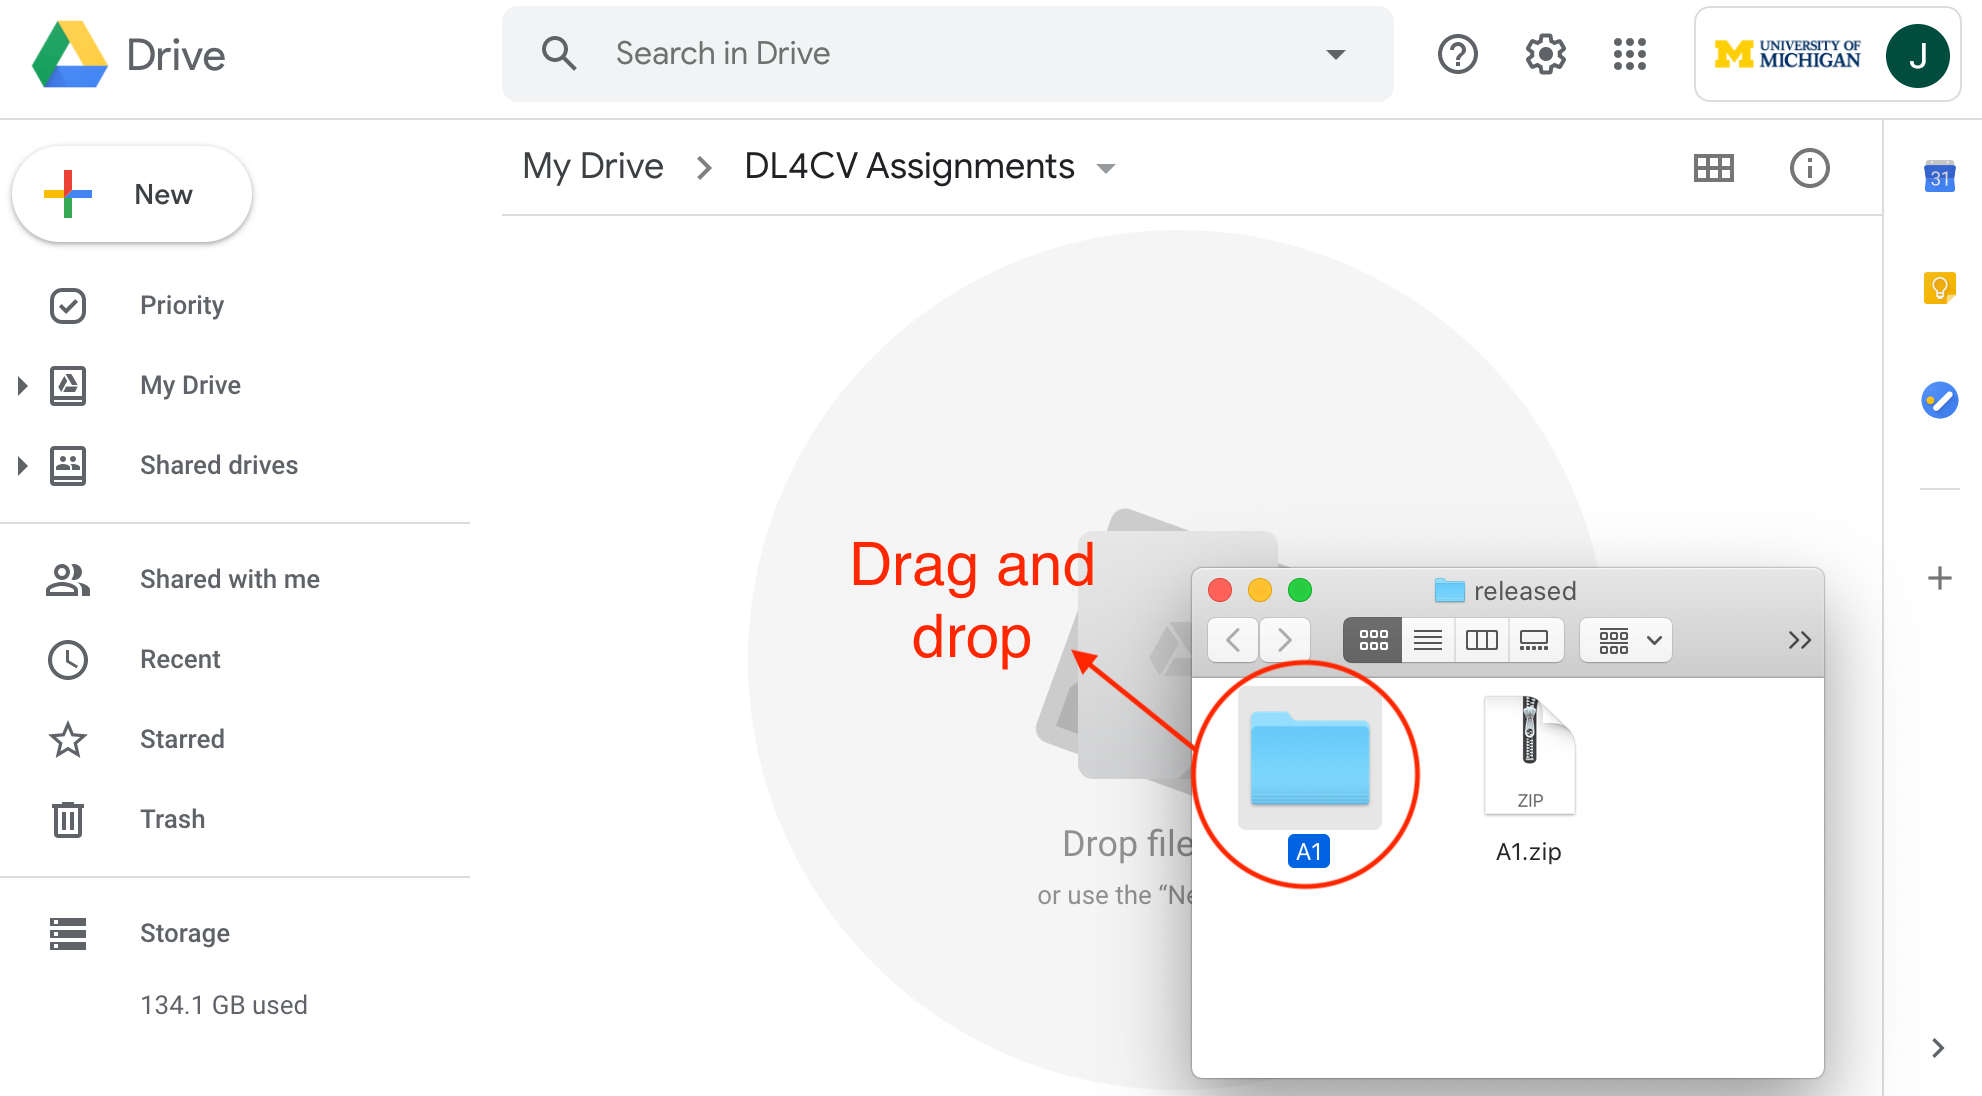
Each assignment will have starter code distributed as a .zip file.
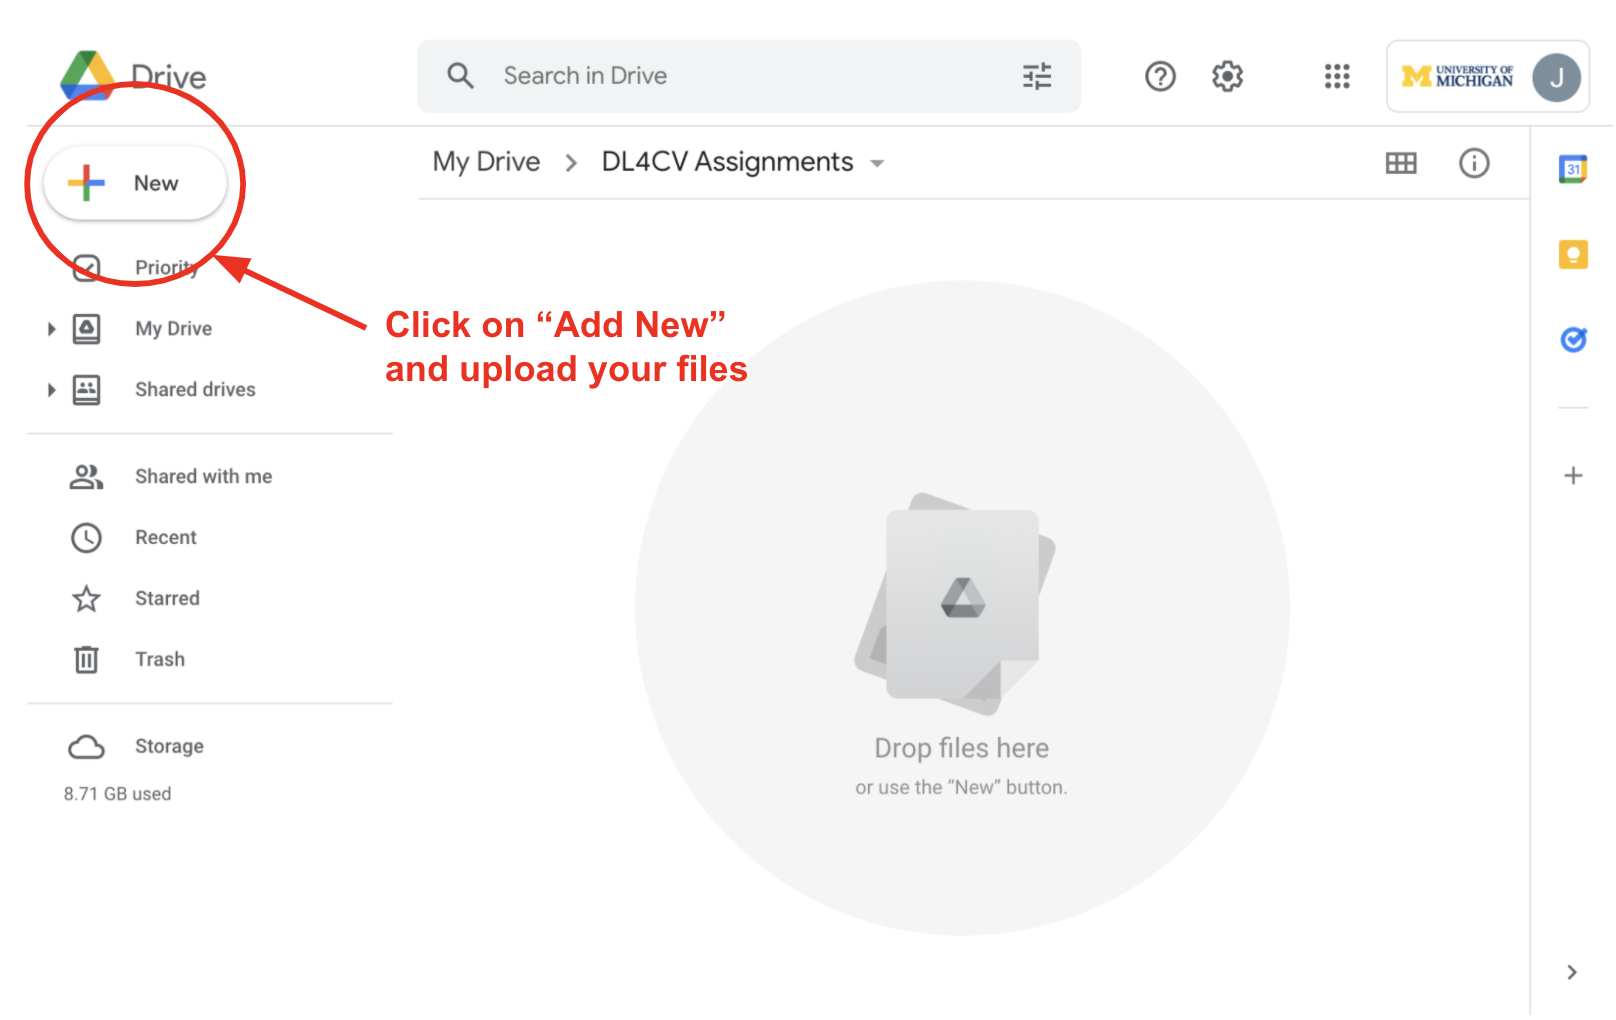
You should download and unpack the starter code, then upload the unzipped directory to some location in your UMich Google Drive by dragging your files or folder:
Or by clicking on the “Add New” button:
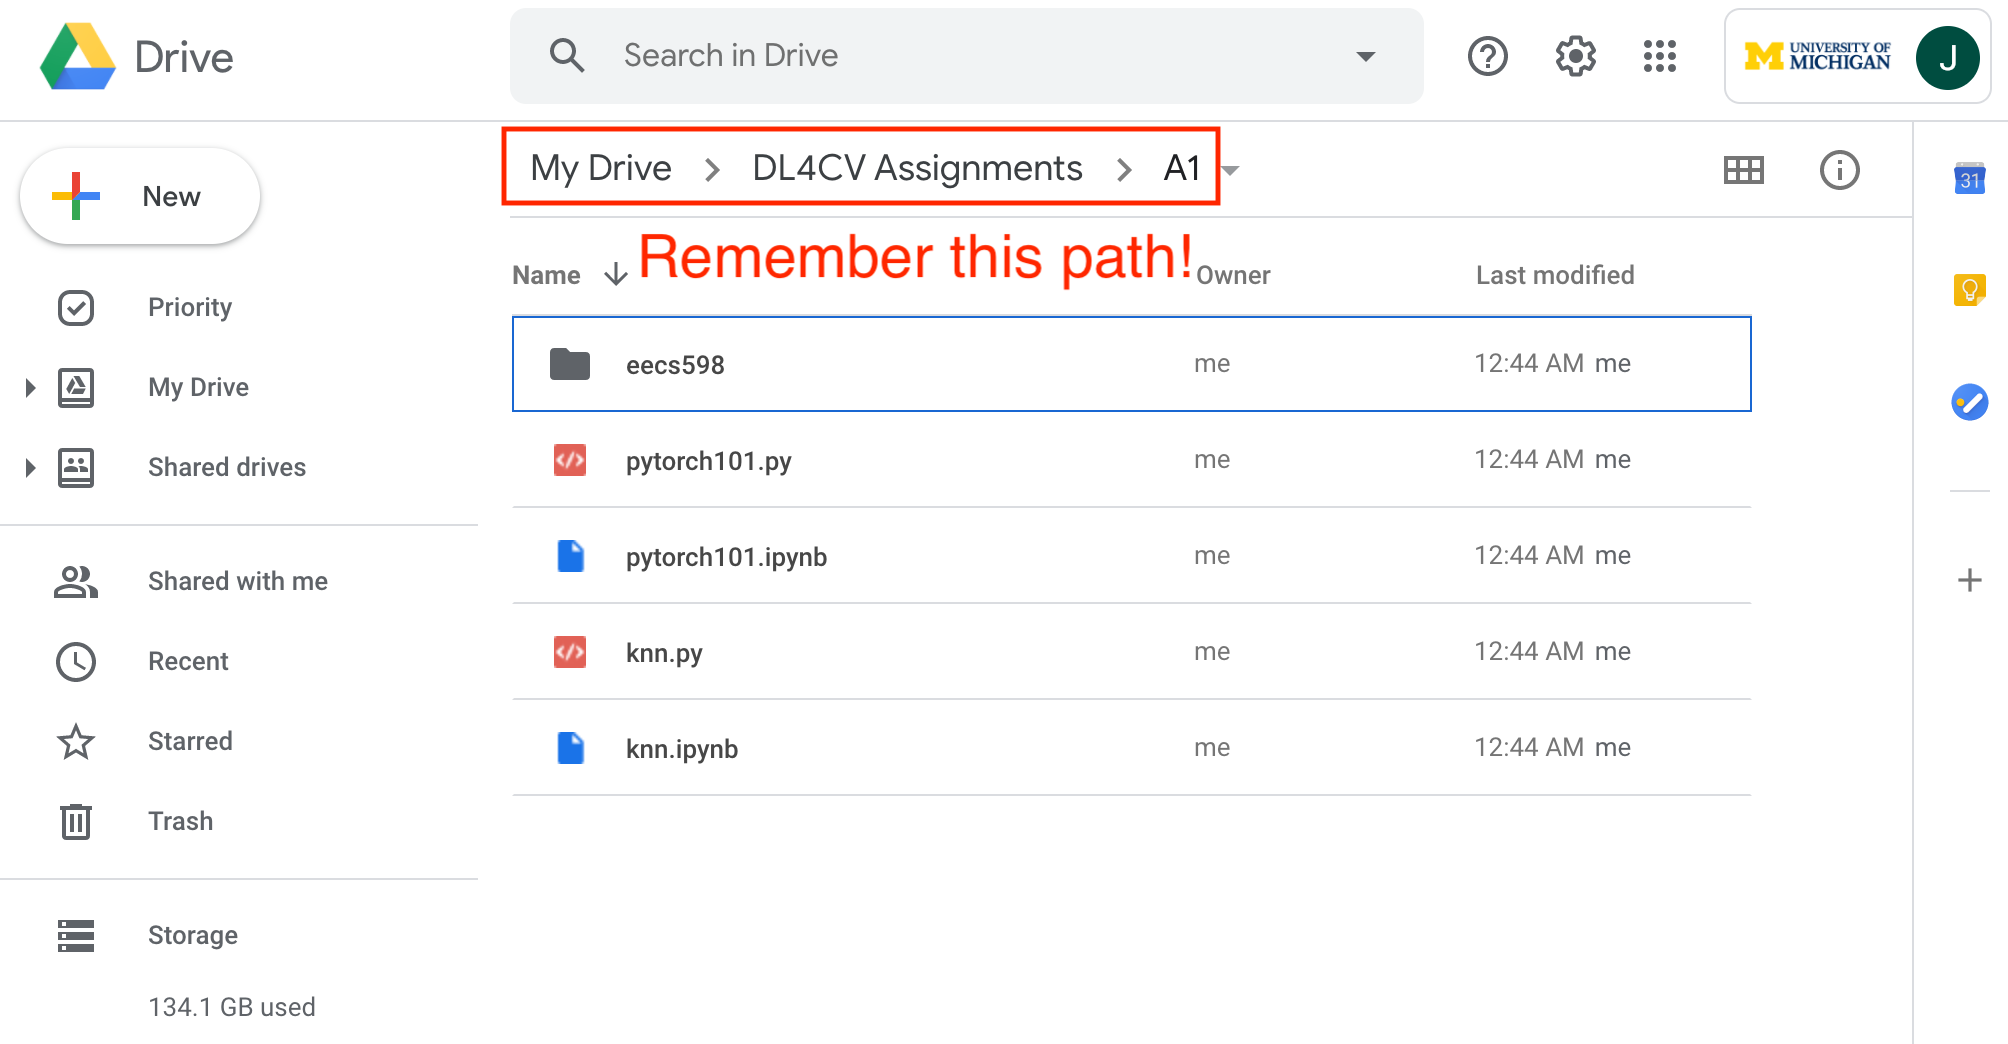
After uploading the starter code, click through to the assignment directory you just created. You should see all of the starter files in your Drive. At this point, take note of the path where you uploaded your files – you’ll need to copy it into the Colab notebook later.
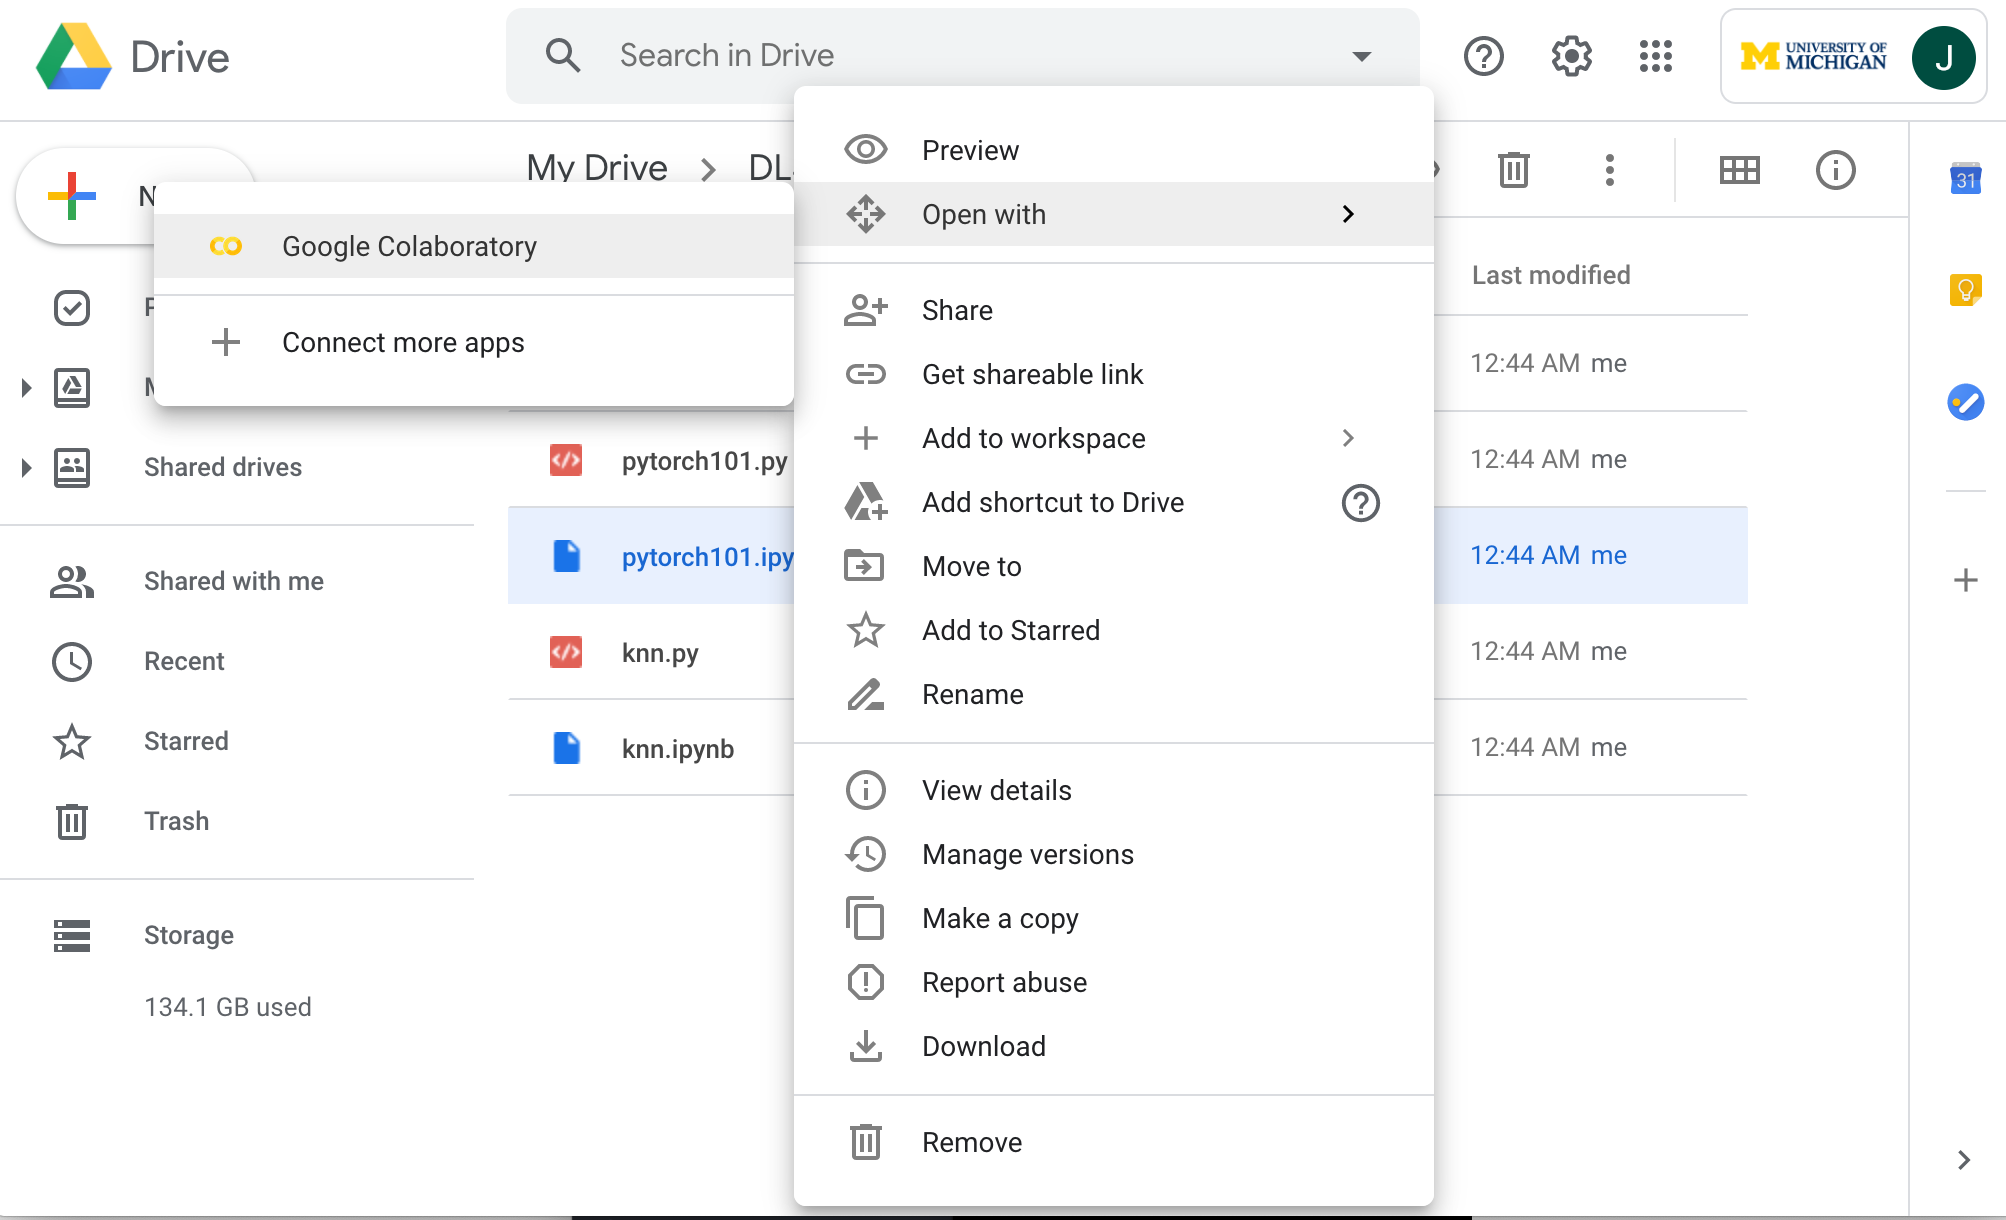
You can now start one of the Colab notebooks (e.g. pytorch101.ipynb) by right clicking on it and selecting Open With > Google Colaboratory (If you don’t see Colab after clicking on Open With, click on `Connect more apps):
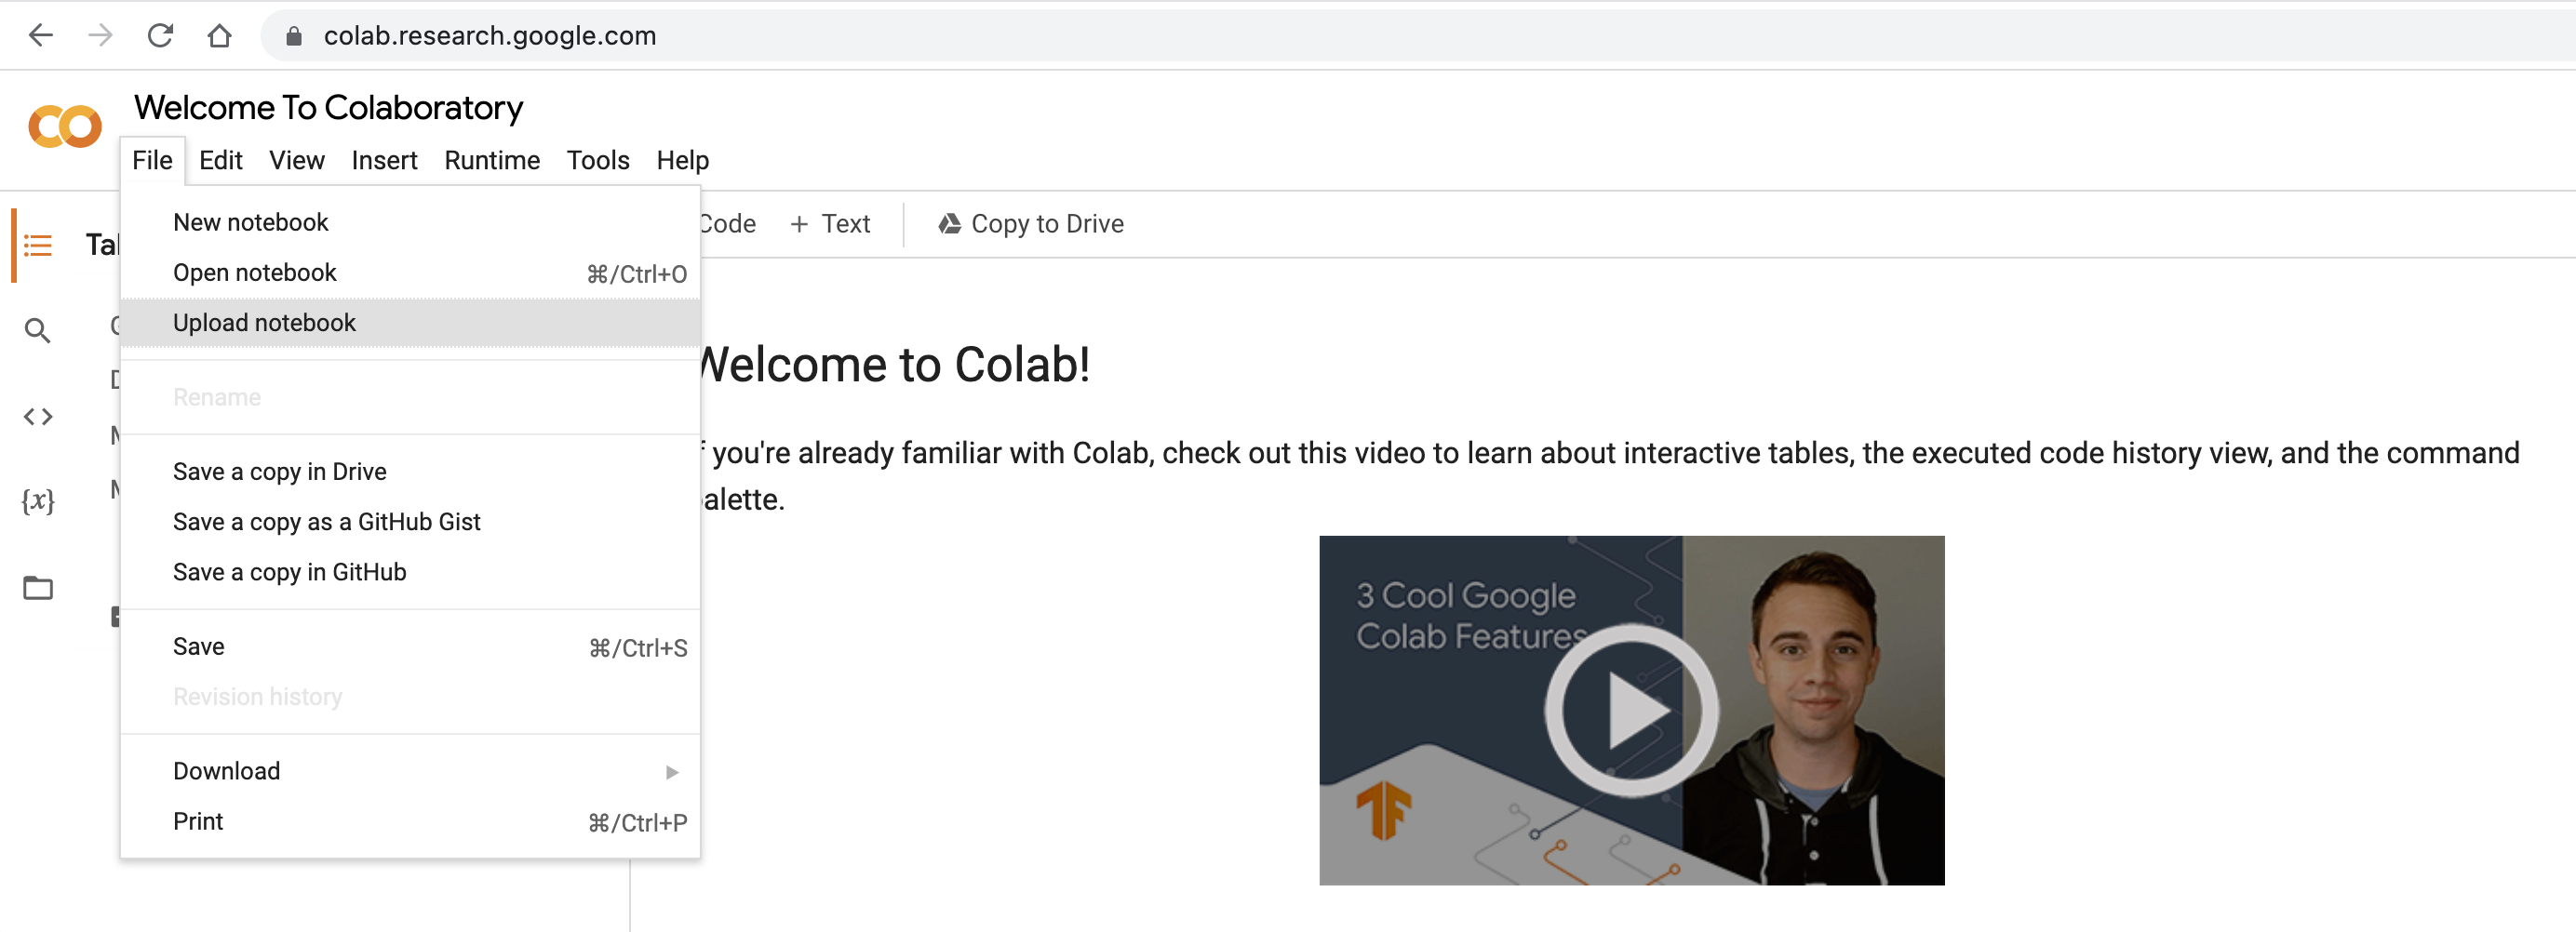
If your account hasn’t installed Colab already, you might not be able to install it due to UM’s current policy. As a workaround, visit Google Colaboratory directly. Select File > Upload notebook.
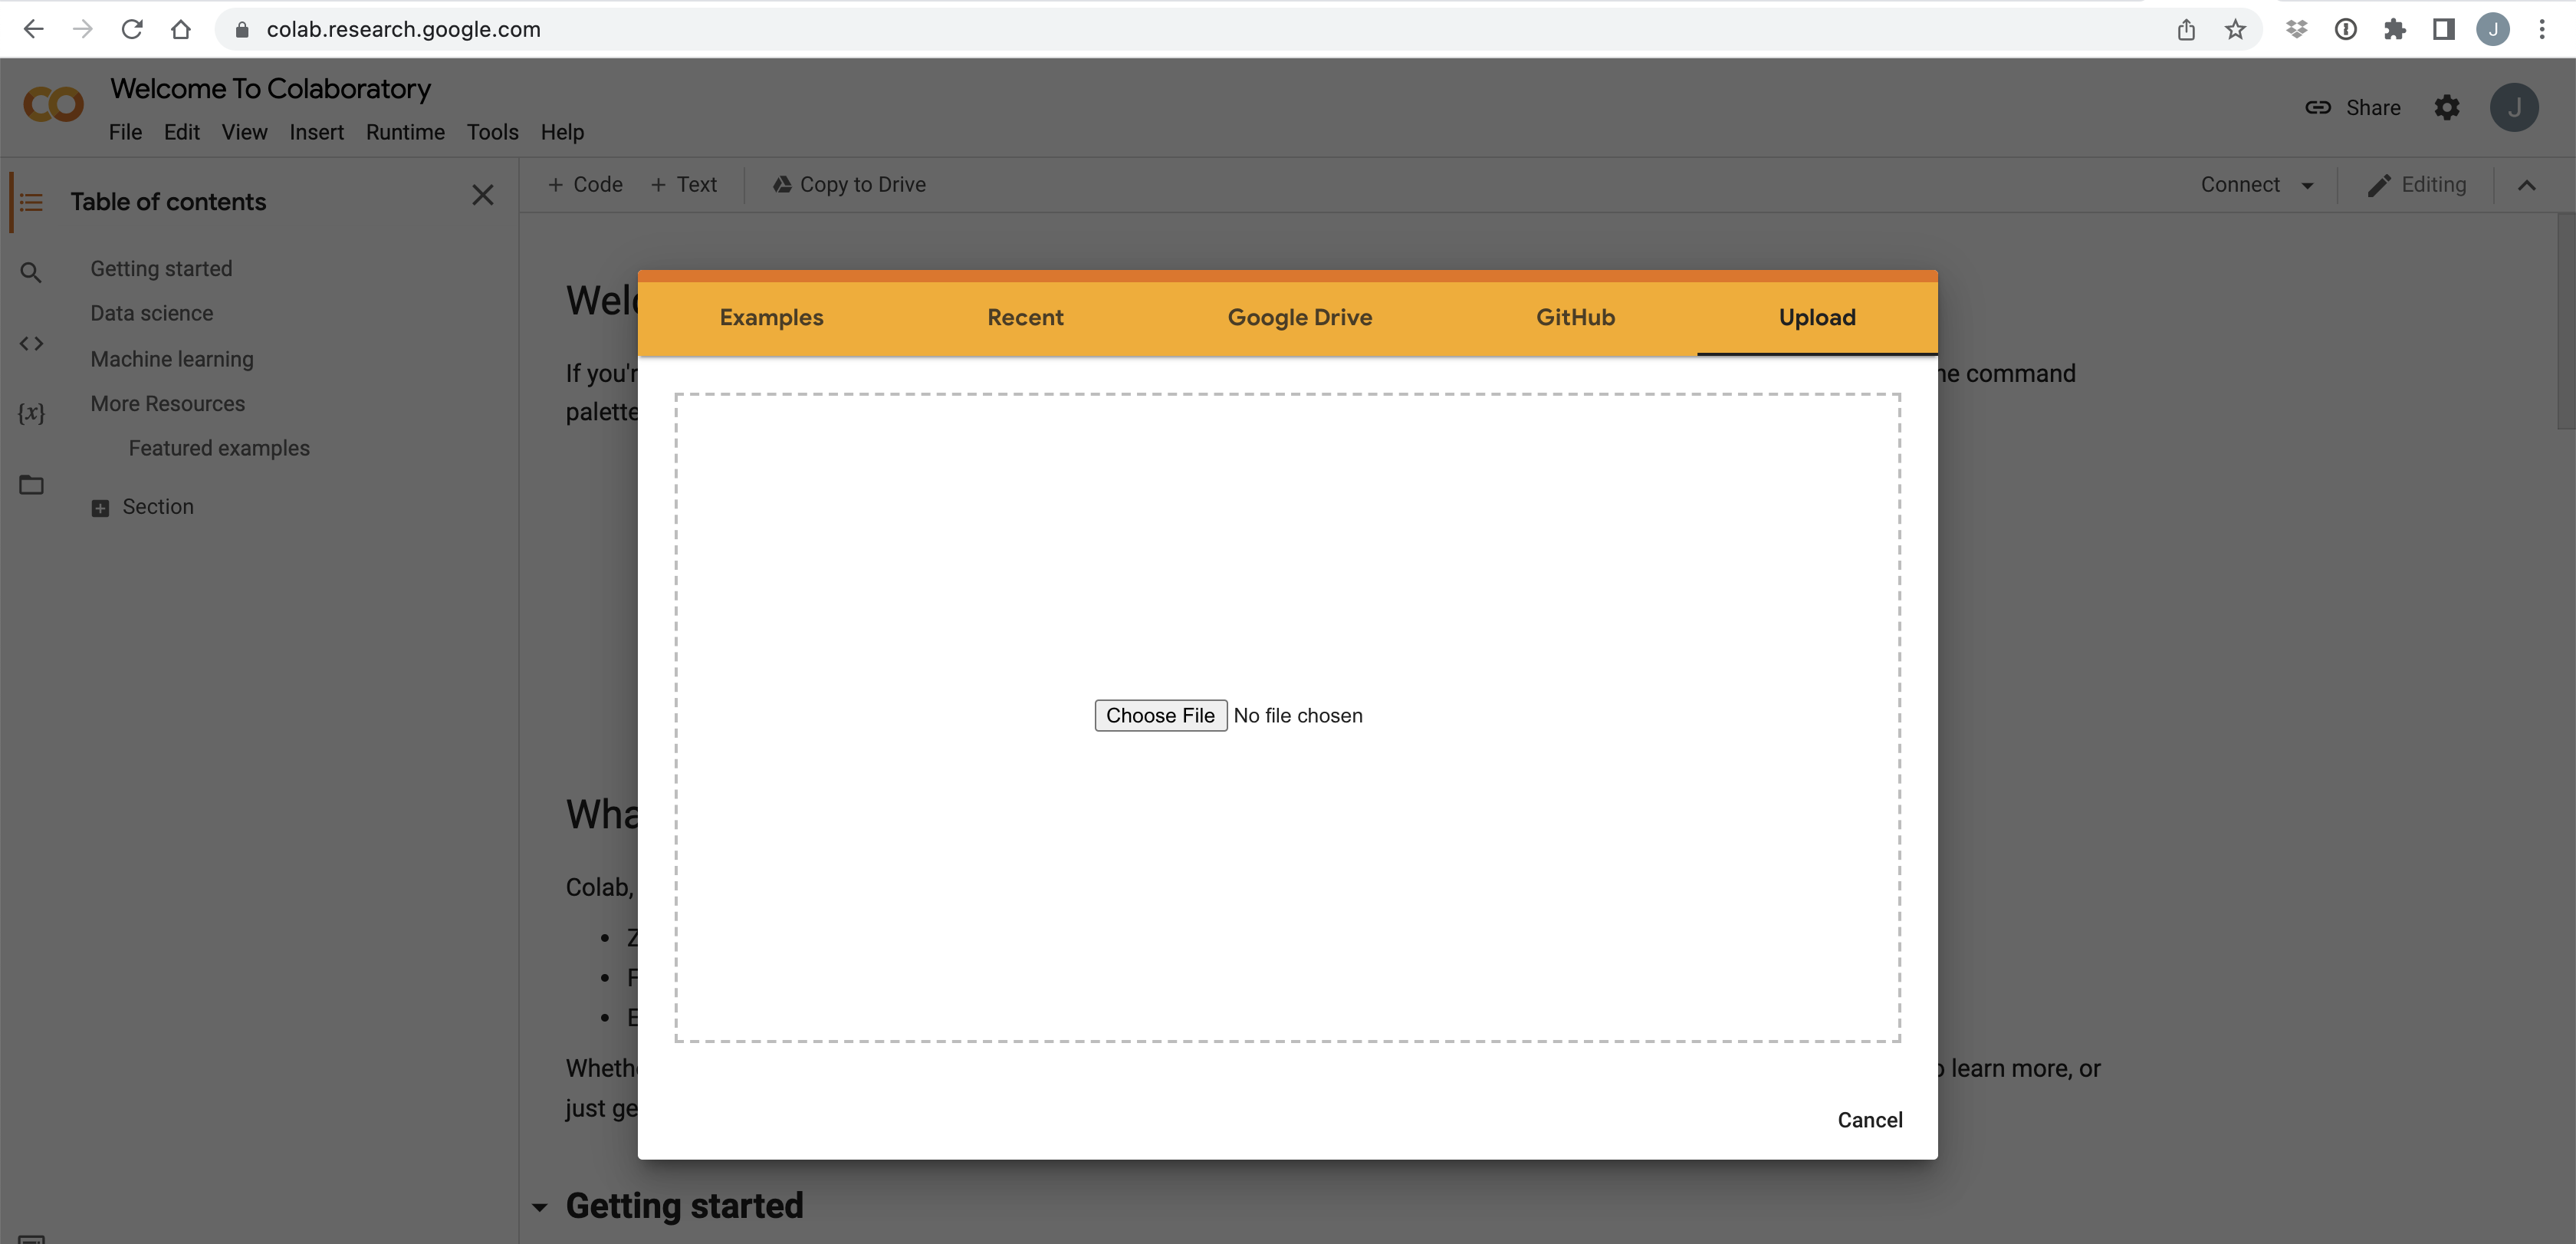
Click on Choose File and select one of your Colab notebooks.
After this step, your Google Drive can recognize your Colab Notebooks (ending with .ipynb) and you will be able to access them from your Google Drive as the above steps described.
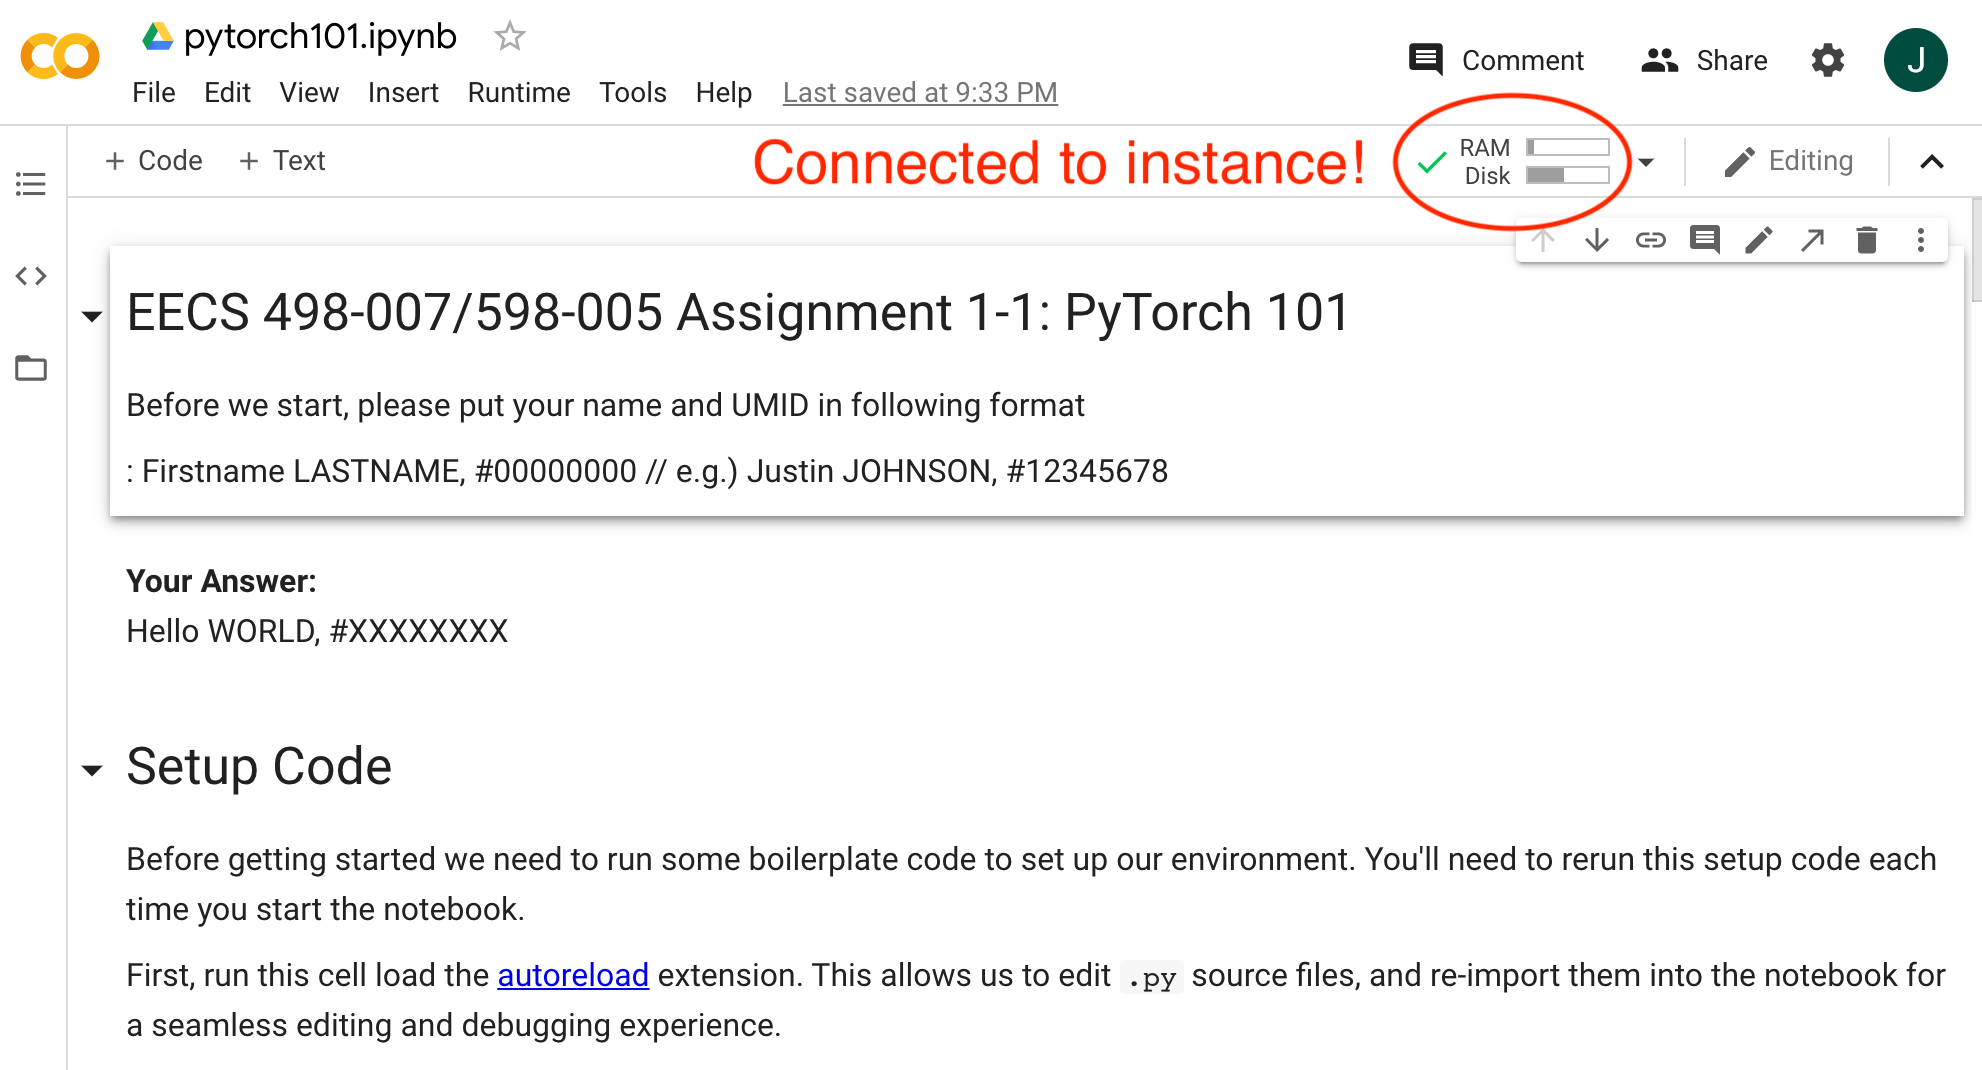
Connect to an instance (top)
The notebook should now be open in your browser.
Before you can run any code, you need to connect the notebook to a virtual machine in the cloud.
This is easy to do – just click the Connect button.
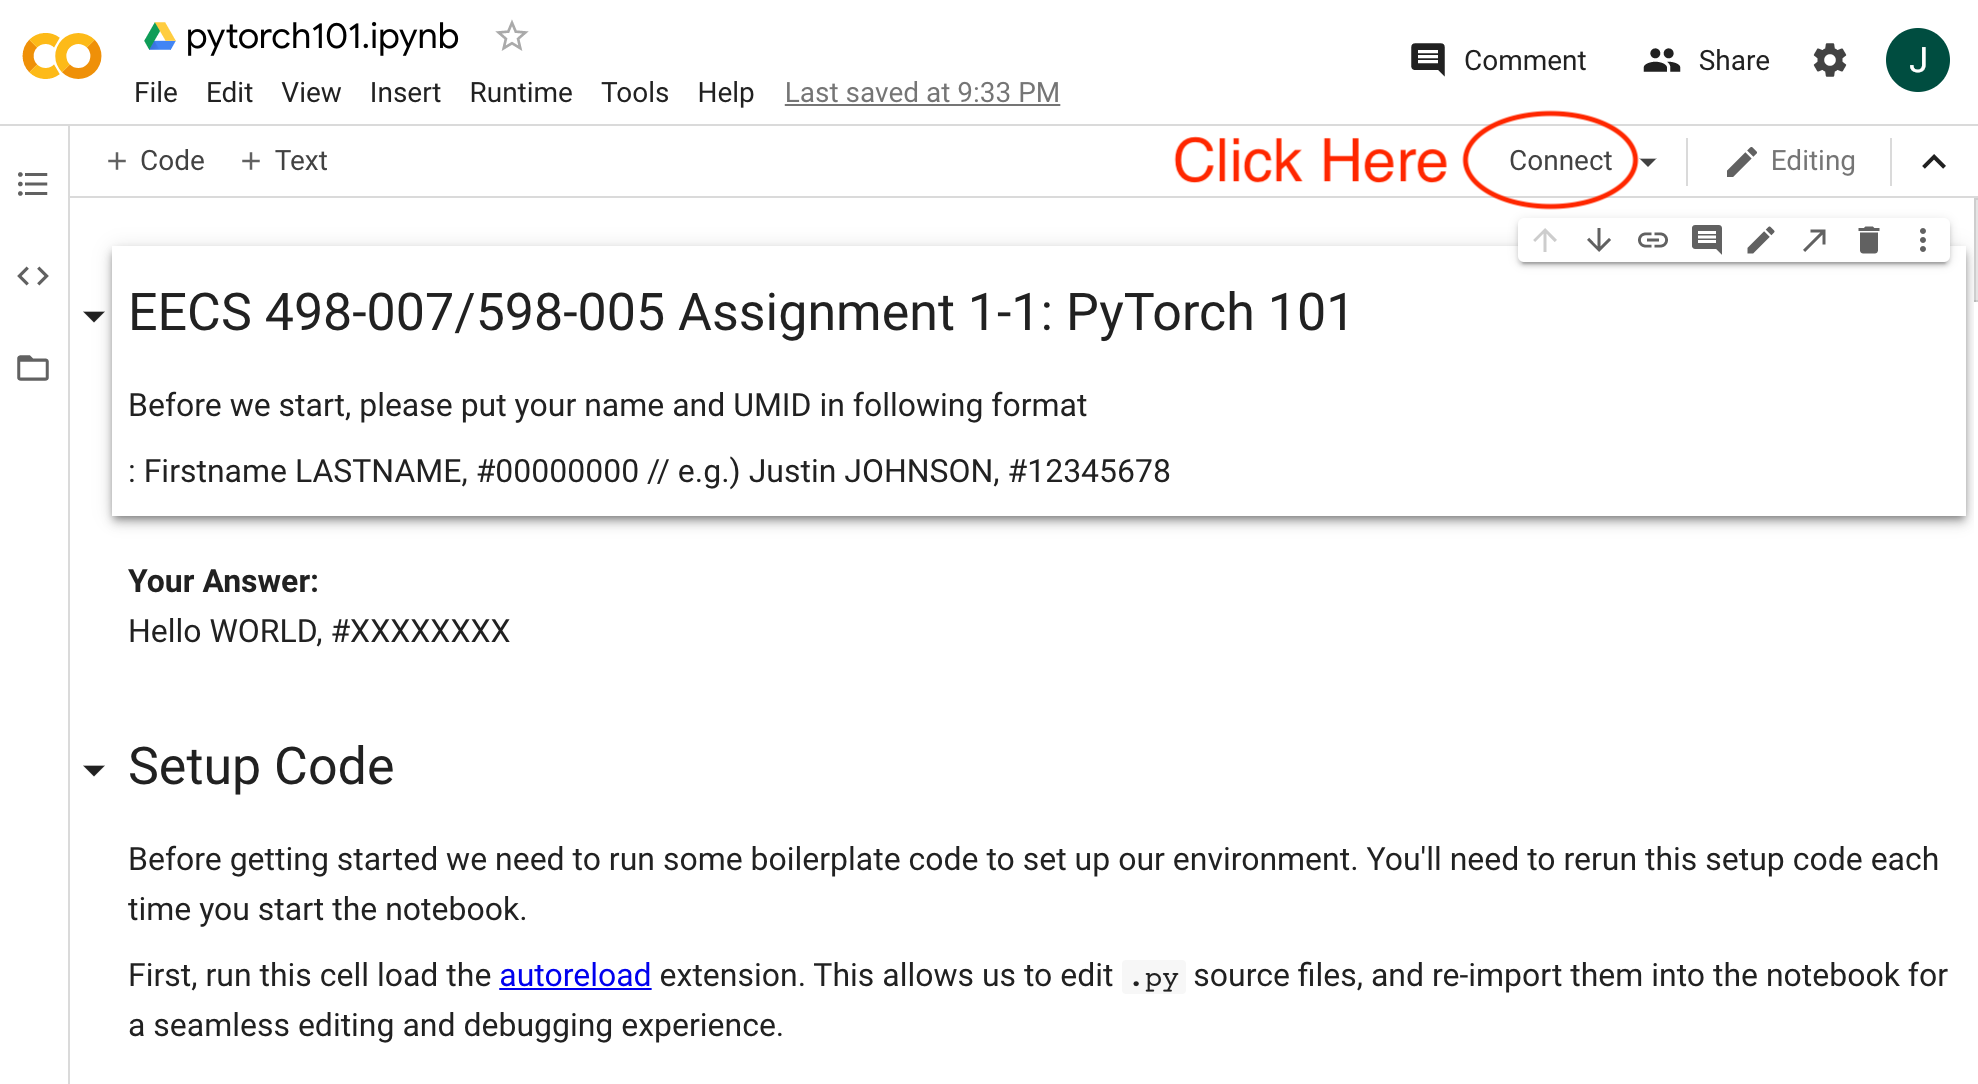
After successfully connecting, the Connect button should change to show you the current RAM and Disk usage of your virtual machine.
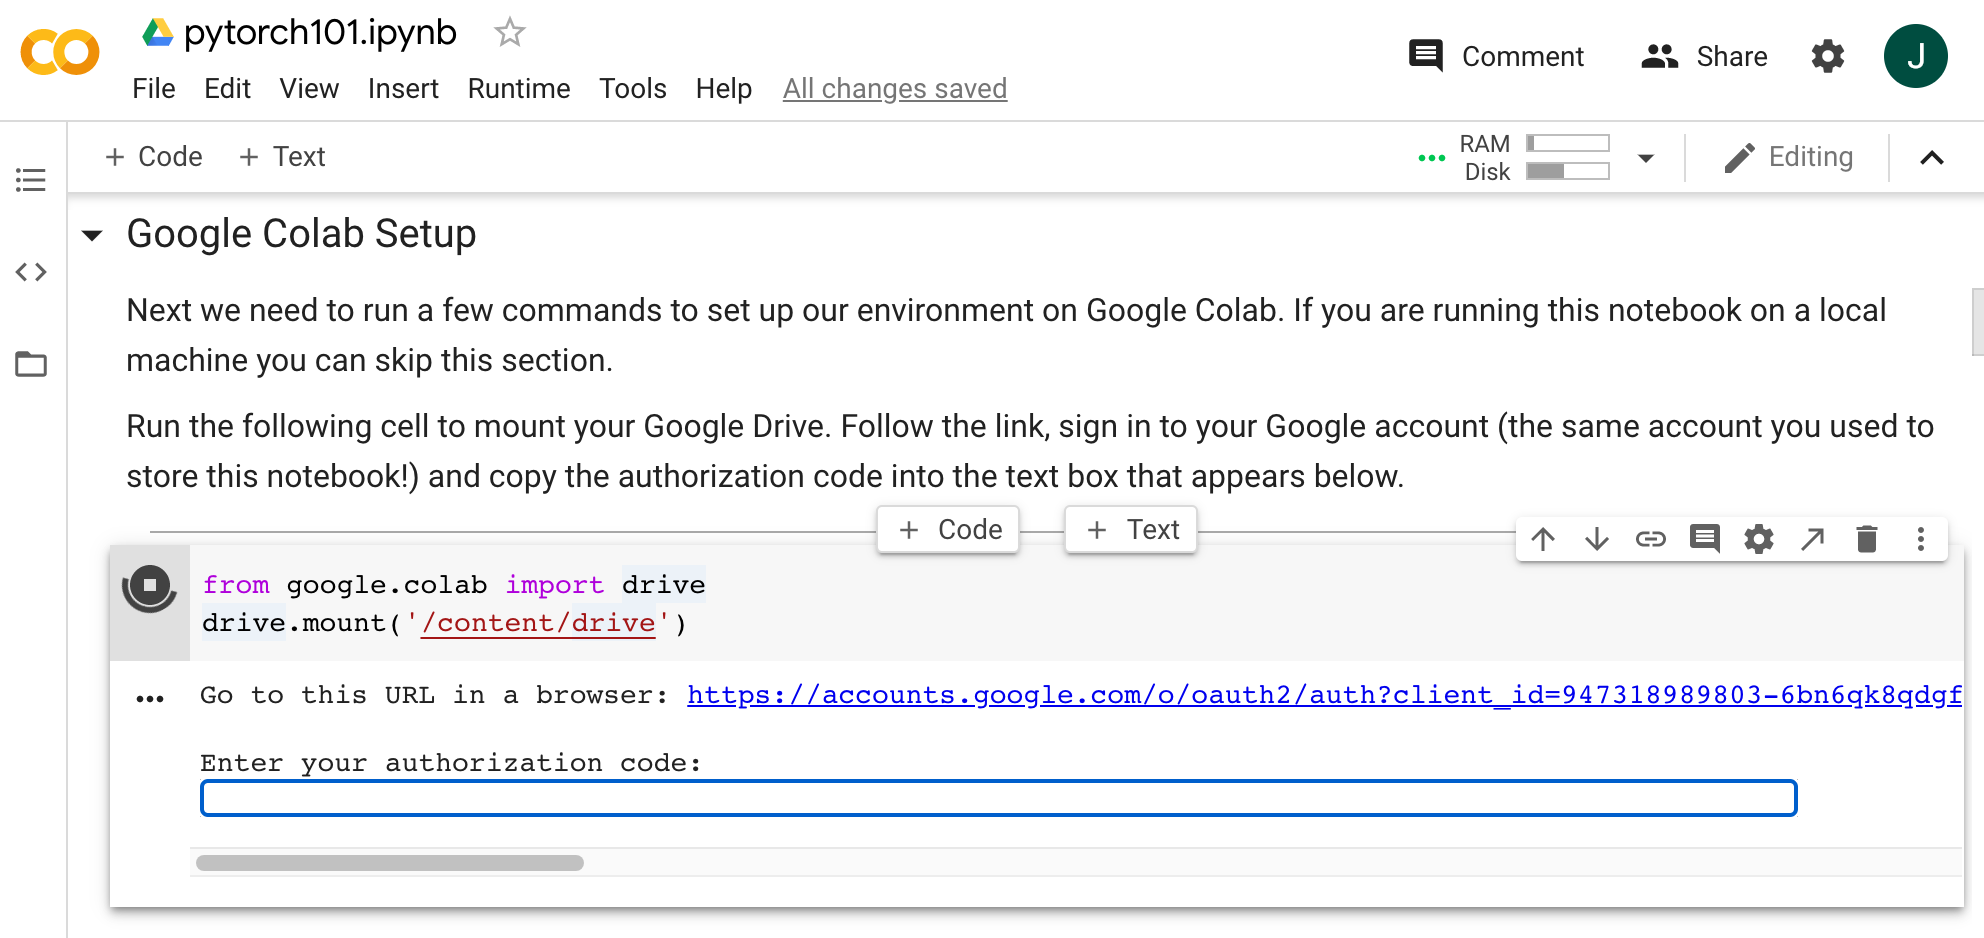
Run Setup Code (top)
Before you start writing and executing any interesting code, you need to do a bit of setup on the notebook. You’ll need to repeat this section every time you restart the notebook.
First, run the first cell (Shift + Enter) to load the autoreload extension.
This allows us to edit .py files, and automatically re-import the updated versions into the notebook.

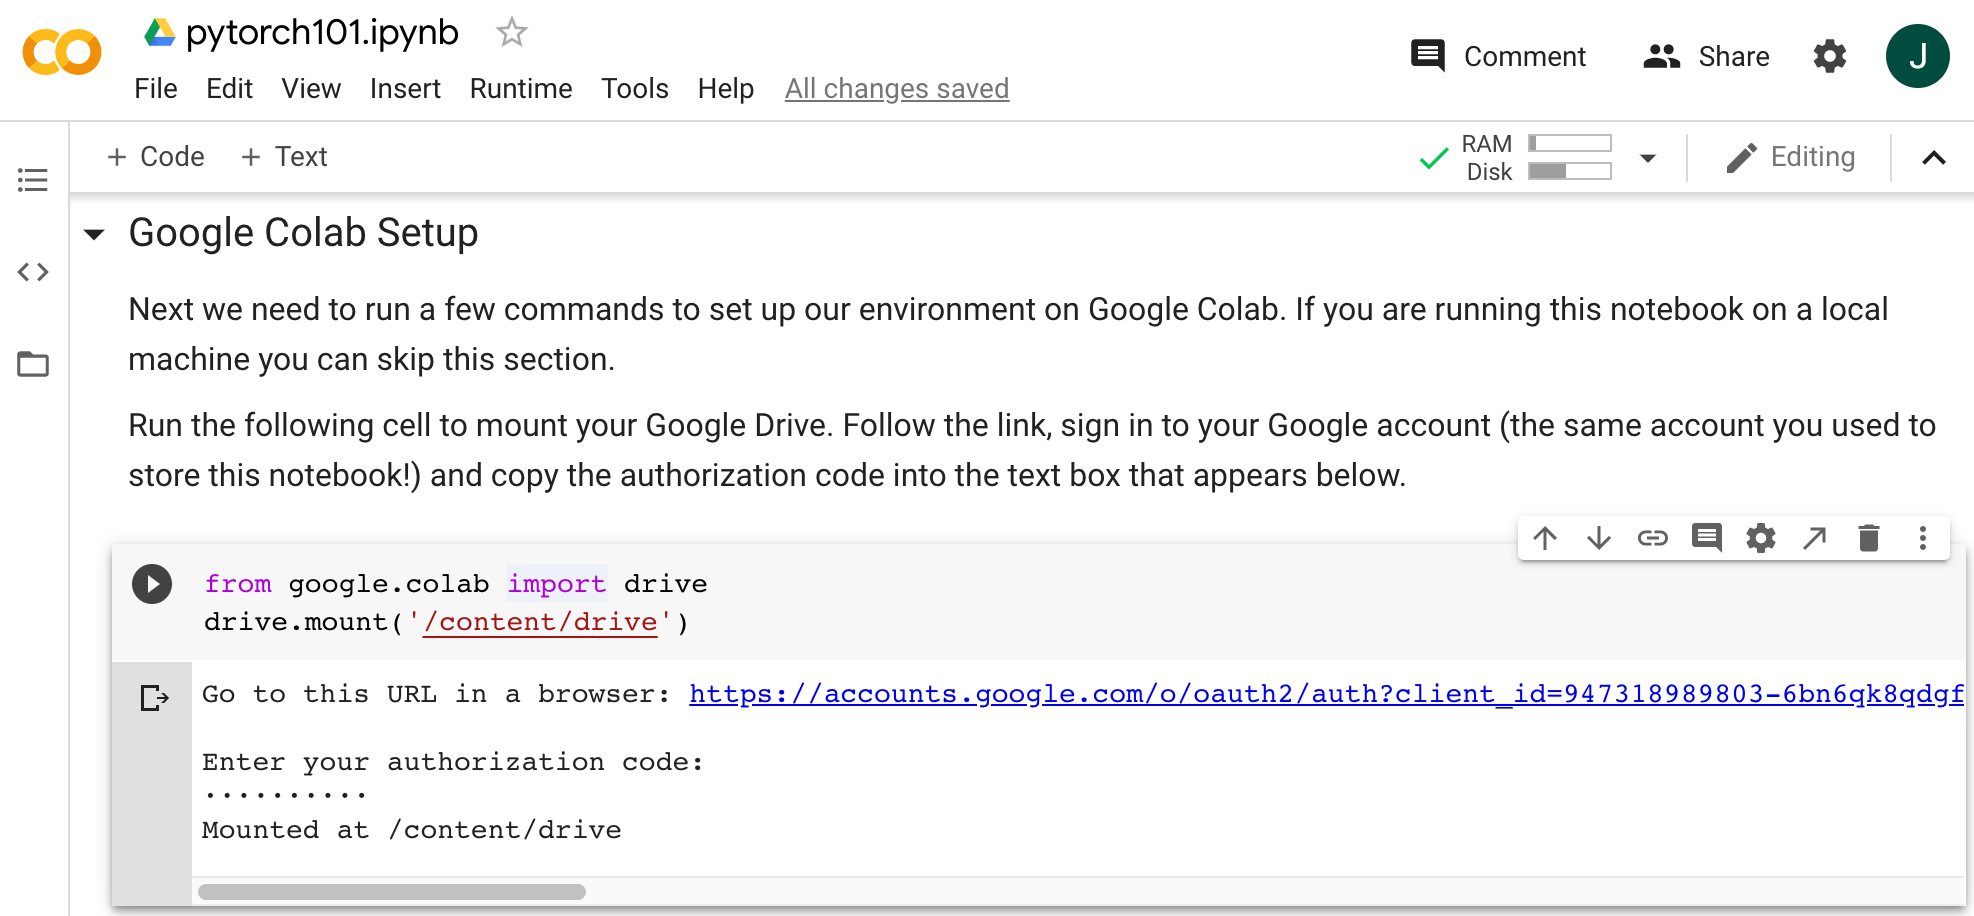
Next we need to mount Google Drive.
This will allow us to edit .py files, and import functions and classes from them into our Colab notebook.
Run the next cell to start the mount process. Click on the link that it prints.
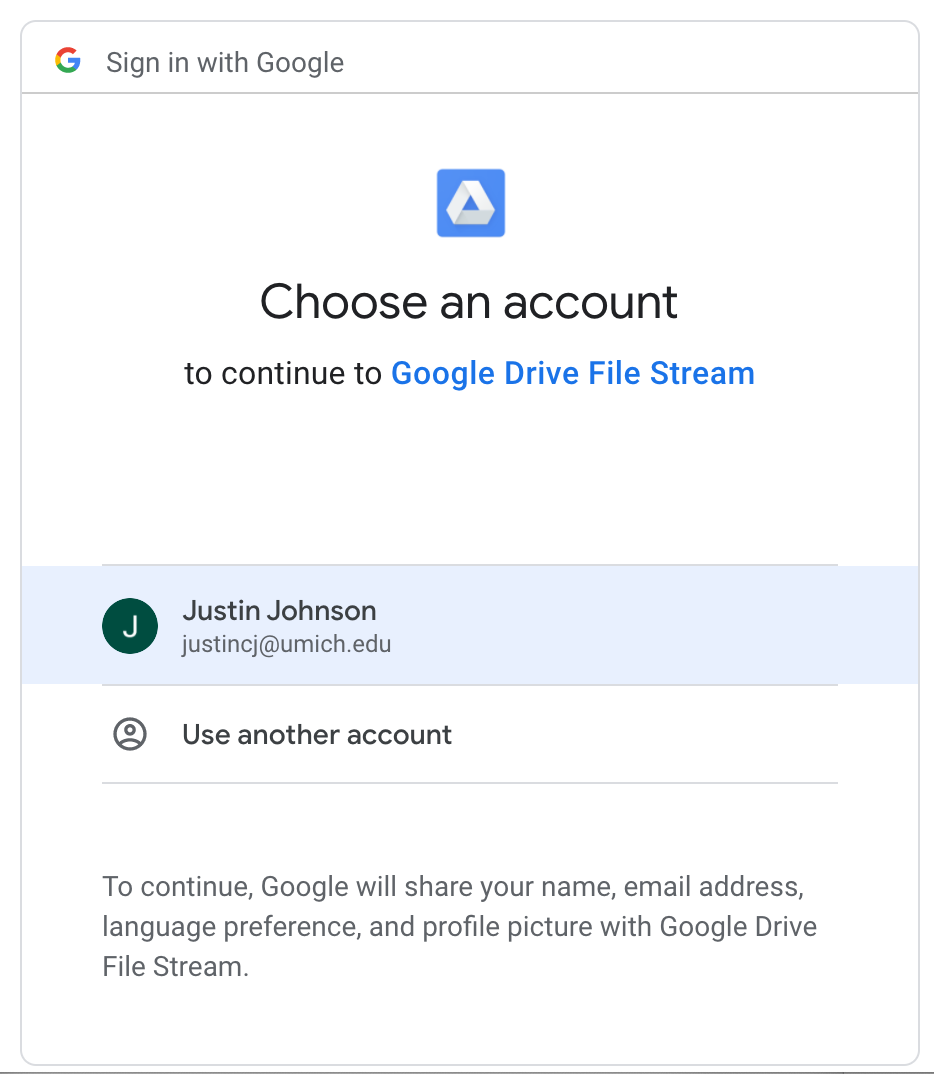
You’ll be prompted to sign into your Google account. If you have multiple Google accounts (e.g. UMich and personal), make sure to sign into the same account that you used to upload the starter code to Google Drive.
You’ll be prompted with a message about the permissions that this action will grant to Colab. After accepting, you’ll be shown a one-time code to copy and paste back into the Colab notebook.
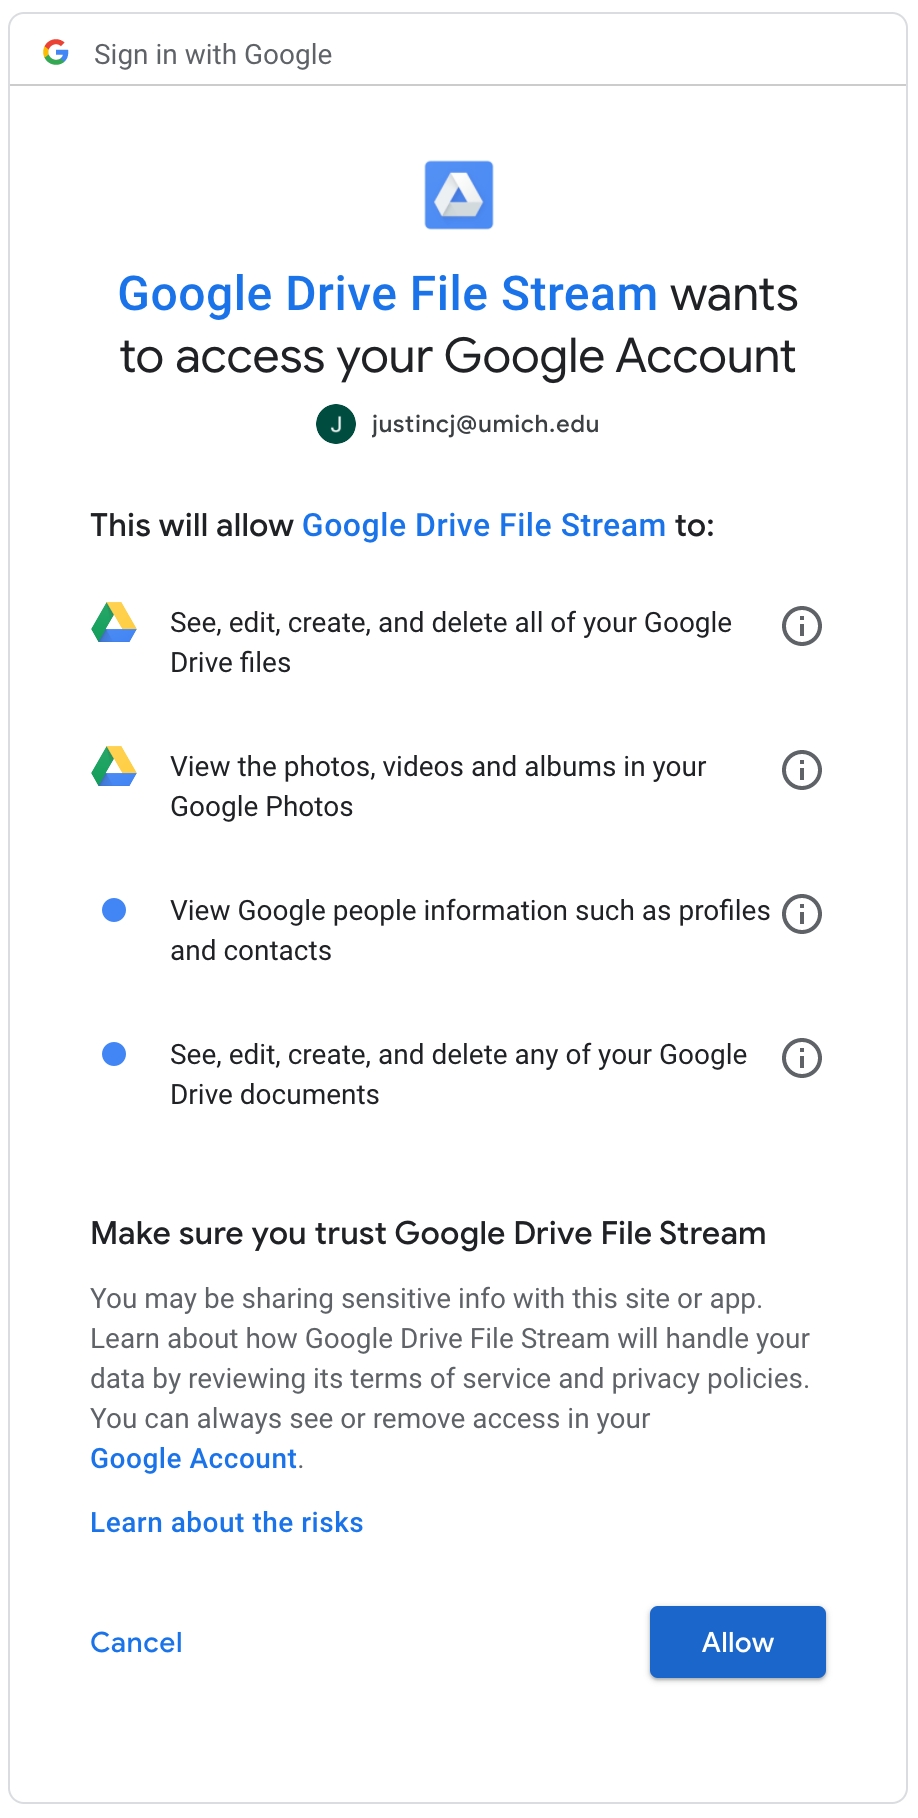
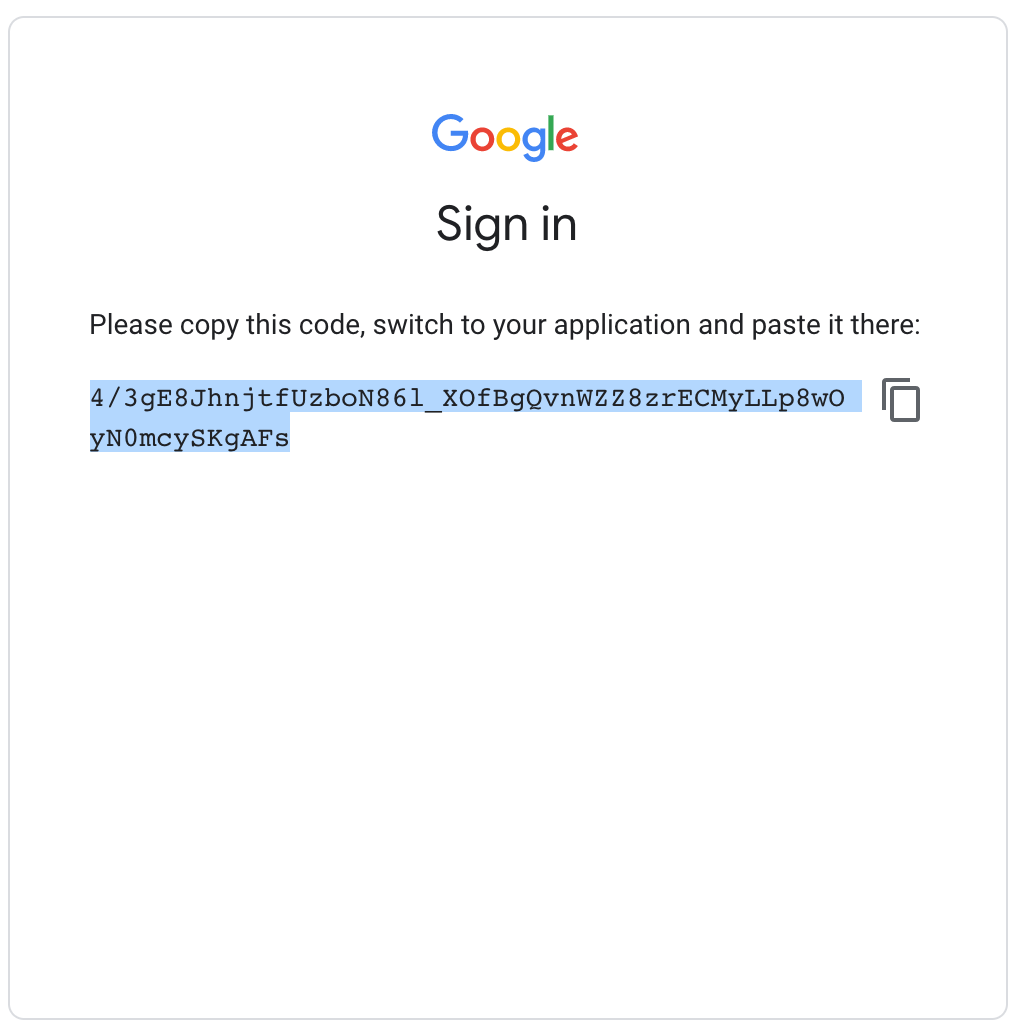
Paste the code back into the Colab cell and hit enter. Now the notebook has mounted your Google Drive!
Now fill in the variable GOOGLE_DRIVE_PATH_AFTER_MYDRIVE with the path to which you uploaded the starter code in your Google Drive.
We told you to remember this a few steps ago!
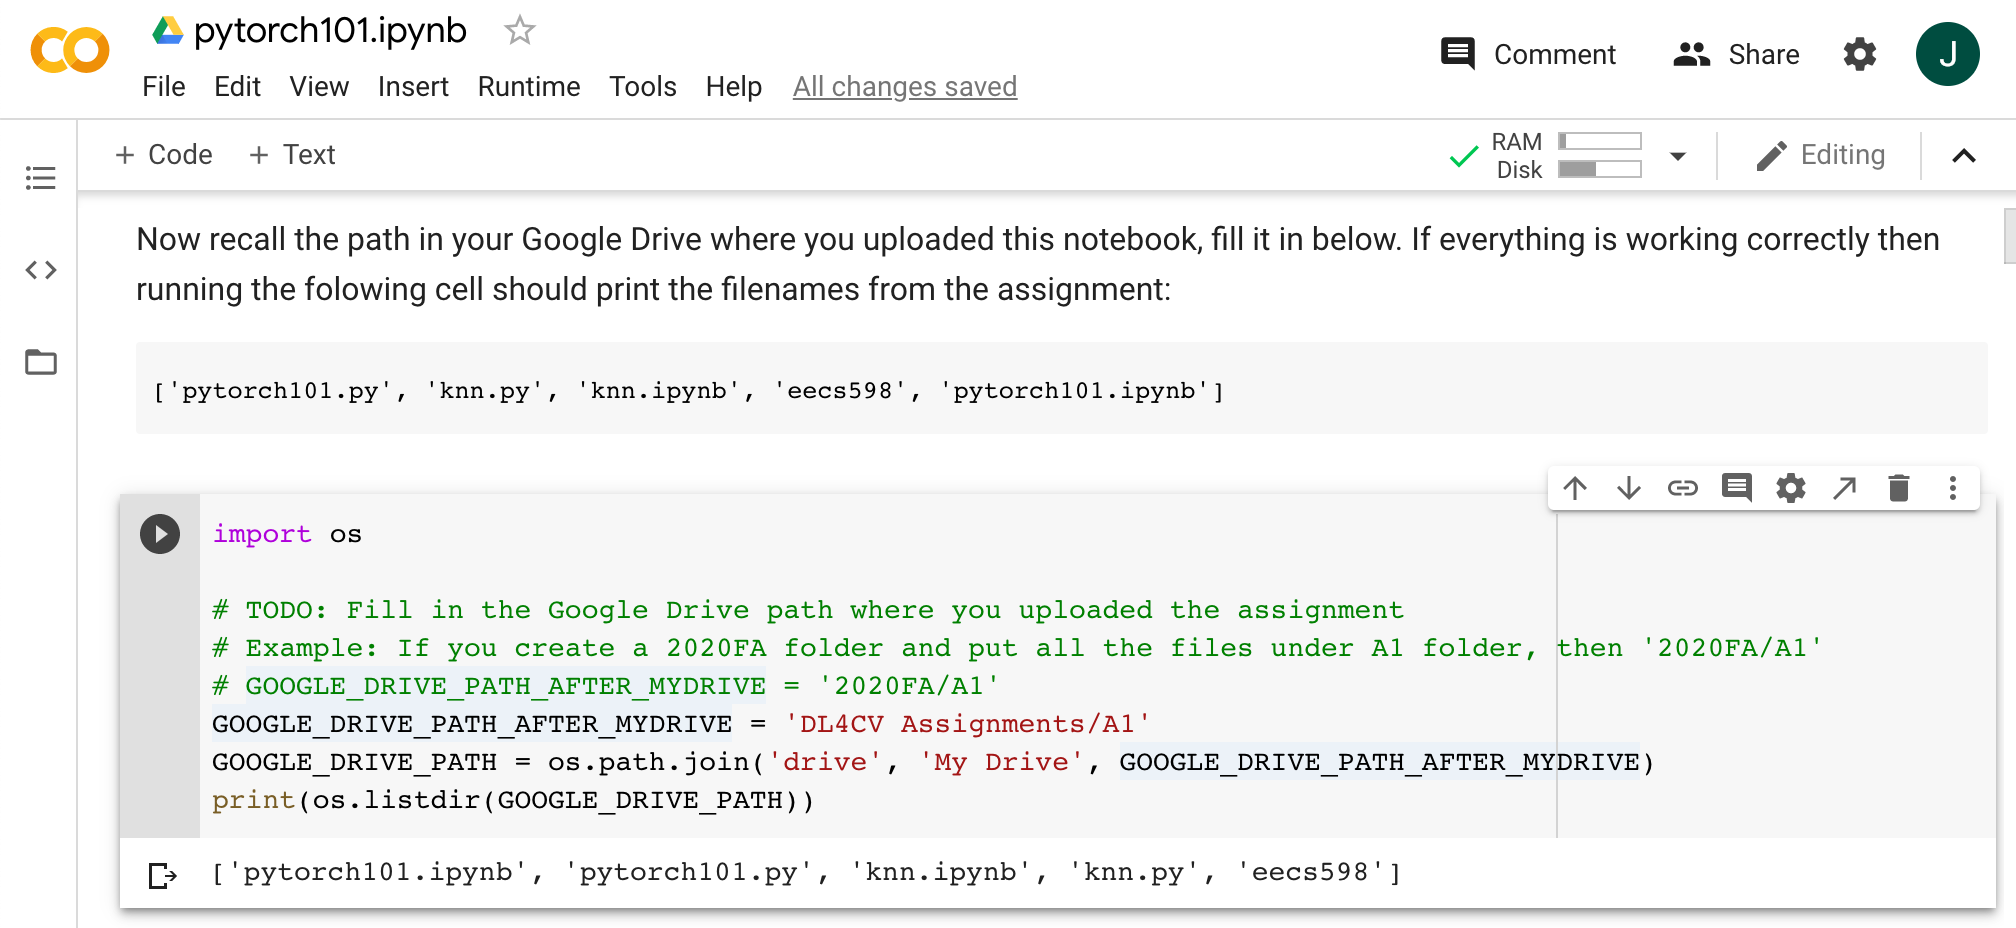
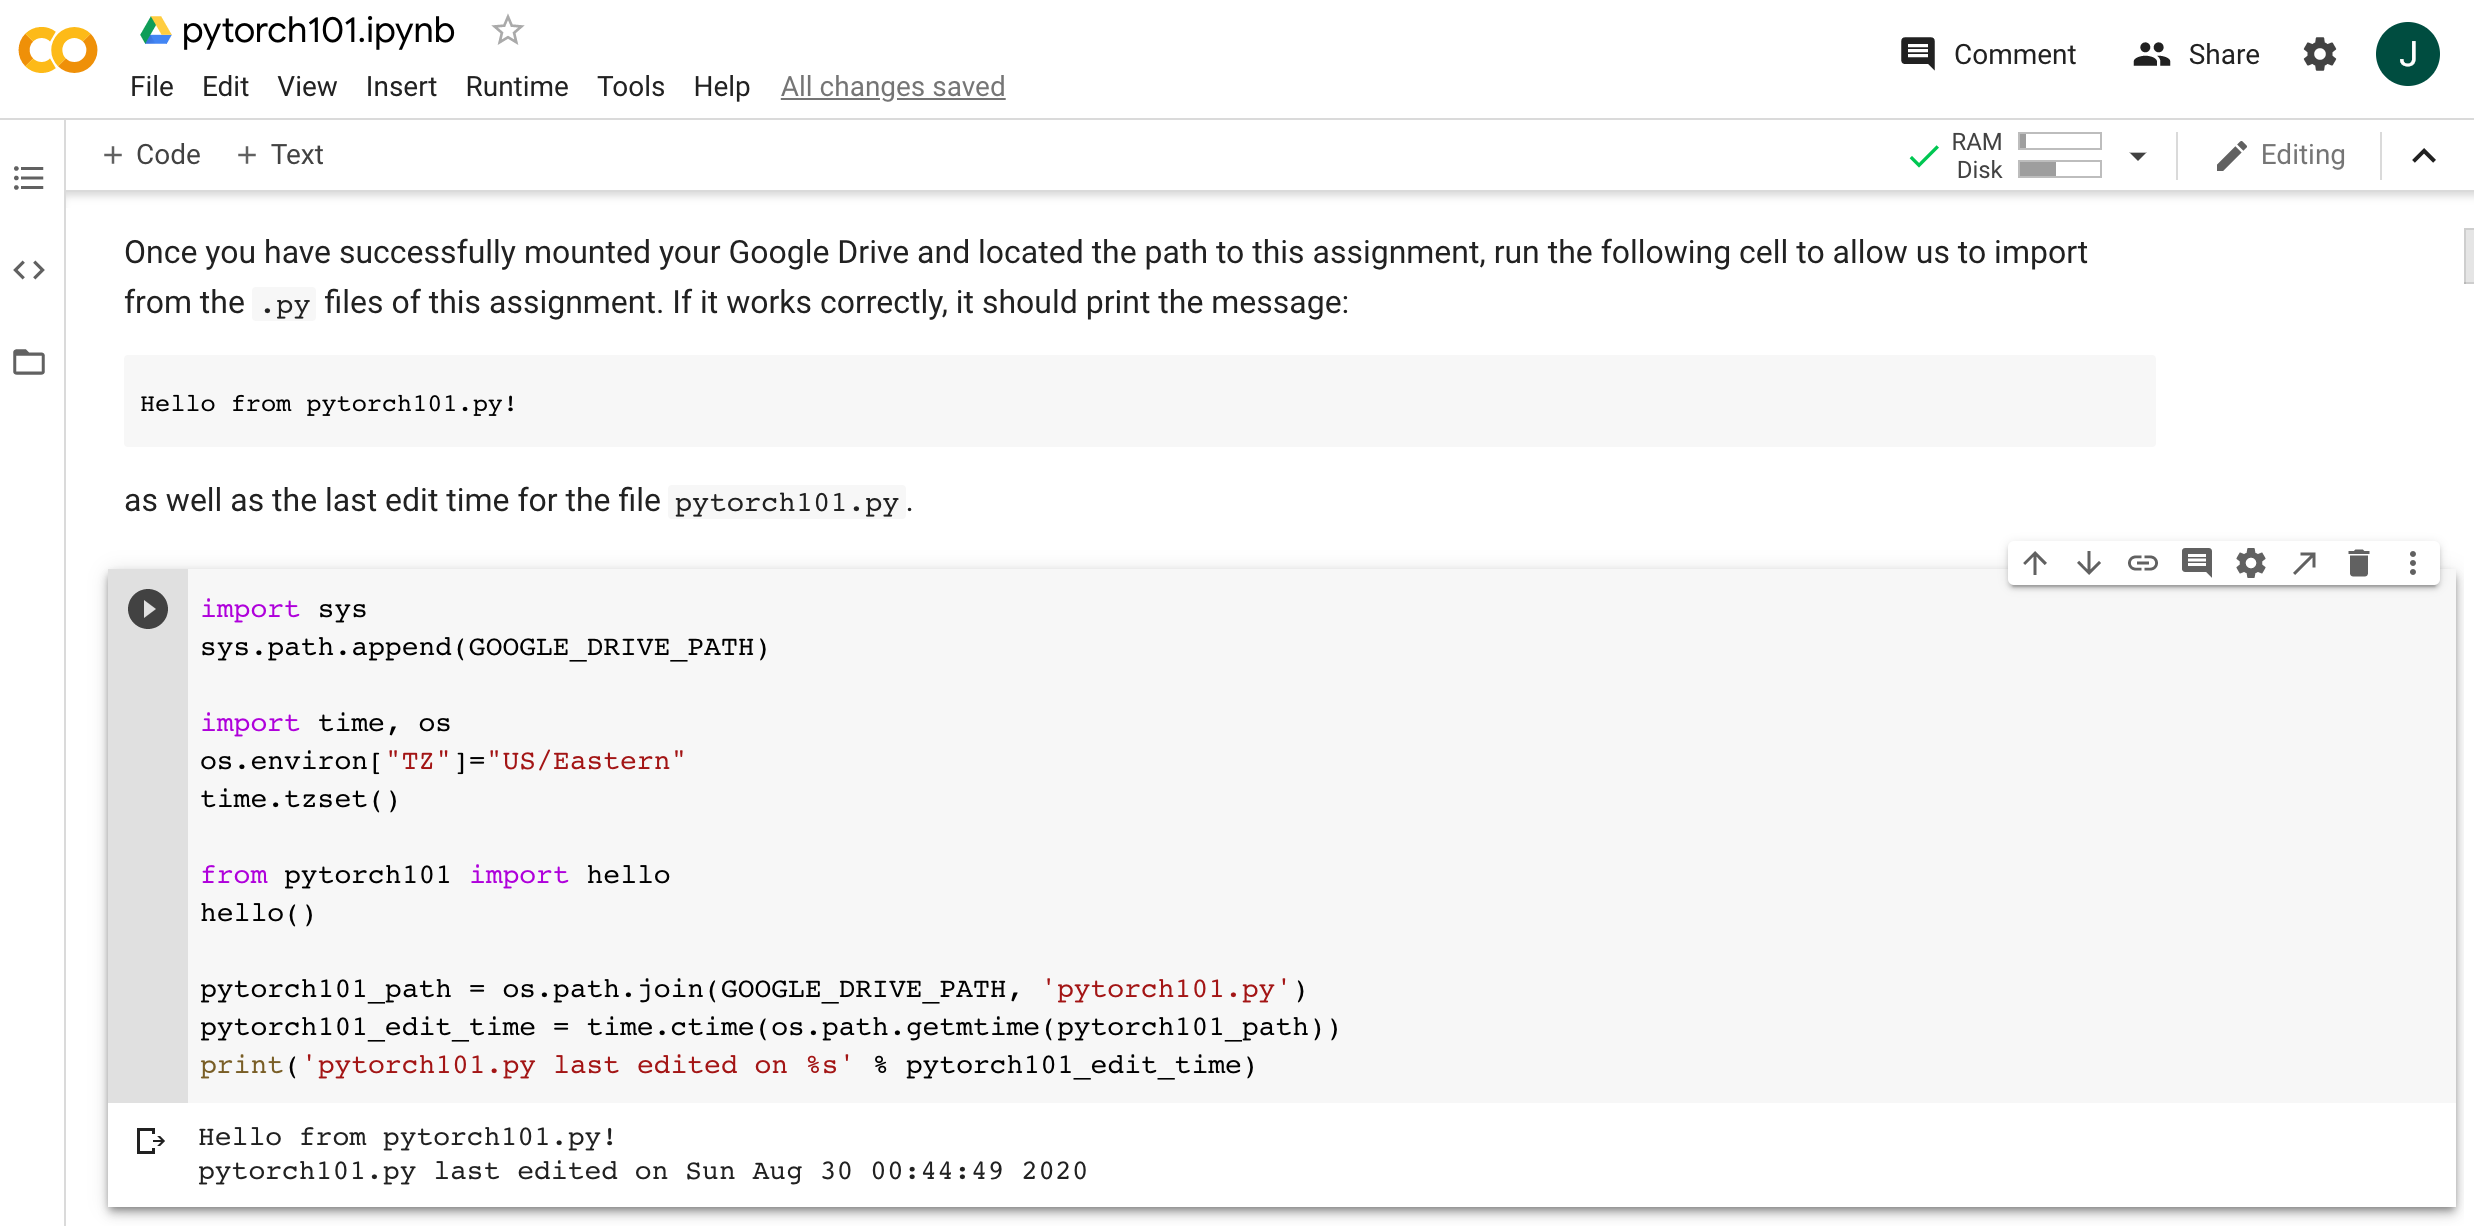
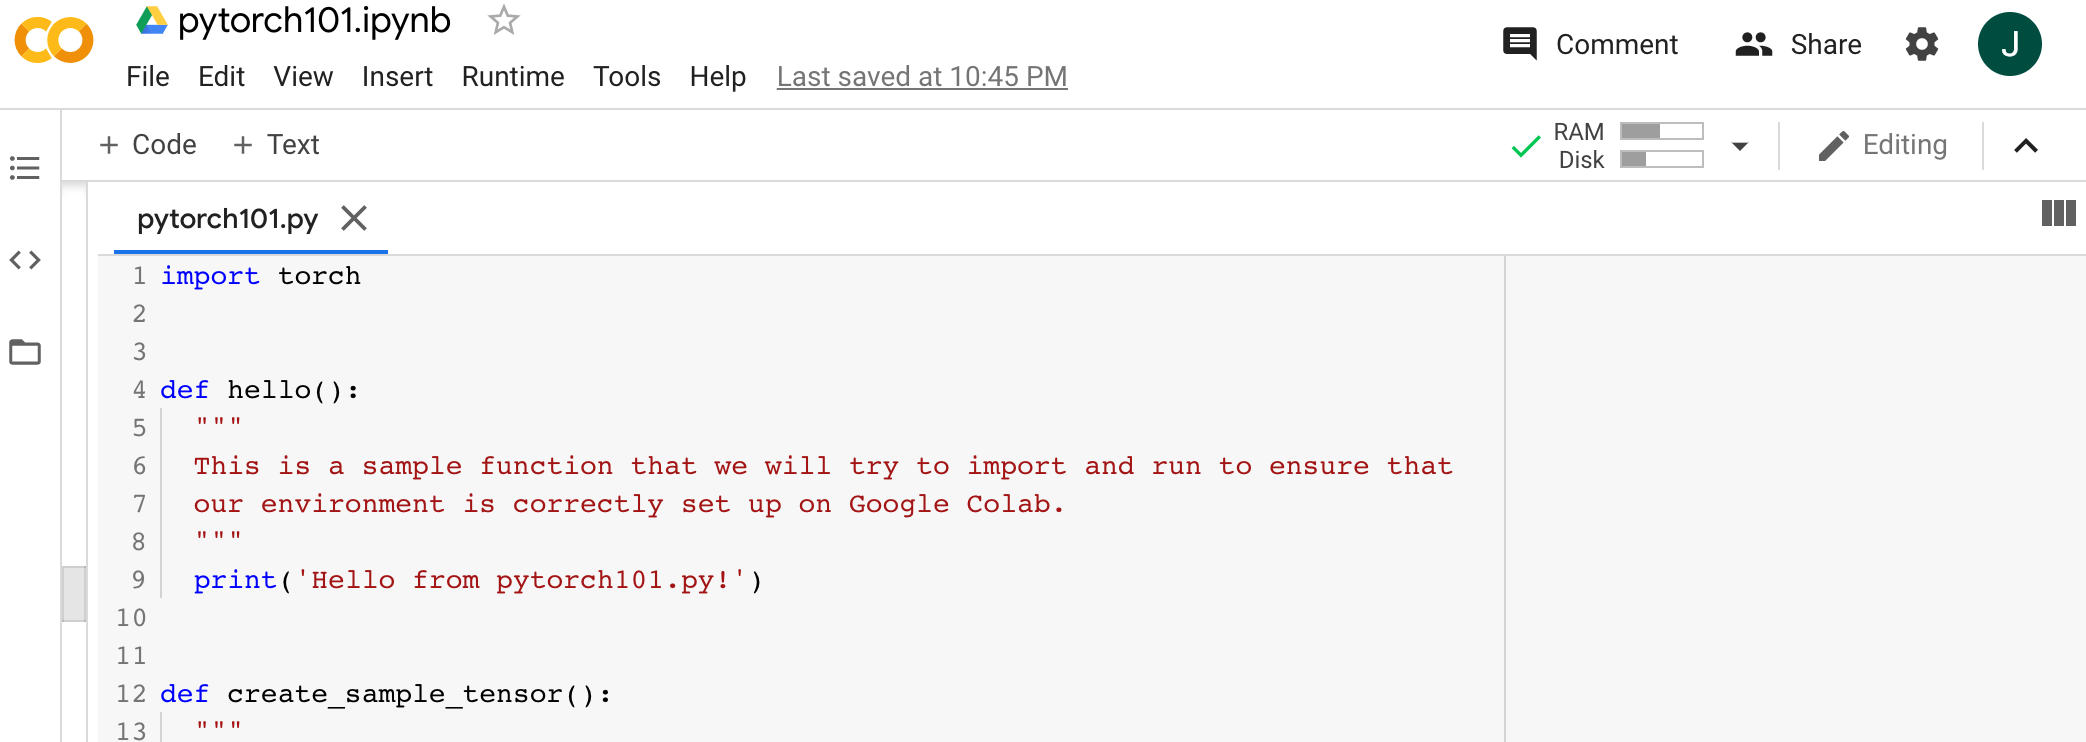
The next step will add the starter code to your Python path, then check that everything is working by importing and running a sample function from the starter code.
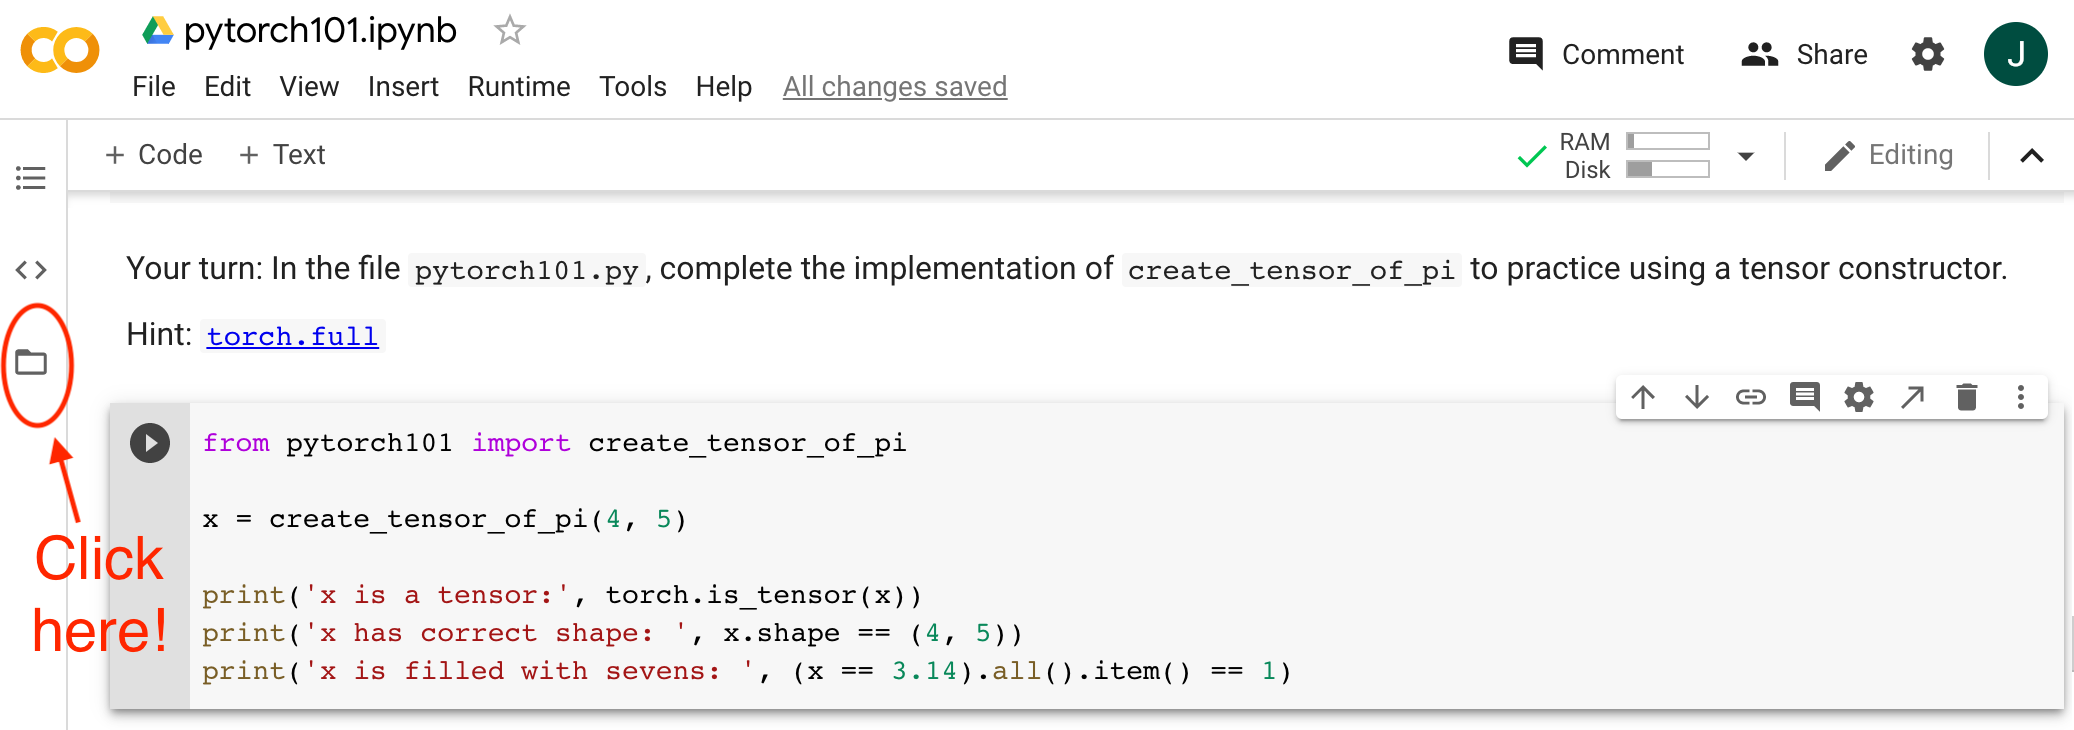
Editing files (top)
Some parts of the notebook will instruct you to implement functions or classes in .py files provided in the starter code.
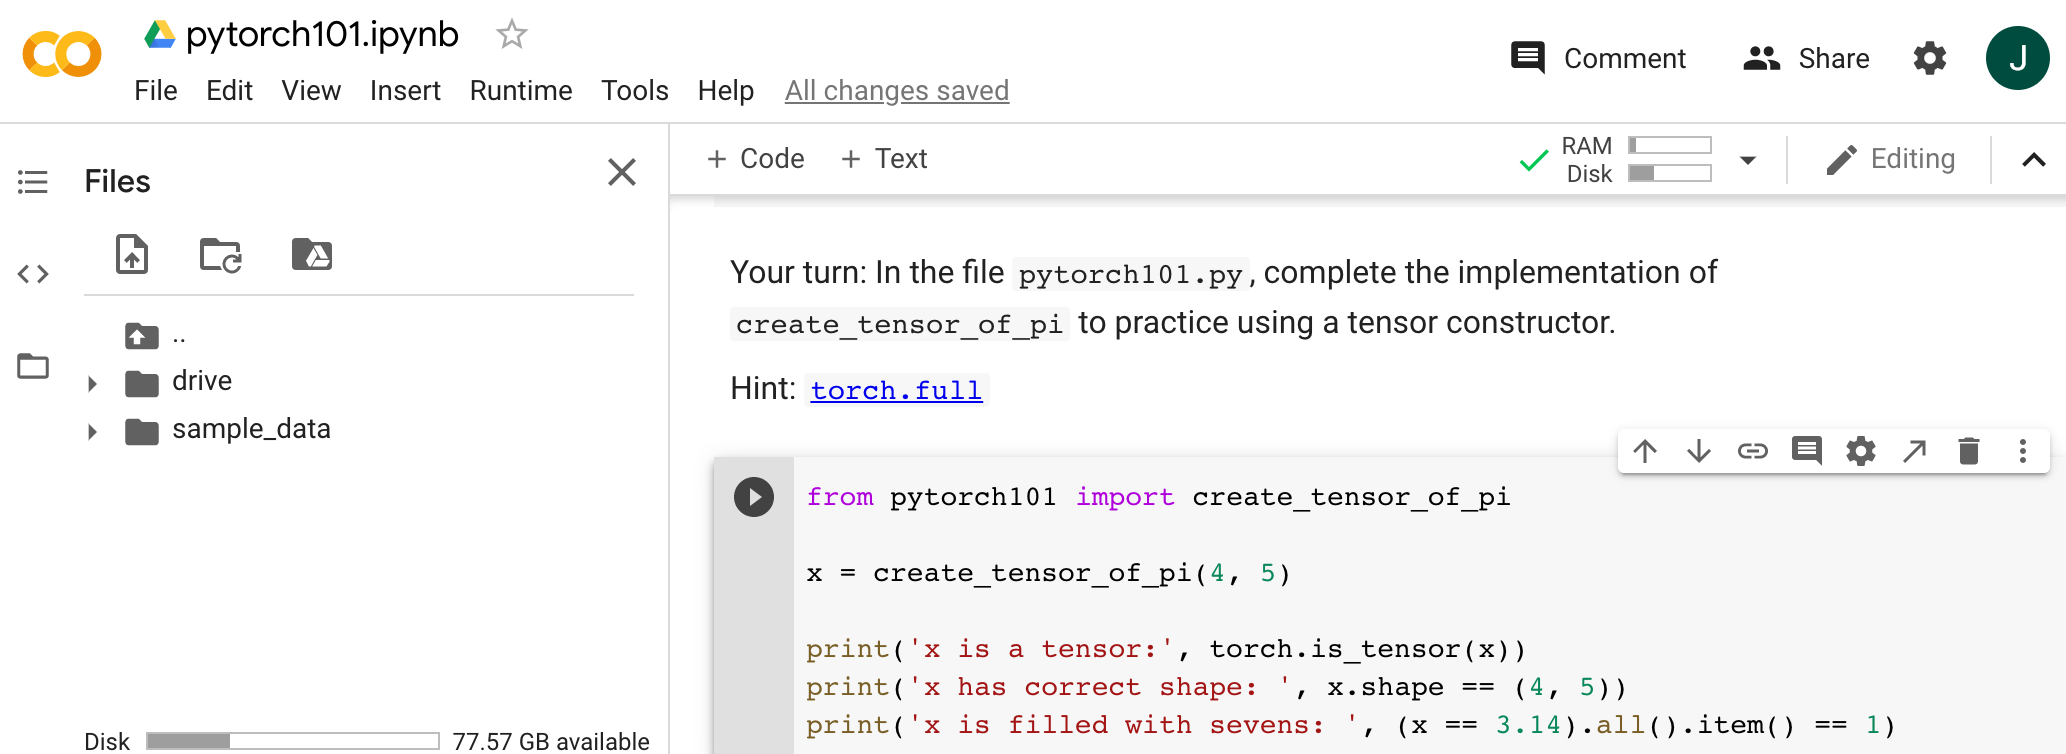
Click the folder icon on the left to open up a file explorer panel:
Your Google Drive is mounted under the drive directory.
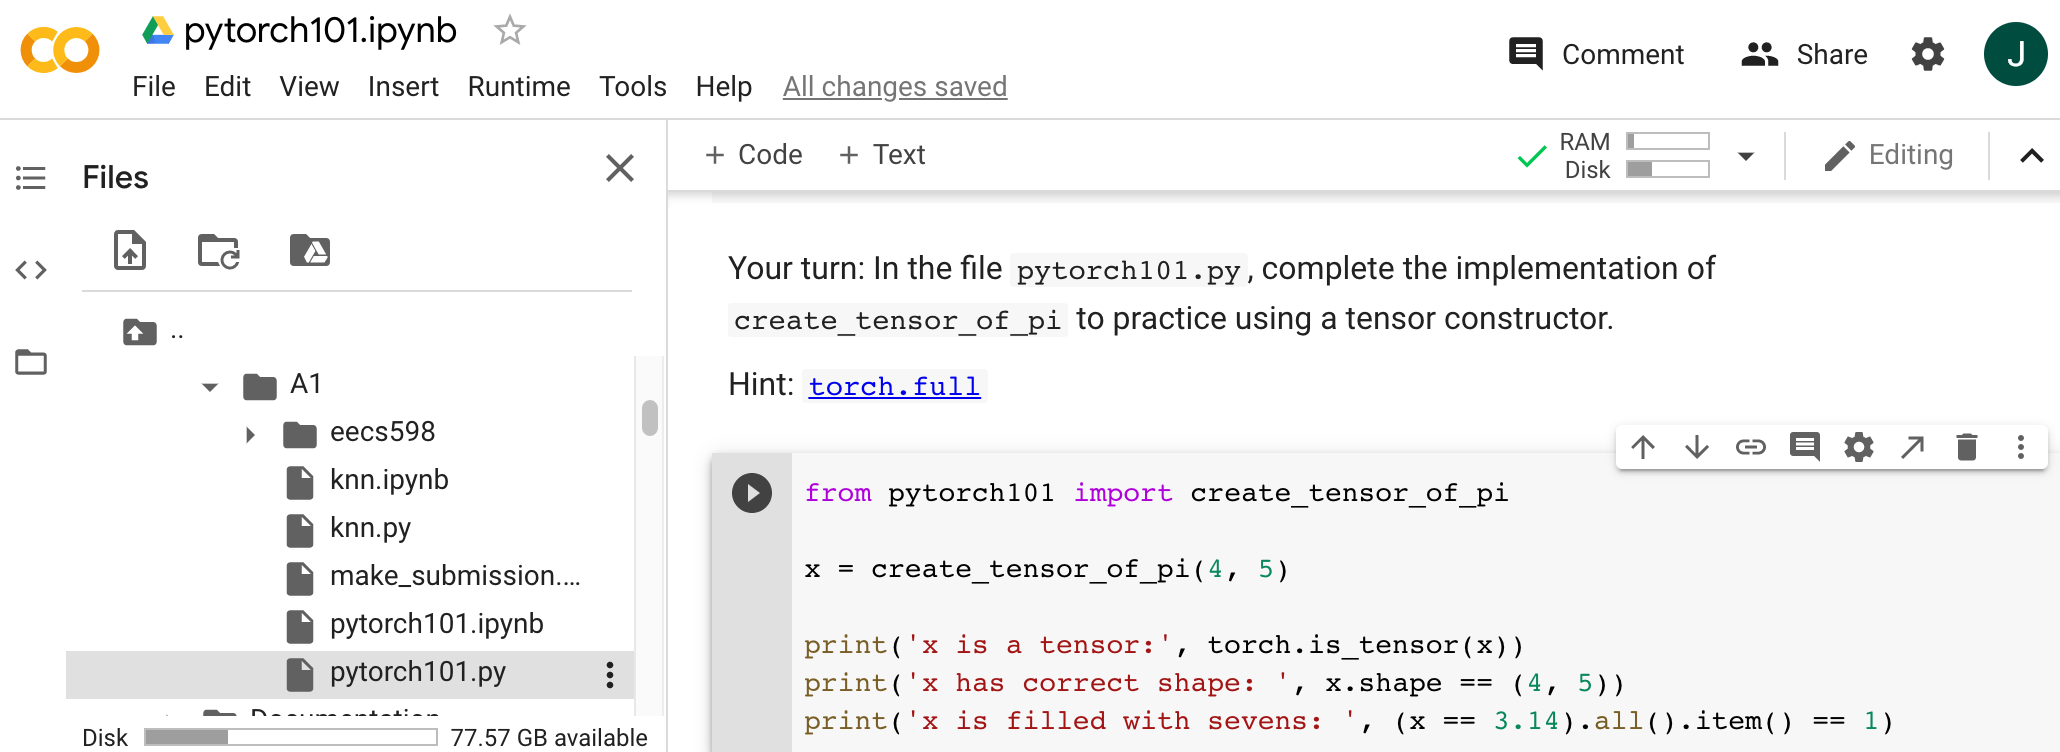
Navigate to the directory where you stored the assignment:
Double-click on the .py file you want to edit:
and a text editor panel will open to the right.
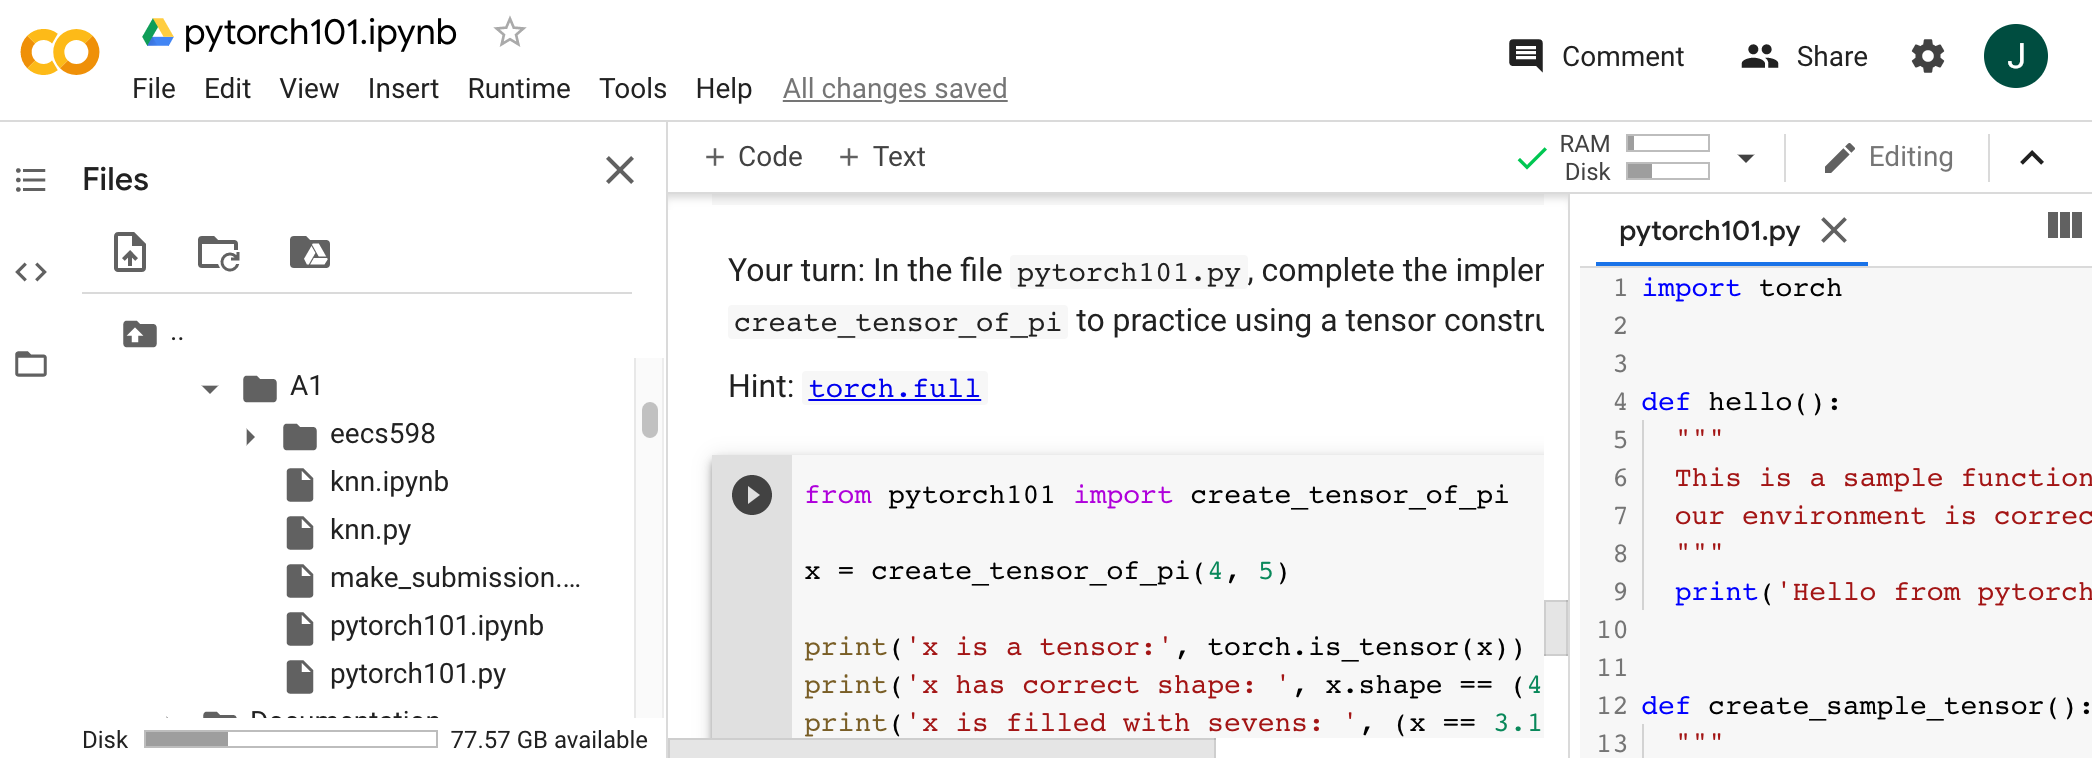
If you need more space for the text editor, you can close the file explorer panel and resize the text editor panel:
Whenever you make changes to a .py file, make sure to save it (CTRL+S) before re-running any notebook cells.
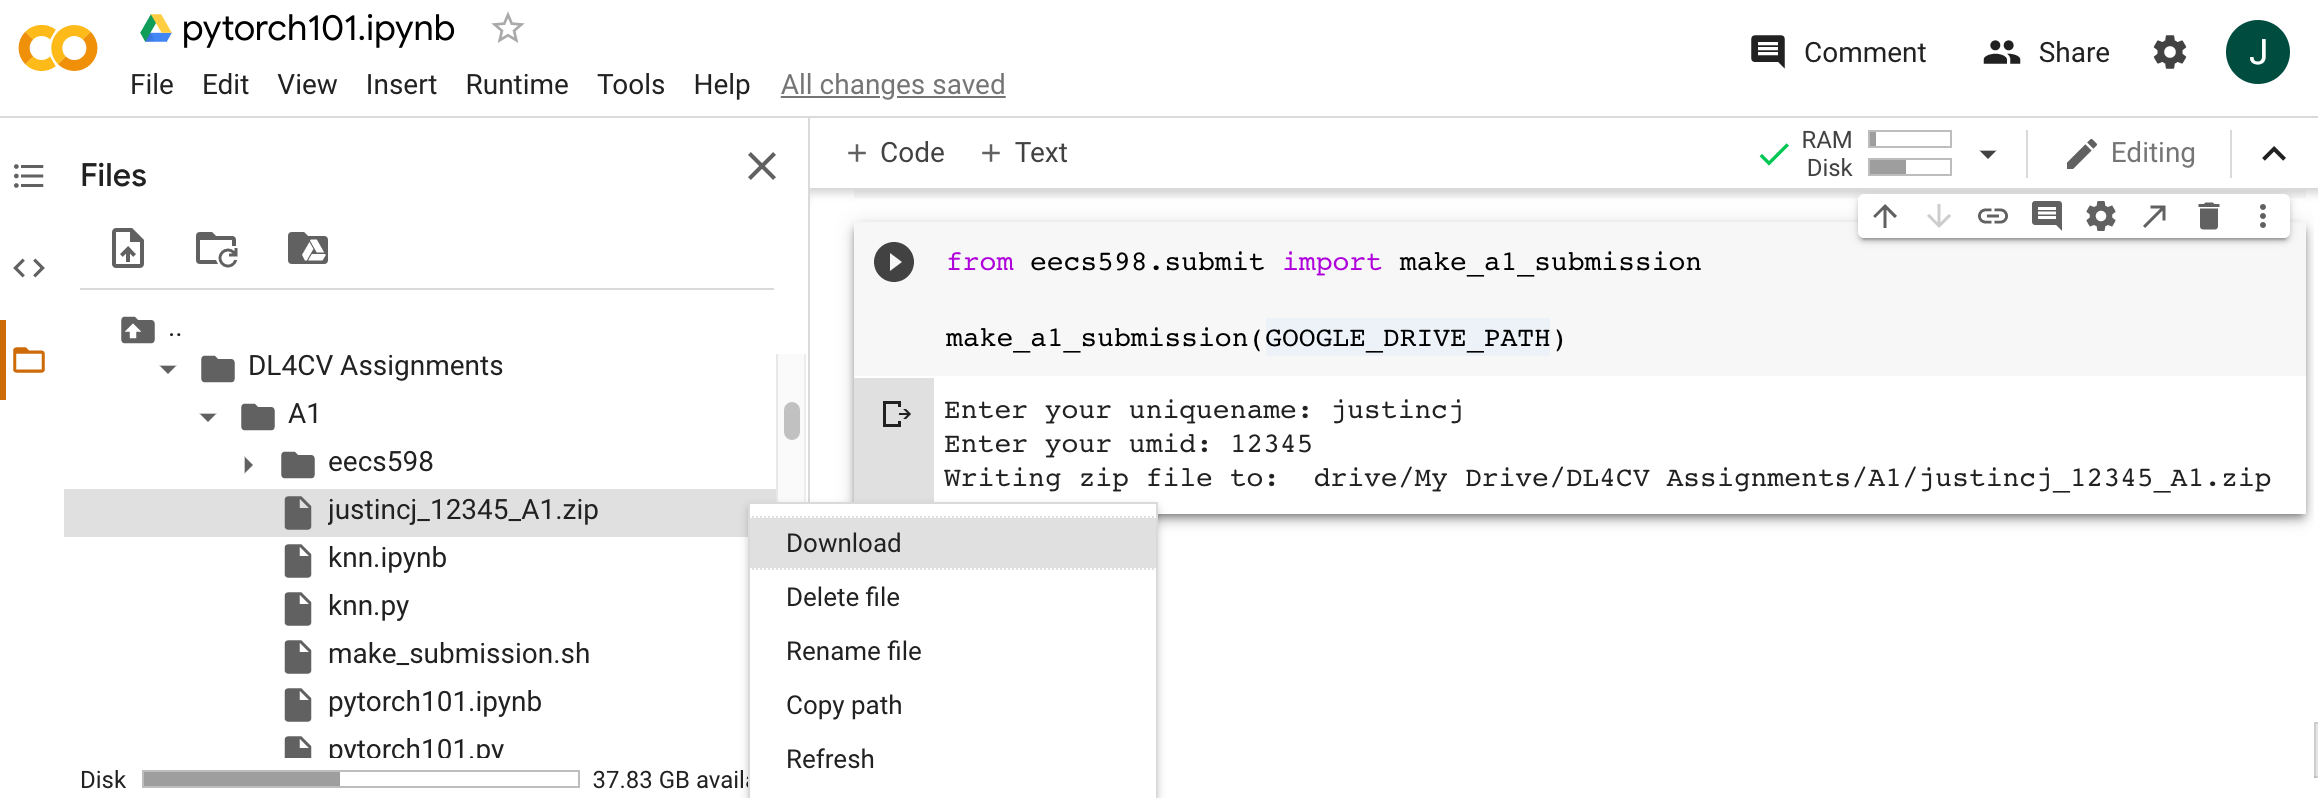
Submitting your work (top)
After you have completed all parts of the assignment, you can run the very last cell in the final notebook to create a .zip file with all your code.
You will be prompted for your UMich uniquename and UMid:
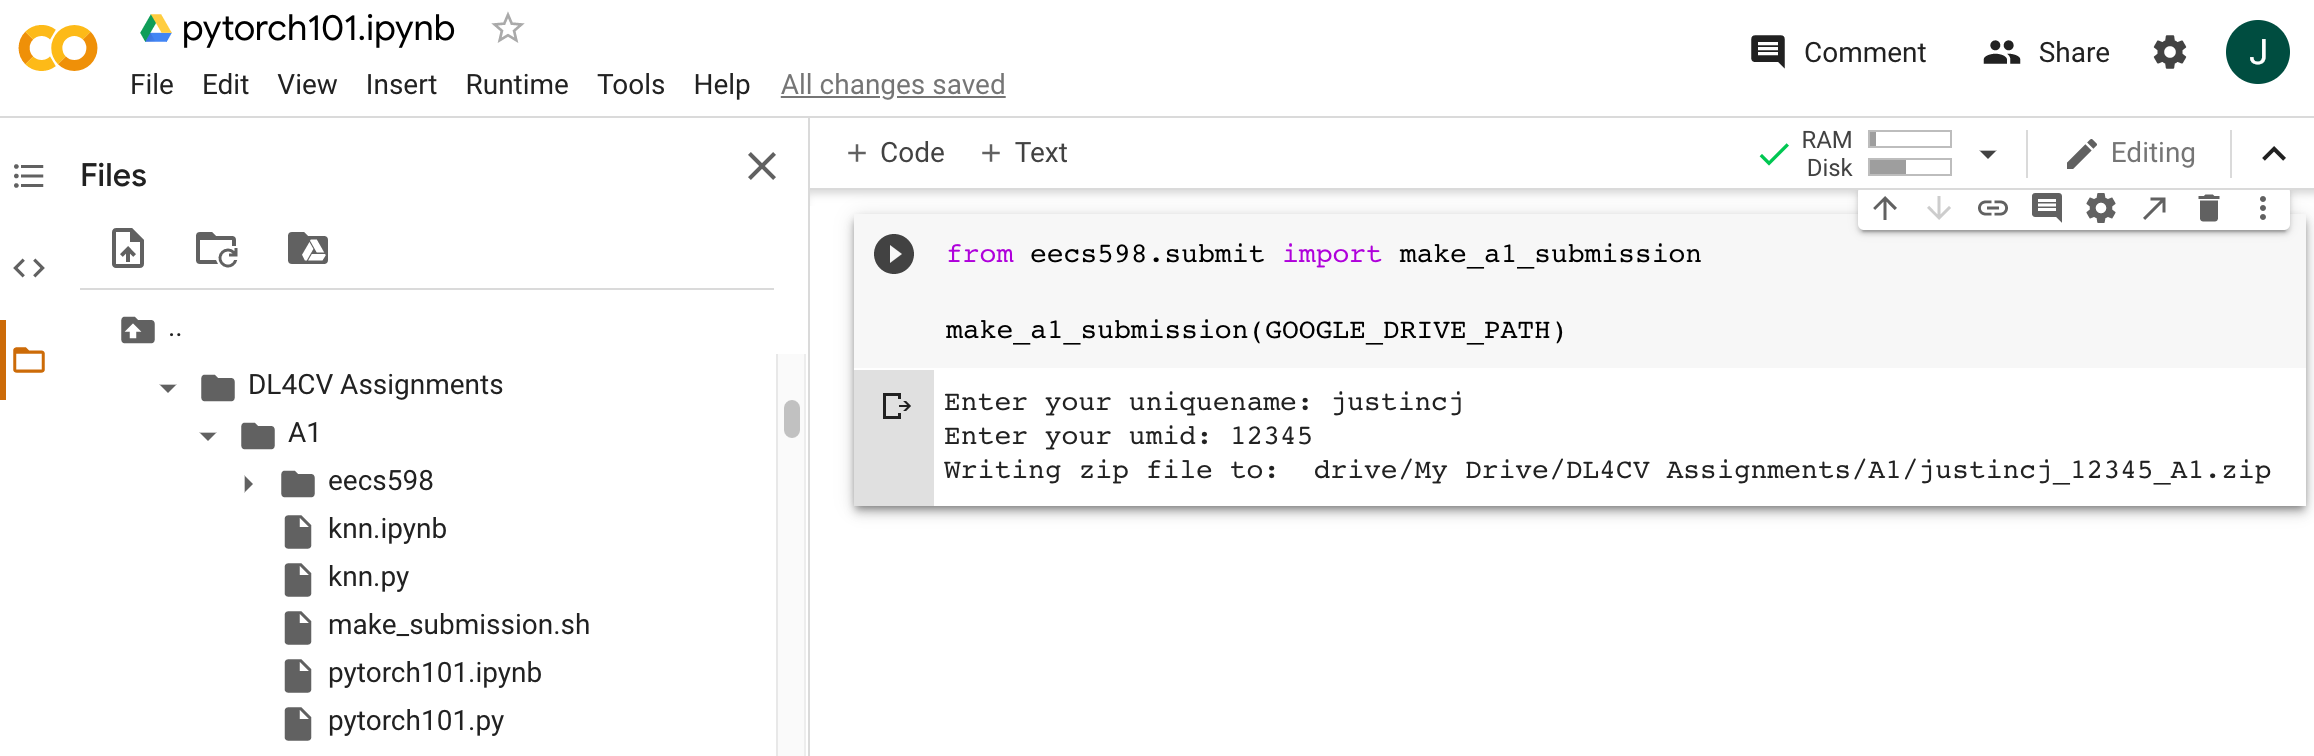
The .zip file should be visible in the file explorer panel to the left, in the same directory you stored the starter code.
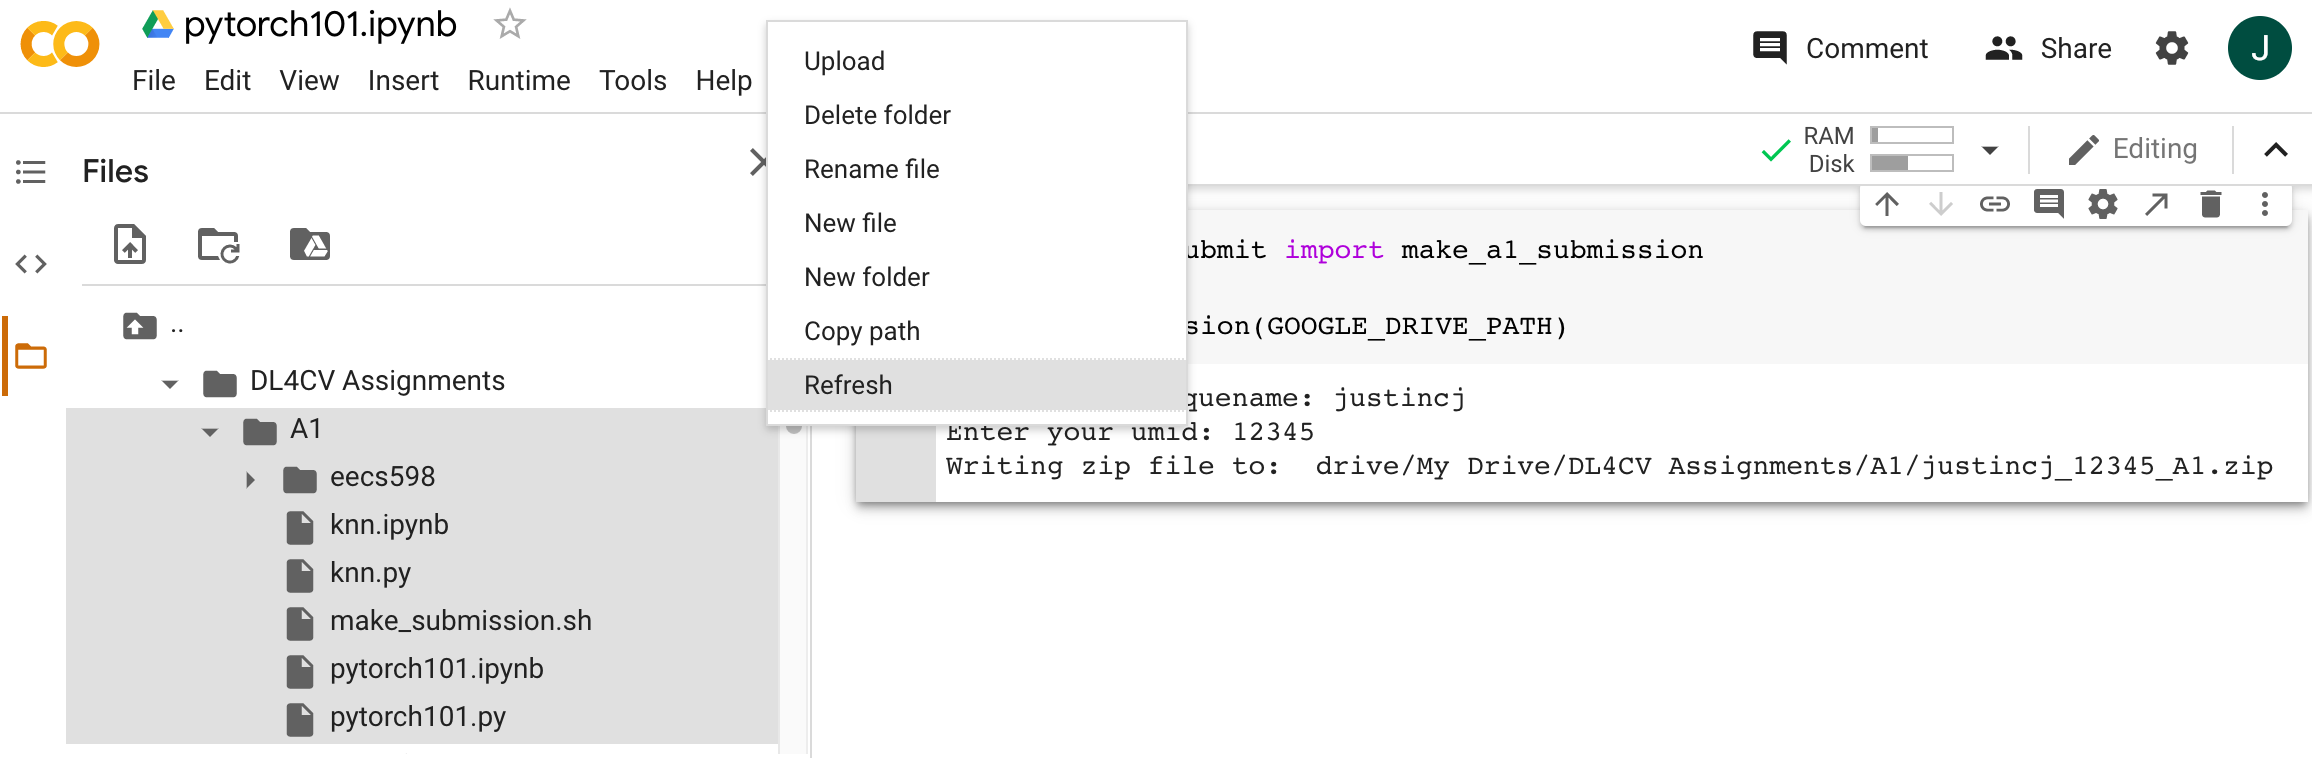
You may need to right-click on the assignment directory and Refresh it for the .zip file to become visible.
Once the .zip file appears in the file explorer panel, you can right-click it to download the .zip file to your computer.
You can then turn in this .zip file to the Autograder page.