
|
|
Building OpenGL/GLUT Programs |
|---|
Makefile and
source code
build a simple line drawing application and runs on Linux, Mac OS X,
and Windows platforms. You can also try out some
examples with buffer objects and shaders.
If you're interested in using GLFW instead of GLUT, please refer to
the course note Building
OpenGL/GLFW Apps. Please let me know if you have any
correction or addition. Thanks.
To find out how to specify command line options, add to header file
search path, and link with libraries such as GLEW, Expat, JPEG, and
PNG, see the course note on these topics.
/usr/lib/libGL*
on Ubuntu 14.04.1:
/usr/lib/x86_64-linux-gnu/libGL*
/usr/include/GL/{gl,glu}.h
/usr/lib/libglut*
on Ubuntu 14.04.1:
/usr/lib/x86_64-linux-gnu/libglut*
/usr/include/GL/glut.h
Ubuntu# sudo apt-get install freeglut3-dev
Fedora/RedHat# sudo yum install freeglut-devel
which should install all the dependent packages,
including OpenGL itself. You must have sudo/administrator privileges.
#include <GL/glut.h>
You don't need to include gl.h and glu.h,
as they are already included in glut.h.
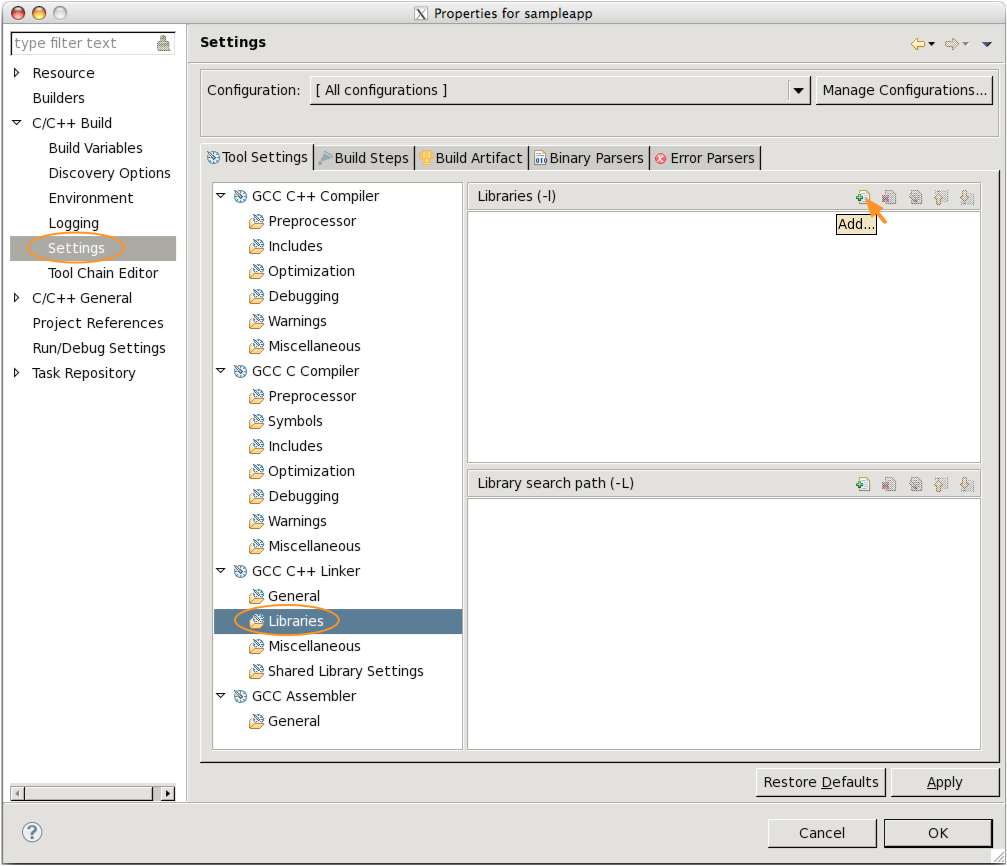
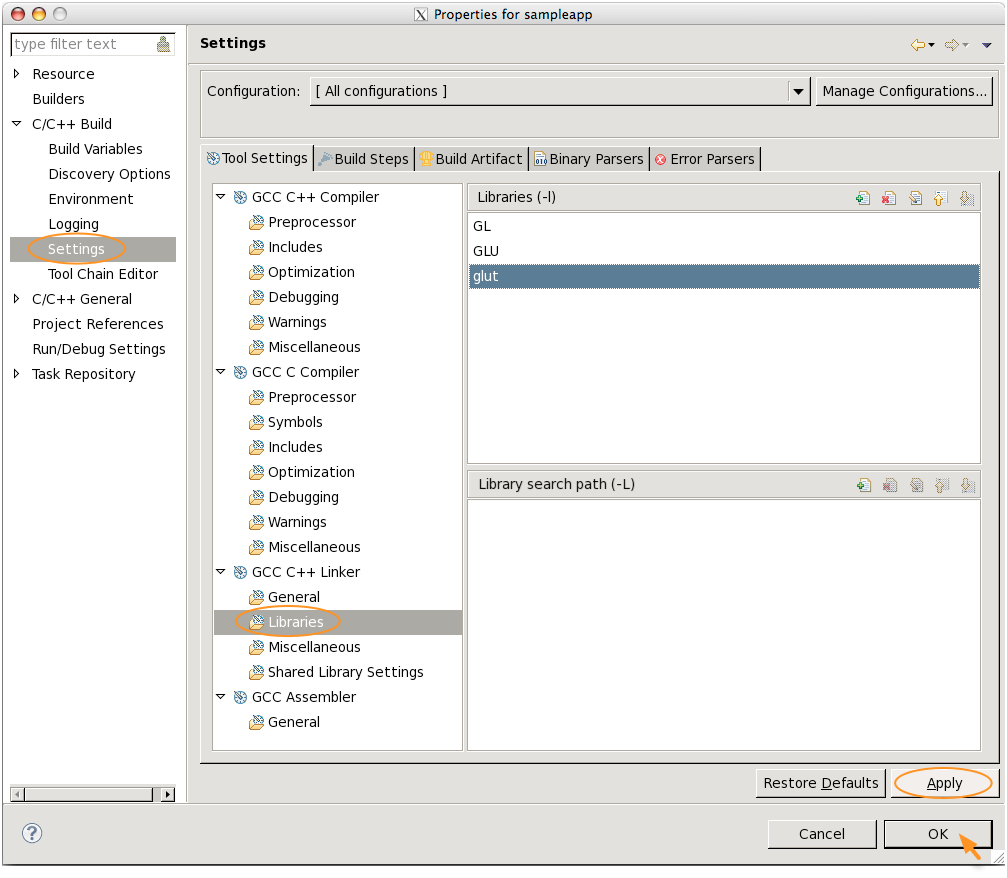
-lGL -lGLU -lglut
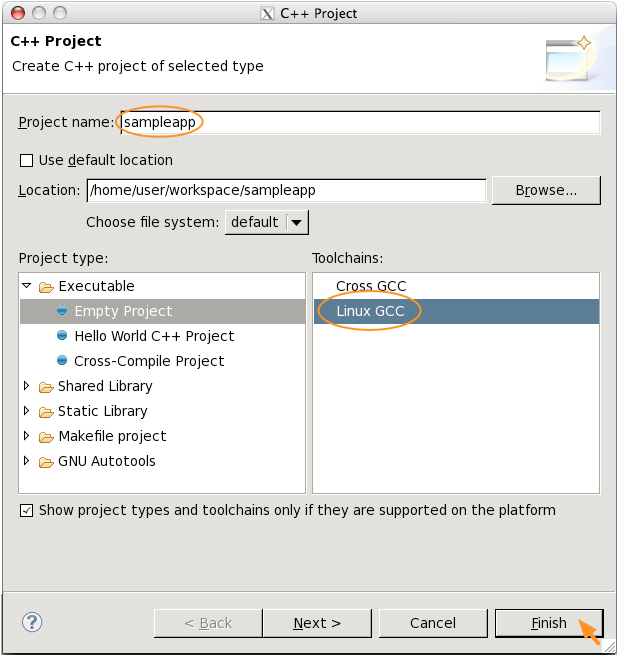
sudo apt-get install eclipse eclipse-cdt
make, gcc, ld, etc.). Since we're not
cross compiling, I choose the "Linux GCC" toolchain. Click "Finish"
(Fig. 4)
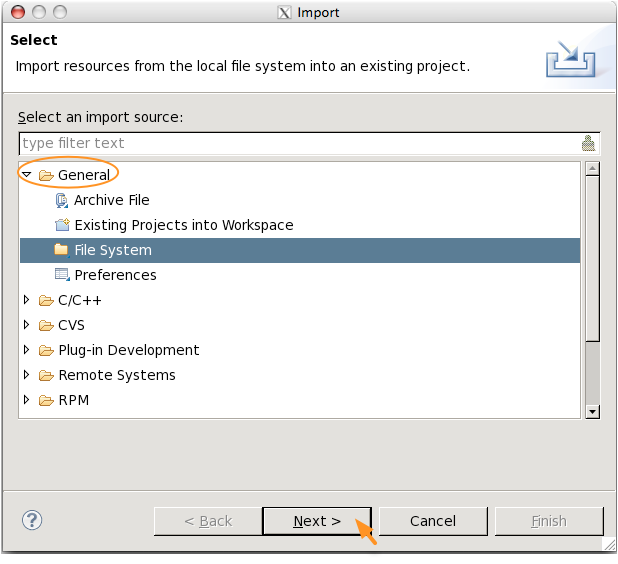
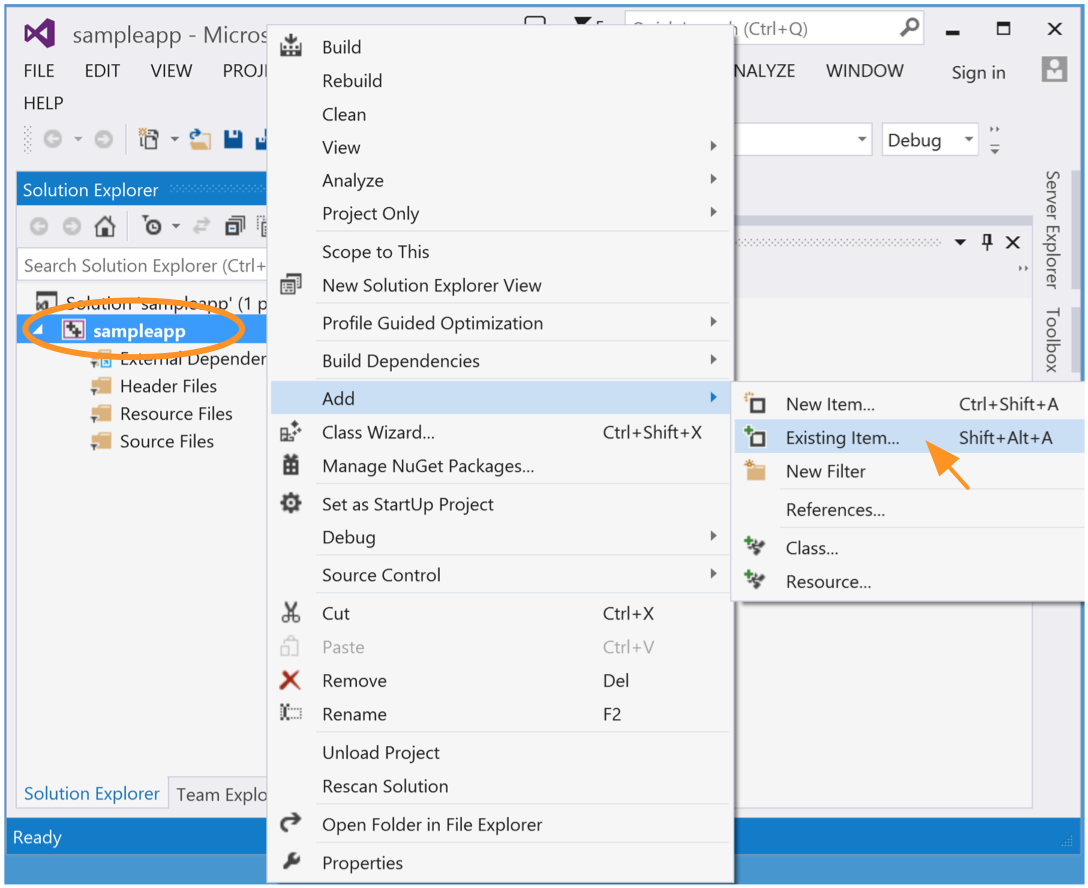
server.c (or click the directory
name on the left pane to import all files in the directory), and click "Finish"
(Fig. 8)
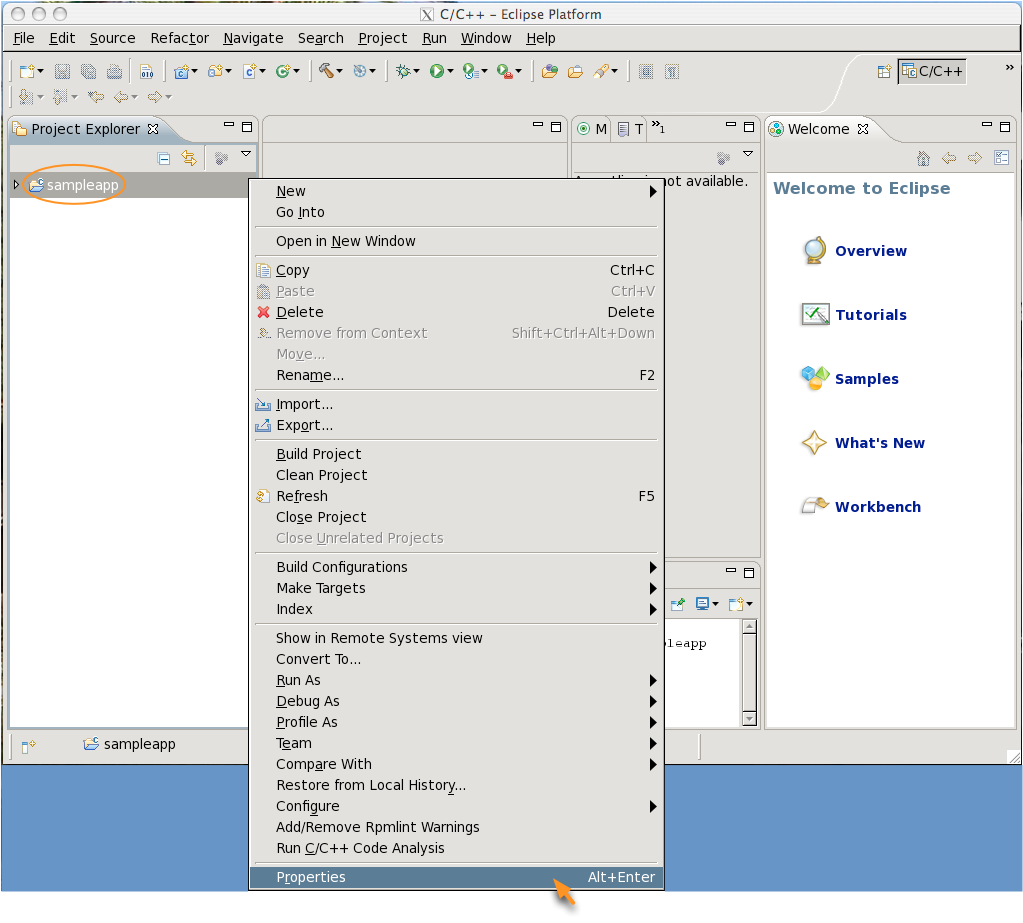
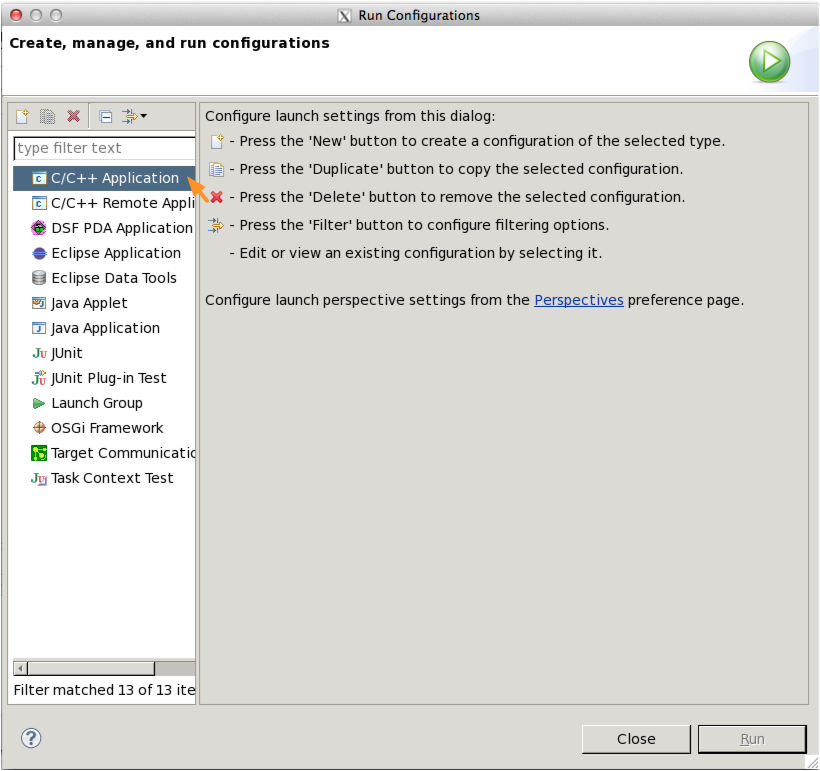
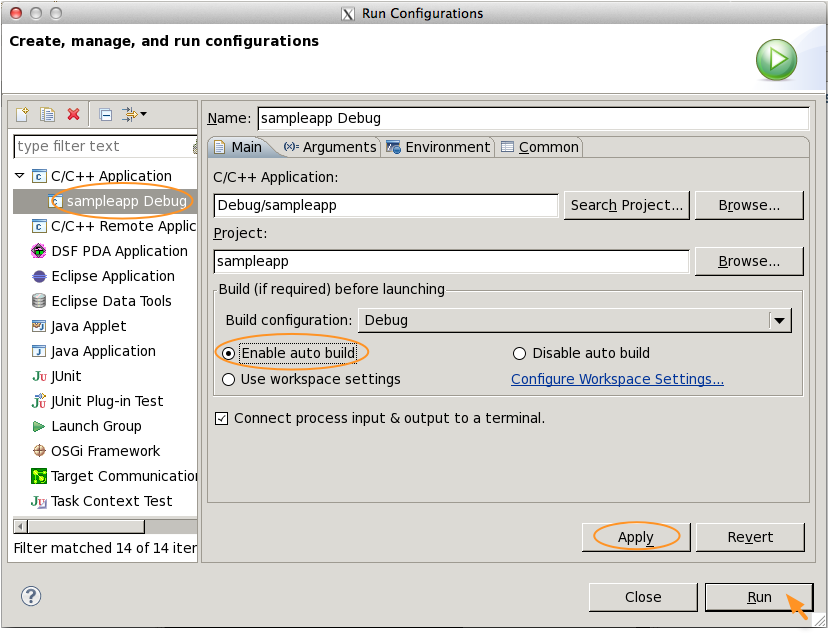
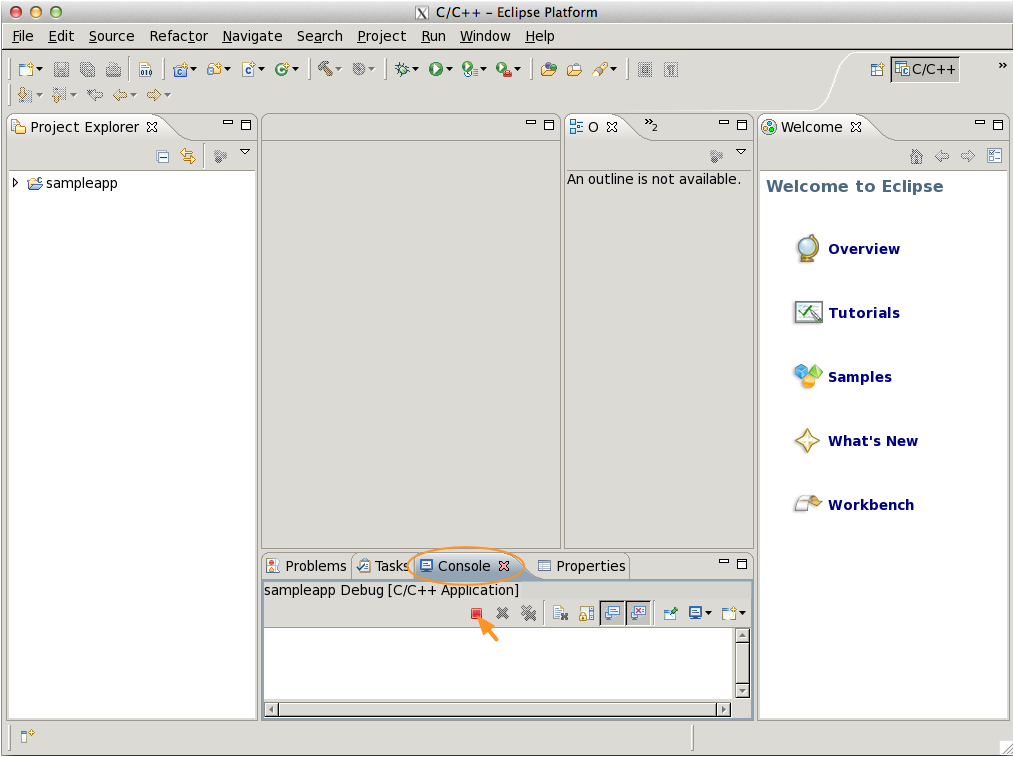
 ) button (Fig. 11)
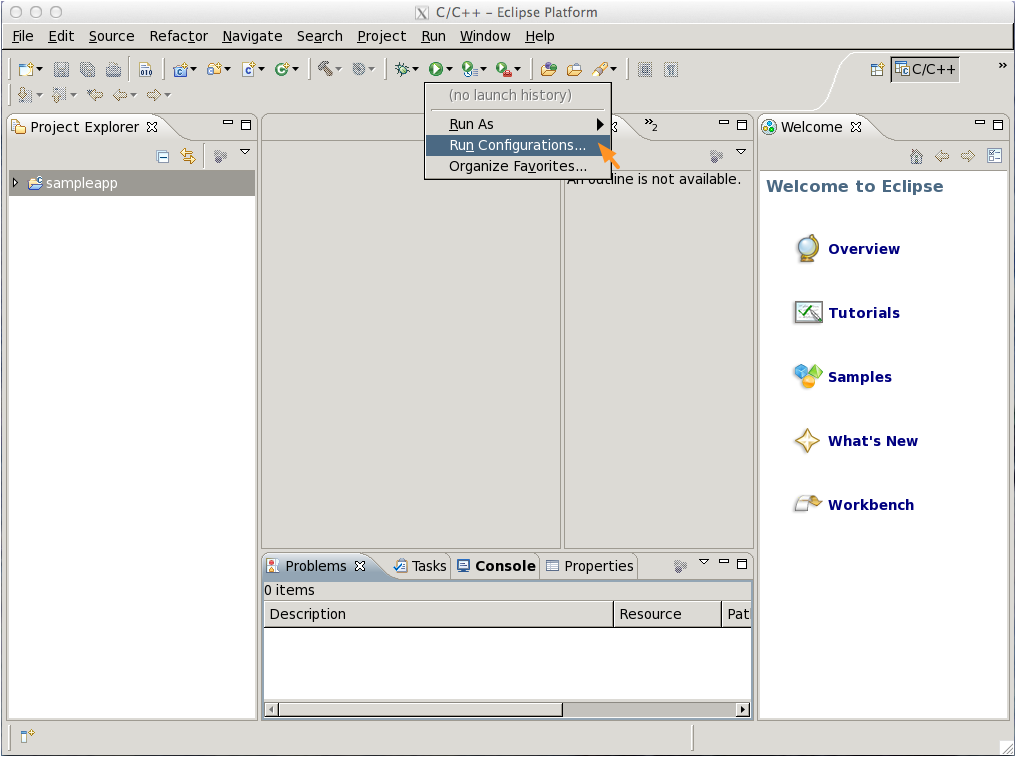
 ), click on the drop-down menu and select
"Run Configurations..."" (Fig. 14)
), click on the drop-down menu and select
"Run Configurations..."" (Fig. 14)
/System/Library/Frameworks/{OpenGL,GLUT}.framework
[The installed GLUT is the
original GLUT
not freeglut.]
#include <GLUT/glut.h>
Despite Apple's documentation, you don't need to include gl.h and glu.h, as they are already included in glut.h.
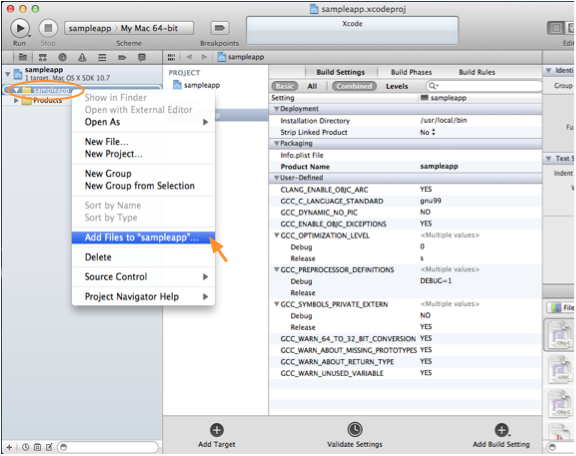
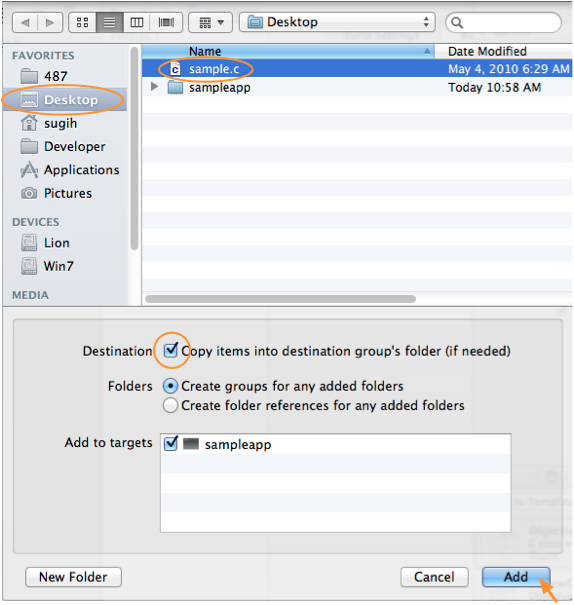
For an example, see the provided sample source code.
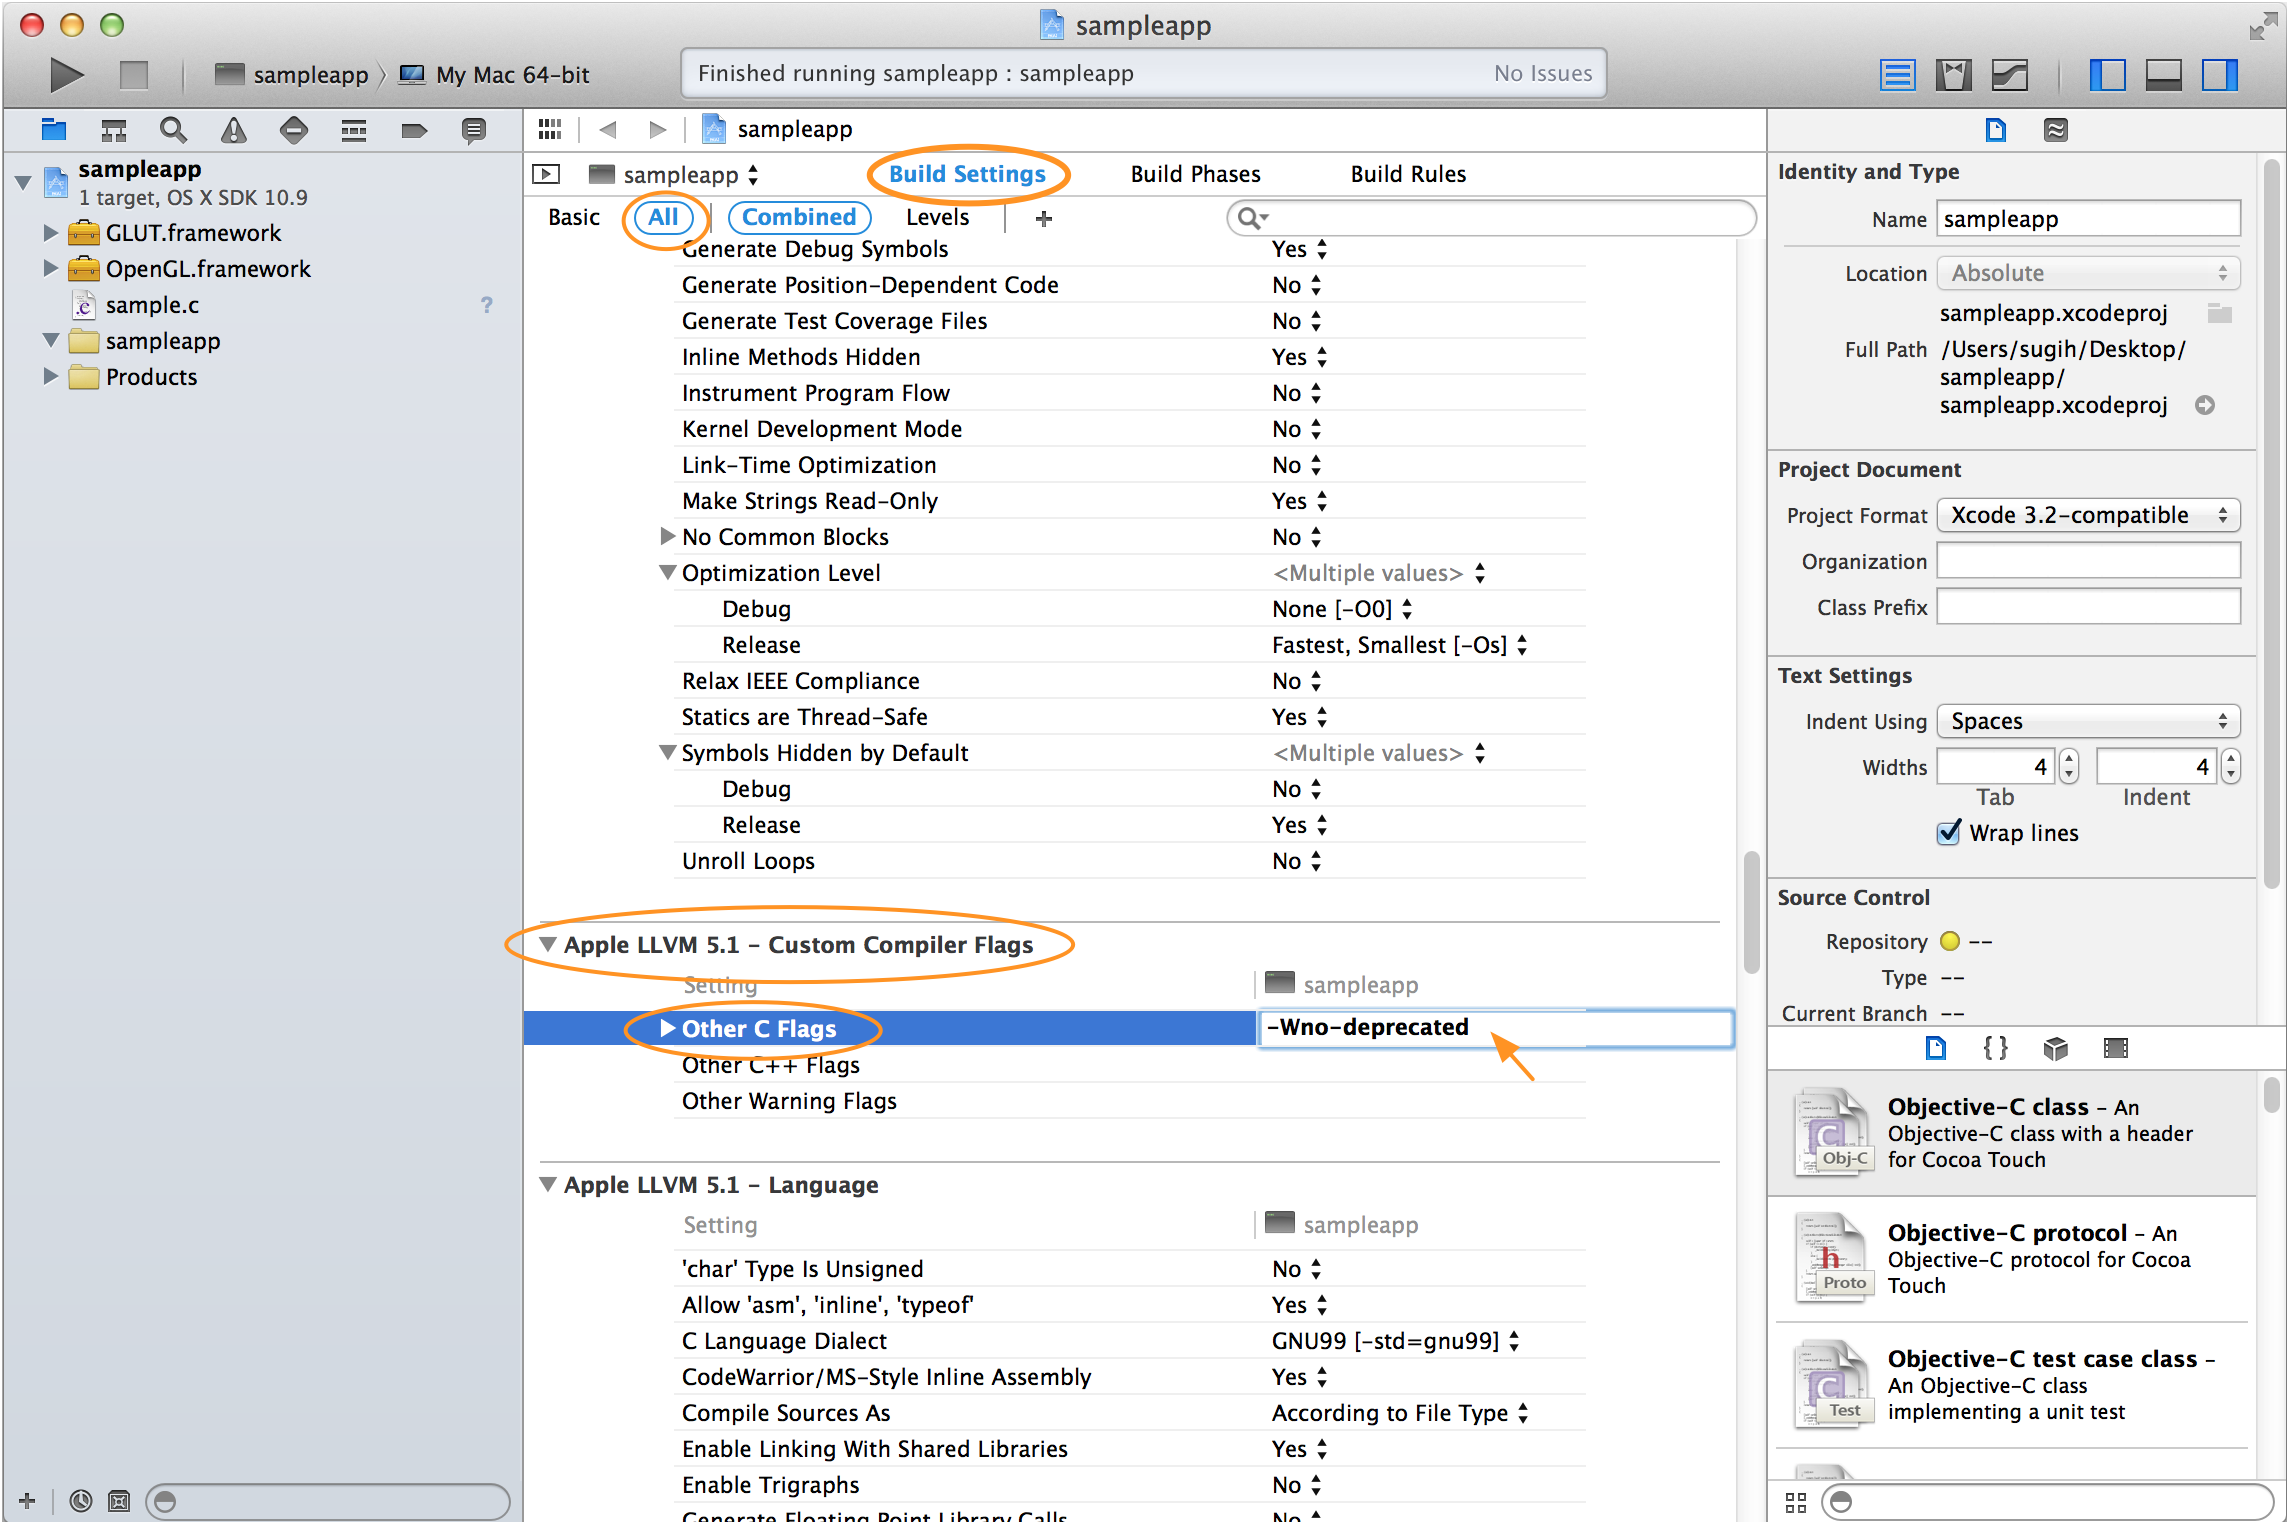
-framework OpenGL -framework GLUT
 to build and run the program.
C:\Program Files (x86)\Windows Kits\8.1\Include\um\gl\{GL,GLU}.h
C:\Program Files (x86)\Microsoft SDKs\Windows\v7.1A\Include\gl\{GL,GLU}.h
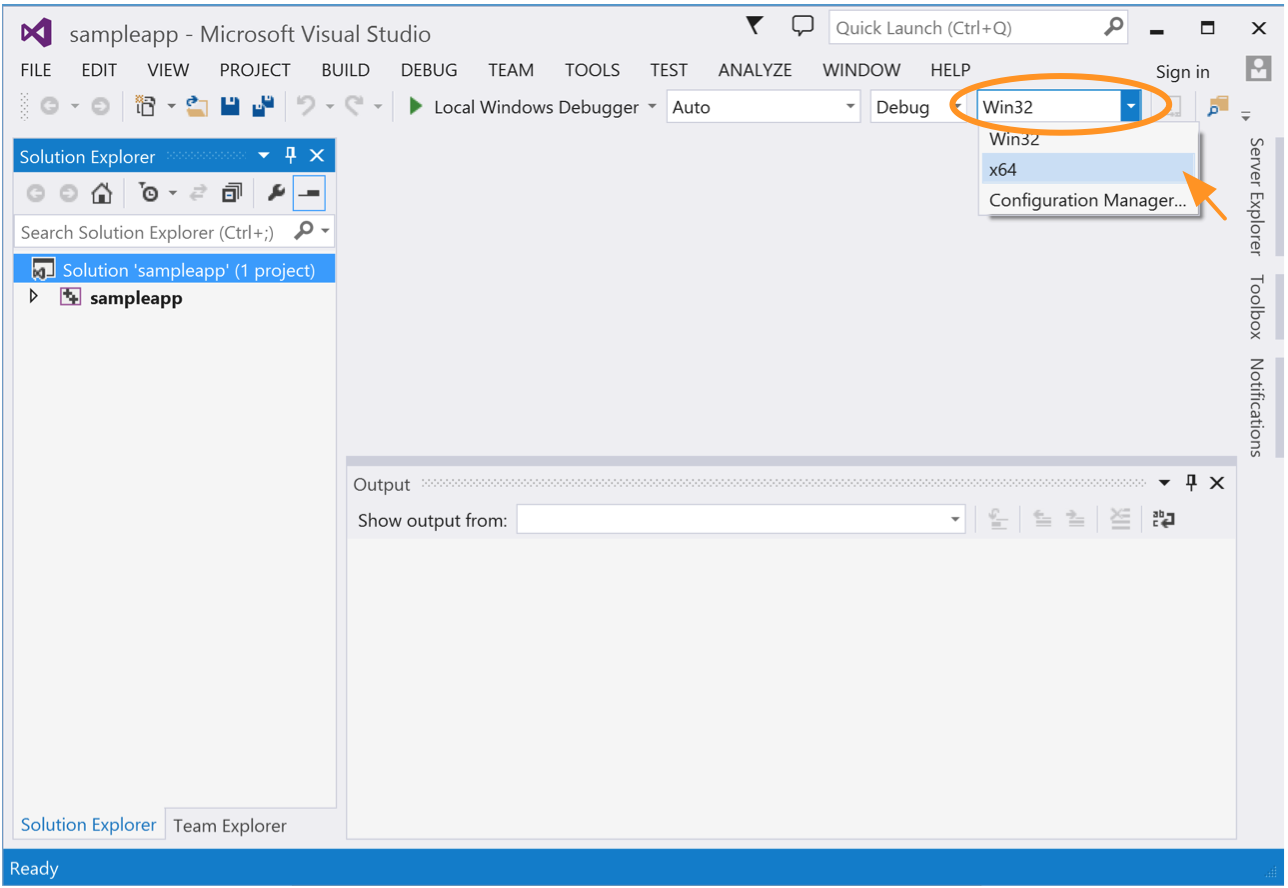
[without the " (x86)" for 32-bit Windows; VS2010: v7.0A, VS2008: v6.0A]
C:\Program Files (x86)\Windows Kits\8.1\Lib\winv6.3\um\x86\{OpenGL32,GlU32}.Lib

C:\Program Files (x86)\Windows Kits\8.1\Lib\winv6.3\um\x64\{OpenGL32,GlU32}.Lib
C:\Program Files (x86)\Microsoft SDKs\Windows\v7.1A\Lib\{OpenGL32,GlU32}.Lib
C:\Windows\SysWOW64\{opengl,glu}32.dll
C:\Windows\System32\{opengl,glu}32.dll
C:\Program Files (x86)\NVIDIA Corporation\Cg folder.
You can then distribute the GLUT files as follows:
C:\Program Files (x86)\Microsoft Visual Studio *\VC\include\GL\glut.h
include folder.
C:\Program Files\Microsoft SDKs\Windows\v7.0A\Include\GL\glut.h
C:\Program Files (x86)\Microsoft Visual Studio *\VC\lib\glut32.lib
C:\Program Files\Microsoft SDKs\Windows\v7.0A\Lib\glut32.lib
C:\Program Files (x86)\Microsoft Visual Studio *\VC\lib\amd64\glut32.lib
C:\Program Files (x86)\Microsoft Visual Studio *\VC\bin\glut32.dll
C:\Windows\system\glut32.dll
C:\Program Files (x86)\Microsoft Visual Studio *\VC\bin\amd64\glut32.dll
stdlib header file that comes
with Visual Studio 2013 has compatibility issue with the header file that
comes with the 32-bit
glut-3.7.6.zip (web site), in particular
with the redefinition of exit(). So you may want to avoid using
this library. There is also the
freeglut library.
However,
freeglut
on Windows makes duplicate calls to the display callback handler.
This means your display handler must be safe to be run multiple times,
which could require extra memory copying to save and restore states.
It also is a performance hit as each display redrawn must be done twice.
I suggest you don't use freeglut on Windows in EECS 487.
#include <GL/glut.h>
You don't need to include gl.h and glu.h,
as they are already included in glut.h.
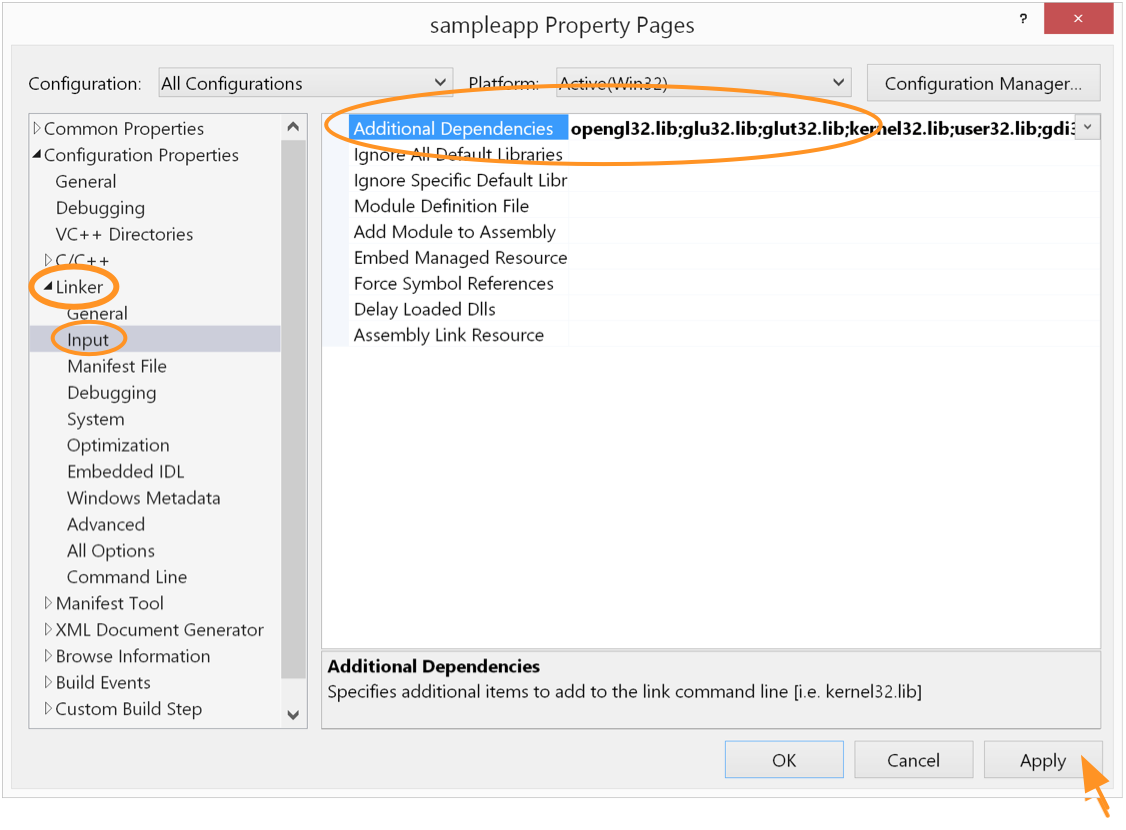
opengl32.lib;glu32.lib;glut32.lib;
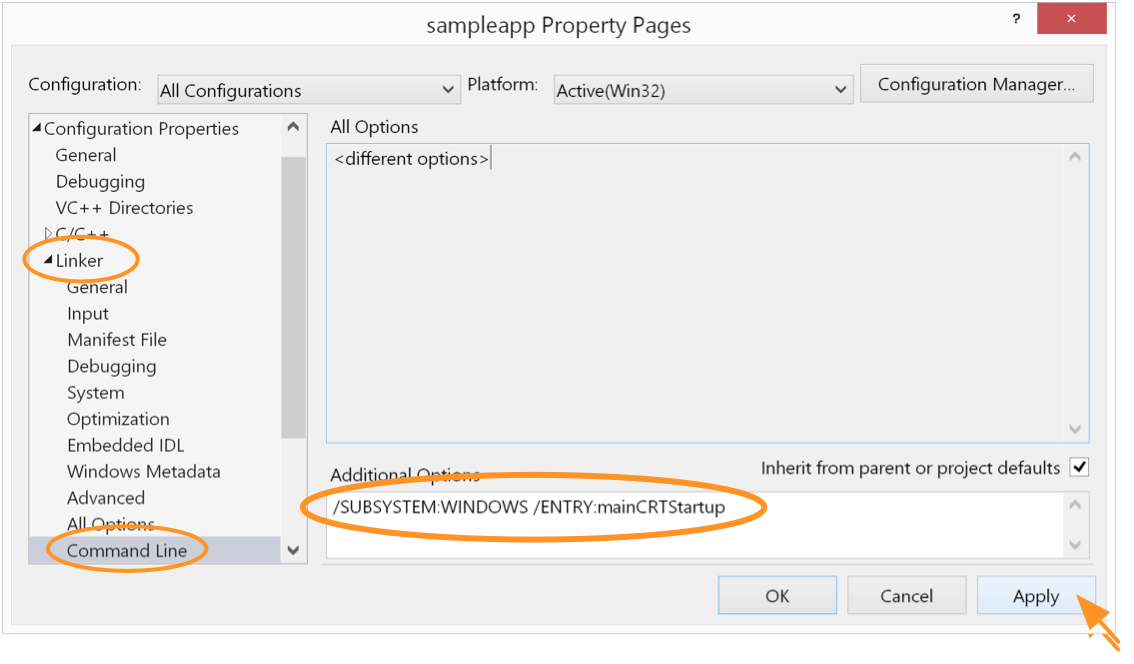
/SUBSYSTEM:WINDOWS /ENTRY:mainCRTStartup
then click "Apply" (Fig. 37). You
may not want to disable the console window if you print out
messages to the console (see next step).
 ) to build and
run the program. If you print out messages
to the console, run the program using Ctl-F5 instead, to keep
the cmd window from exiting after the program exits.
) to build and
run the program. If you print out messages
to the console, run the program using Ctl-F5 instead, to keep
the cmd window from exiting after the program exits.
glut32.dll with
your distribution. Unfortunately there doesn't seem to be any
precompiled statically linked GLUT library for Windows.
glBindBuffer()
and those that use shaders segfault on the call to glCreateProgram().
So we'll build WGL apps instead. The compiler toolchain that comes with Cygwin
can build WGL apps (see Building OpenGL/GLFW Apps), but
unfortunately there is no GLUT library that works with it. The available
freeglut binaries for MinGW makes duplicate calls to the display
callback hanlder as noted above. The Nvidia's GLUT binaries were evidently
not compiled to support large memory model, resulting in "relocation truncated
to fit" error messages from the linker. Fortunately, the MinGW x86_64 compiler
toolchain can work with the Nvidia's GLUT libraries, so we'll use this toolchain
instead of the native Cygwin toolchain.
Devel→mingw64-x86_64-gcc-g++
The setup program will figure out, download, and install all necessary dependencies.
To use WGL instead of GLX under Cygwin, you need to link your program against native Win32
graphics libraries. Let YOUR_TOOLCHAIN be x86_64-w64-mingw32 and
replace every occurrences of YOUR_TOOLCHAIN below with x86_64-w64-mingw32
(we'll see the use of other toolchains later). Verify that you have the Win32 version of
OpenGL and GLU installed:
  /usr/YOUR_TOOLCHAIN/sys-root/mingw/lib/libopengl32.a

  /usr/YOUR_TOOLCHAIN/sys-root/mingw/lib/libglu32.a
with the OpenGL include files in:
/usr/YOUR_TOOLCHAIN/sys-root/mingw/include/GL
You would then need to add the path /usr/YOUR_TOOLCHAIN/sys_root/mingw/bin
and /usr/YOUR_TOOLCHAIN/bin to your search path, i.e., your environment PATH
variable, for binaries and dynamically linked libraries (dll). (As such, you can only
have one toolchain in use for a given PATH environment variable.)
/cygdrive/c/Program\ Files\ (x86)/NVIDIA\ Corporation/Cg as follows:
/usr/YOUR_TOOLCHAIN/include/GL/
You'd have to create the include and GL directories.
/usr/YOUR_TOOLCHAIN/lib/libglut32.a
When linking against a library, unlike Visual Studio,
the MinGW/Cygwin linker looks for either
lib<pkg>.a or <pkg>.lib,
not lib<pkg>.lib.
/usr/YOUR_TOOLCHAIN/bin/glut32.dll
Remember to add /usr/YOUR_TOOLCHAIN/bin to your environment
PATH variable prior to launching your app, as noted above.
-lglut32 -lglu32 -lopengl32
[Some antivirus software such as Avast! may automatically move the
binary you build into its virus quarantine folder. You may want to
exclude your working folder from automatic virus quarantine.]
 Devel→cygwin32-gcc-g++

 Devel→mingw64-i686-gcc-g++

 Devel→mingw-gcc-g++
use the following labels, respectively, in place of YOUR_TOOLCHAIN above:
i686-pc-cygwin, i686-pc-mingw32, or i686-w64-mingw32.
For i686-pc-cygwin, the subdirectory under sys-root is called
usr instead of mingw.