EECS 487 PA3: Buffers, Textures, Shaders
This assignment is due on Fri.,
Nov. 20, 2014 at 10:00 pm
Overview
In this assignment you will create a scene consisting of multiple
spheres and cubes, apply a different texture to each object, and give
a bumpy-looking appearance to each surface using normal mapping. You
will also get a chance to exercise your understanding of vertex-array
object, the use of shader custom vertex attributes and texture samplers,
and the use of multiple texture units.
Graded tasks summary (100 points)
- Transfer your vertex-buffer object code from Lab 6: Textures and Mapped PBO to the
provided support code. (5 points)
- Create and texture a cube: fill out init_cube() and
draw_cube(), both in objects.cpp. (15 points)
- Use vertex-array object to alternately display a sphere
or a cube. (5 lines in init_world() and 2 lines in
draw_world(), both in objects.cpp). (10
points)
- Load multiple textures and texture the objects in task 2
using a different texture for each object. (3 lines in
scene.cpp:init_texture() and 2 lines in
objects.cpp:draw_world()). (10 points)
- Replace client-side vertex attribute with shader attributes
(objects.cpp:init_{sphere,cube}(), nmap.vs).
(10 points)
- Use shader texture samplers (2 lines in
scene.cpp:init_textures(), 2 lines in
nmap.vs, 3 lines in nmap.fs, and
at least 4 lines in objects.cpp:init_{sphere,cube}()). (15 points)
- Use multiple texture units and implement normal mapping. (25 points)
- Make a scene that incoprates at least 3 objects consisting of
normal-mapped sphere(s) and cube(s). Preferably the scene tells a
story or expounds upon a concept. (10 points)
The tasks above build on each other, so you should finish debugging one
task before moving on to the next task. You may not be able to return
to work on the previous task once you have started on the next one.
Implementation details
TASK 1: Vertex-Buffer Object
This assignment builds upon Lab 6: Textures and Mapped PBO. As with PA1, your first task is to
transfer your Lab 6 solution to the provided
support code. You will be modifying files scene.cpp and
objects.cpp for this task. Your solution to Lab 6 is required to
have used GL_TRIANGLE_STRIP instead of GL_QUADS. All
vertex attributes (position, color, normal, tangent, texture coordinates)
must use vertex-buffer object with mapped buffer instead of copying from
client-side vertex arrays or using immediate mode.
If you are not able to complete Lab 6, you may use our solution instead.
However, we will not be making the solution available until after Lab 6
is due and you will be forfeiting the 5 points of this task.
As usual, the provided code files are commented to mark the locations
of each task. They also come with sometimes helpful remarks and
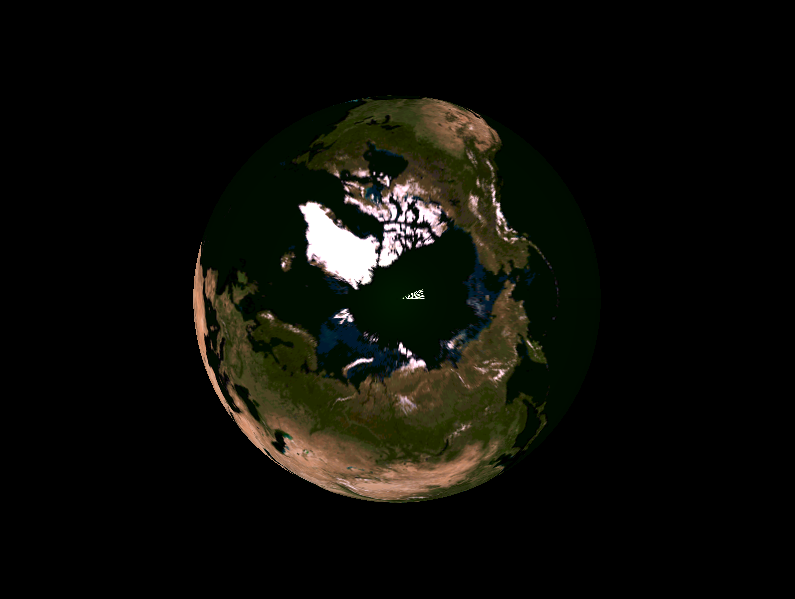
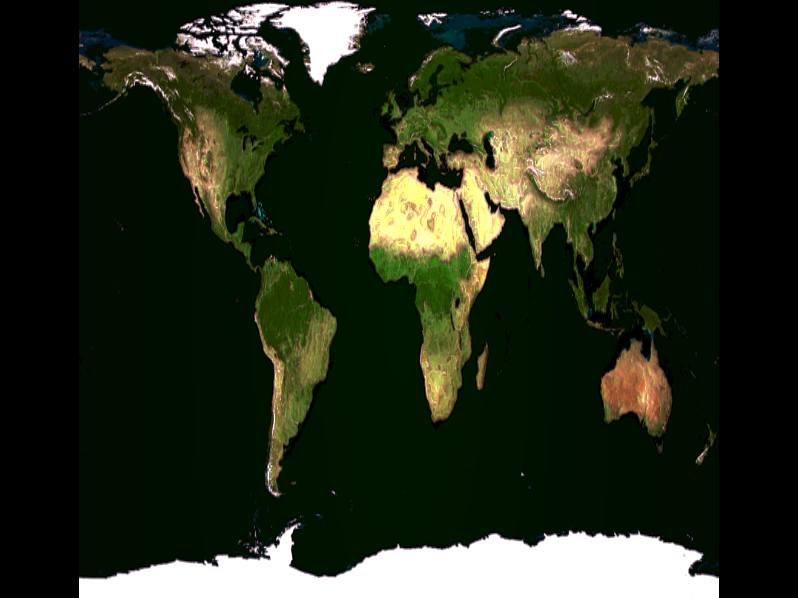
hints. After you have completed Task 1, running the provided code
using the command line: scene -t images/BlueMarble2004-08.tga
renders one of the following images. The image is generated by
modulating the texture with surface shading instead of just replacing
it. All keyboard shortcuts controlling modeling transforms from
Lab 6 apply.
 Visual Studio: to process the commad line options, we use
the getopt() API. If you're building on Windows with
Visual Studio, you need to add common/src/wingetopt.c
and common/src/wingetopt.h to your project. You may also need
to tell Visual Studio the location of wingetopt.h.
If you don't know how to do that, please consult the
course note
on the topic.
Visual Studio: to process the commad line options, we use
the getopt() API. If you're building on Windows with
Visual Studio, you need to add common/src/wingetopt.c
and common/src/wingetopt.h to your project. You may also need
to tell Visual Studio the location of wingetopt.h.
If you don't know how to do that, please consult the
course note
on the topic.
TASK 2: Cube rendering
Your second task is to render and texture a cube using client-side
vertex attributes. Review the code in init_sphere() and
draw_sphere() and adapt them to draw a cube.
Modern OpenGL no longer supports GL_QUADS, thus you
must use GL_TRIANGLES to model your cube. The important
thing to remember here is that you want your cube to have sharp
edges. Polygons sharing a cube edge all face different directions,
so the normals of shared vertices should not be averaged.
In modeling your cube, you must use vertex-buffer object with
mapped buffer instead of copying from client-side vertex array or
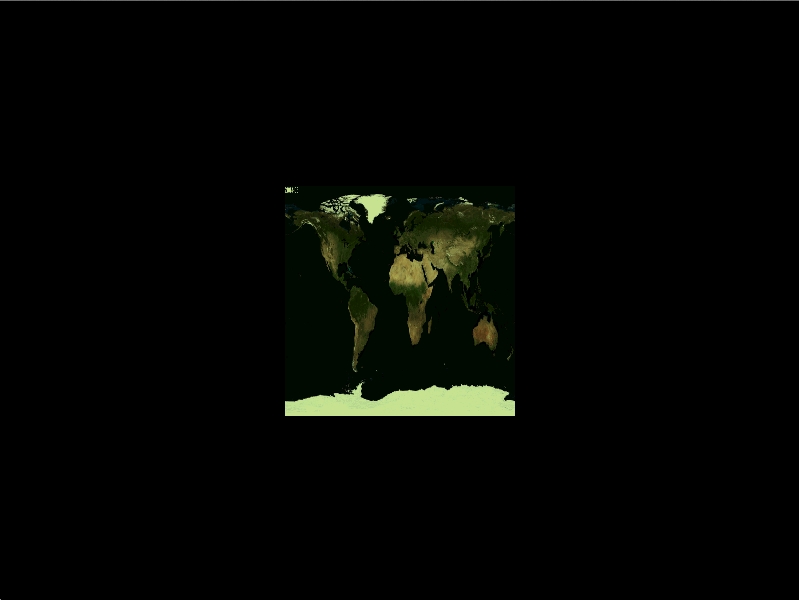
using immediate mode. After you've
completed init_cube() and draw_cube() in
object.cpp, set drawobject=CUBE in scene.cpp:main()
before re-building the binary. Upon completion of
this task, running the program with the "Blue Marble" texture should
render this image (the orientation of the texture doesn't matter):
TASK 3: Vertex-array object
In this program we recognize only three shape alternatives:
SPHERE, CUBE, and NOBJS, where
NOBJS means both sphere and cube (see
objects.h). Your third task is to encapsulate all the
states for rendering each shape in a vertex-array object. This is
accomplished in objects.cpp:init_world() by first generating
NOBJS vertex-array objects, then binding to the vertex-array
object for SPHERE before calling init_sphere(), and
then binding to the vertex-array object for CUBE before
calling init_cube(). To enable alternate rendering of the
sphere and cube, in objects.cpp:draw_world(), bind to the
corresponding vertex-array object before calling
draw_sphere() or draw_cube(). You may use a global
array to hold the vertex-array object handles so that they are
accessible in both init_world() and draw_world()
functions. Set drawobject=NOBJS in scene.cpp:main()
before re-building the binary. When you run the updated program,
you'll see a blank, black screen. Pressing the 'b' or
'c' key renders a sphere or a cube as shown above
respectively.
TASK 4: Multiple texture objects
As is, scene.cpp:init_textures() creates ntexs
number of texture objects, but the code from Lab 6 loads only a single
texture. Modify the function such that it loads ntexs number
of textures into as many texture objects. Then in
objects.cpp:draw_world() bind with the corresponding texture
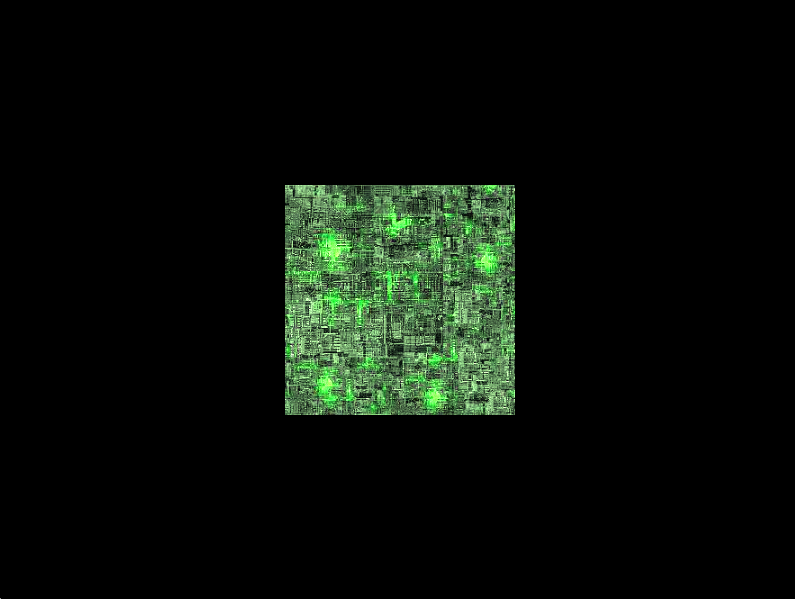
before calling draw_sphere() and draw_cube(). Run
the updated program with two different textures, e.g., scene -t
images/BlueMarble2004-08.tga -t
images/borg_Celtic_Entropy.tga. You'll see a blank, black screen;
pressing the 'b' or 'c' key renders a sphere or a
cube as before, but each textured differently.
TASK 5: Shader custom vertex attributes
The provided, skeletal vertex shader nmap.vs uses client-side
vertex attributes such as gl_Vertex and gl_Normal to
perform its computations. Modify nmap.vs to use custom
vertex attribute variables for vertex position and vertex normal. In
objects.cpp:init_sphere(), first get the location of the
custom vertex attributes using glGetAttribLocation(), then
enable the vertex attributes and pass the corresponding attribute
arrays to the shader using glEnableVertexAttribArray() and
glVertexAttribPointer(). The shader program handler that you
need to set the custom vertex attributes is declared as a global
variable (spd) in scene.cpp. Near the top of
scene.cpp replace the default shader_mode from
NONE to NMAP to have the program load your shaders
instead of using the fixed-function pipeline. You should be able to
build an updated program that renders an untextured sphere when
'b' is pressed. Similarly enable vertex position and normal
attributes in init_cube() to render an untextured cube when
pressing 'c'.
As of OpenGL 3.1, using vertex-array objects, vertex-buffer objects,
and custom vertex attribute locations is considered the ``correct''
way of passing vertex attributes from the application to the shader.
With OpenGL ES (WebGL), this is the only way. The way we
passed vertex attributes in lab5 and lab6 and prior to this task are
considered "deprecated."
TASK 6: Shader texture sampler
Modify objects.cpp:init_sphere() to pass texture coordinates
to the shader as a vertex attribute. Similarly, modify
object.cpp:init_cube(). In nmap.vs, pass the texture
coordinates attribute as a varying variable to the fragment shader.
In scene.cpp:init_textures() use
glGetUniformLocation() and glUniform1i() to get the
texture sampler location and specify texture unit 0 as the texture
sampler. In nmap.fs declare the texture sampler as a uniform
variable to be set by the application and the texture coordinates as a
varying variable to be passed in by the vertex shader. Then sample
the texture at the texel specified by the texture coordinates and
compute lighting at the fragment using the texel. Running the updated
program with scene -t images/BlueMarble2004-08.tga -t
images/borg_Celtic_Entropy.tga and pressing "b' and
'c' should render the following images respectively.
TASK 7: Multitexturing and Normal Mapping
Normal maps can be specified on the command line using the -n
option, e.g., scene -t images/BlueMarble2004-08.tga -n
images/BlueMarble2--4=08-Normal.tga. If multiple texture and
normal maps are specified, the program pairs them up in order. In
scene.cpp:init_nmaps() load the normal maps into texture unit
1. This function pretty much duplicates
scene.cpp:init_textures() except you need to call
glActiveTexture() before creating the texture objects and
loading the texture files. It is made a separate function from
init_textures() simply for ease of separating the tasks in
this assignment. In objects.cpp:draw_world(), for each
texture unit, bind the appropriate texture object you
have intended for each shape before calling its draw function.
You may want to review the lecture notes on normal mapping. As
explained in the lecture notes, the next step is to compute a tangent
per vertex. If a vertex is shared by multiple polygons forming a
curved surface, you most likely want to compute an average tangent for
the vertex, including at the seam where the texture wraps around and meets
itself. Modify your code in objects.cpp:init_sphere() and
objects.cpp:init_cube() to compute and pass along per vertex
tangent to the vertex shader. You would need to add the tangent
attribute to the sphere_vertex_t structure (and the
corresponding structure for your cube). Figuring out how to compute
average tangent per vertex could be rather time consuming (though it's
more straightforward for cube than for sphere). For that reason, you
may want to complete the earlier tasks as soon as they have been
covered in lecture and not wait for the last week before the due date
to start this assignment.
In nmap.vs use the tangent and normal vertex attributes to
compute the bitangent at the vertex and compute an orthonormal TBN
matrix. Use the inverse of the TBN matrix to transform the light
and view vectors to tangent space and pass them to the fragment shader.
In nmap.fs,
sample the normal map passed in by the application at the texture
coordinates passed in by the vertex shader (the same ones used to
sample the texture map) and use the sample from the normal map as the
per-fragment normal. Using the view and light vectors in tangent
space passed in by the vertex shader, along with the
sampled normal, compute the per-fragment lighting. Modulate the
computed light with the texel sampled from the texture map to shade
each fragment.
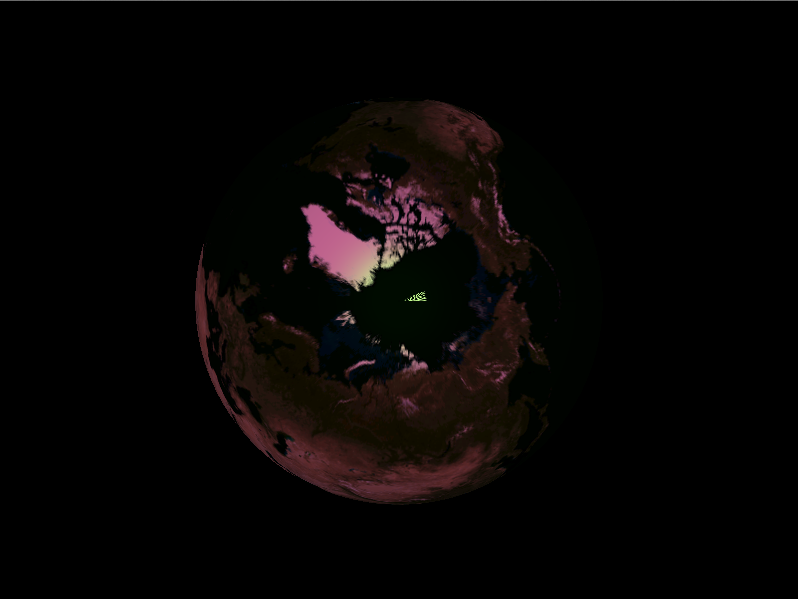
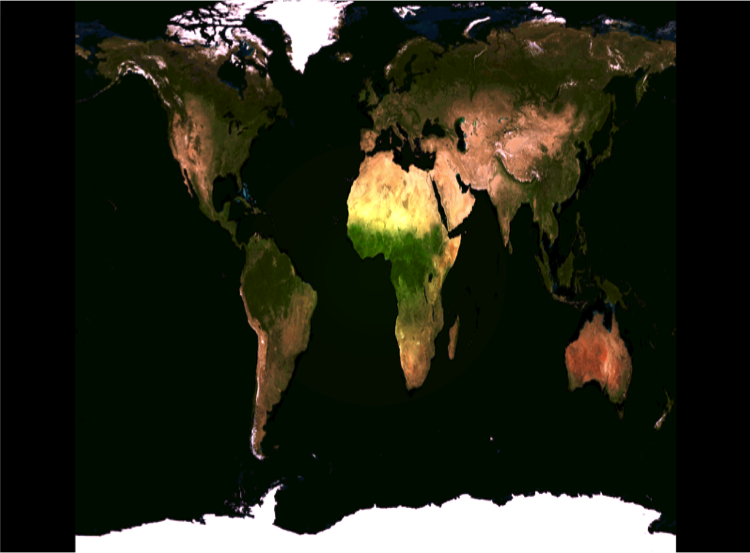
The following images show the "BlueMarble" texture mapped onto a cube
face with and without normal mapping respectively. Note the extra
details in north Africa, for example, in the image rendered with
normal mapping.
TASK 8: Make a scene!
Let your creativity loose and create a scene
involving at least 3 objects incorporating both spheres and cubes.
Remember that you can shear the shapes or apply other transforms to
them. To get full credit, your scene must
(1) show off normal mapping and (2) use texture and normal maps
other than the ones provided (if I forgot to show
how to create normal maps using gimp, please ask). Don't skip
this step! Even if you have completed only the first three tasks, if
your scene is compelling enough, you will get partial credit for this.
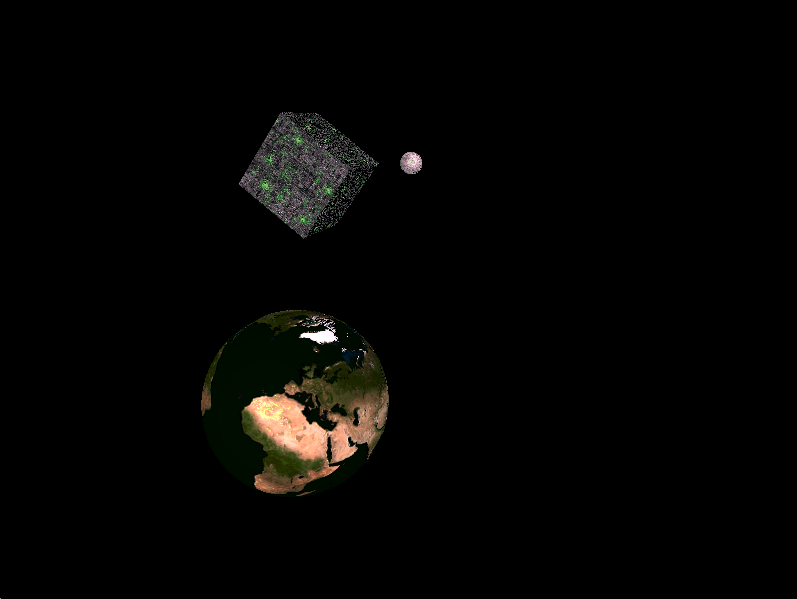
Below is an obvious example scene (you have to come up with something
better!). Running your program should now show your scene.
To help debug each individual shape, you can switch to showing
only the first sphere or the first cube by pressing 'b'
or 'c' respectively. Pressing 'a' returns you
to full scene rendering.
Submission Guidelines
As with PA1, to incorporate publicly available code in your
solution is considered cheating in this course. To
pass off the implementation of an algorithm as that of another is also
considered cheating. For example, if the assignment asks you
to implement sort using heap sort and you turn in a working program
that uses insertion sort in place of the heap sort, it will be
considered cheating. If you can not implement a required algorithm,
you must inform the teaching staff when turning in your
assignment, e.g., by documenting it in your writeup.
Test the compilation!
Code that does not compile
will be heavily penalized.
The creative portion of this project, Task 8, will take a long time if
you are interested in getting a good grade. This involves a lot of
trial and error. Remember that to get full credit for this task,
your scene must (1) show off normal mapping and (2) not use
the provided texture and normal maps. Post the image(s) from your
Task 8 to the course's
Image Gallery by
logging in to a CAEN linux machine and running the following:
% cd <to where your image.png file is located>
% /afs/umich.edu/class/eecs487/scripts/postimg <image.png> [<image2.png ...>]
Create a writeup in text format that discusses:
- Your platform and its version: Linux, Mac OS X, Windows, or any other.
- Anything noteworthy about your implementation, e.g., if you implemented
cube mapping.
- URL of any web site you reference, either for texture, normal map, or
cube modeling.
- Feedback on the assignment.
- Name the file writeup-uniqname.txt.
For example, the person with uniqname
tarukmakto would create
writeup-tarukmakto.txt.
Your "PA3 files" consists of your writeup-uniqname.txt,
scene.cpp, objects.cpp,
nmap.vs, nmap.fs, and
any texture and normal map files you created or used for Task 8.
To turn in your PA3, upload a zipped or gzipped tarball of your
PA3 files to the CTools Drop Box.
Keep your own backup copy!
The timestamp on your uploaded file will be your time of submission.
If this is past the deadline, your submission will be considered late.
You are allowed multiple "submissions" without late-policy implications
as long as you respect the deadline.
Turn in ONLY the files you have modified.
Do not turn in support code we provided that you haven't modified.
Do not turn in any binary files (object, executable,
dll, or library files) with your assignment. Your
code must not require other external libraries and include files
other than the ones listed in the Makefile.
Do remove all printf()'s or
cout's and cerr's you've added for debugging
purposes.
General Information
The
General Information section from PA1 applies. Please review it if
you haven't read it or would like to refresh your memory.