What can you do with this?
Check out What's new in JES 3.0!
Let's say that you have a picture of a girl in front of a wall, then a picture of the wall, and then a picture of the moon. Then you can do this (not great, but keep reading):
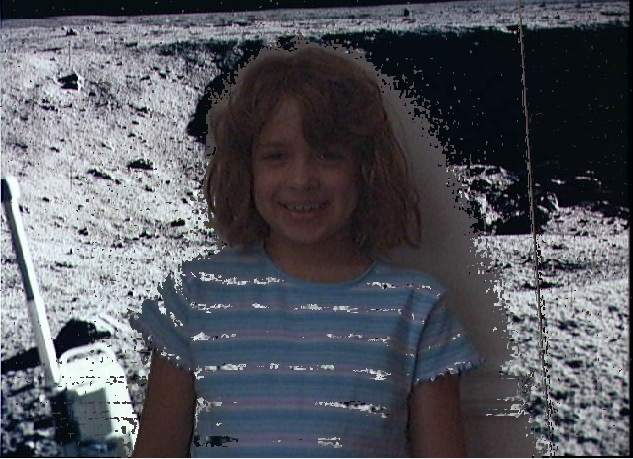
Here's the code to do that: We look at each pixel in the picture with the girl and figure out where the difference in color between the girl-picture and the wall-without-girl is. If the difference is 15 (in this example), then we decide that this pixel must be part of the wall – it's in both pictures! At that spot, we bring in the corresponding picture from the moon background.
#Picture with person, background, and newbackground
def swapbg(pic1, bg, newbg):
	for x in range(1,pic1.getWidth()):
		for y in range(1,pic1.getHeight()):
			p1px = getPixel(pic1,x,y)
			bgpx = getPixel(bg,x,y)
			if (distance(getColor(p1px),getColor(bgpx)) < 15.0):
				setColor(p1px,getColor(getPixel(newbg,x,y)))
	return pic1
But that's pretty yucky still isn't it? We can do a little better. The below uses a Threshold of 10 instead. Why does it still look so bad? Several factors:
- Can you figure out where the light source was and where there's shadow? That causes a difference in pixels that doesn't have to do with the girl.
- The wall color is pretty close to the color of the stripes on the girl's shirt – that makes it hard to discern. Maybe if we tried to identify a closed SHAPE and not just each pixel...
- The picture was out of focus, so colors blurred and looked different when they really weren't.
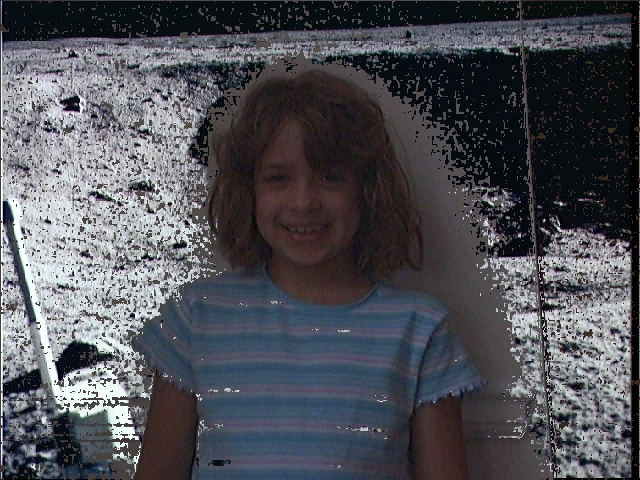
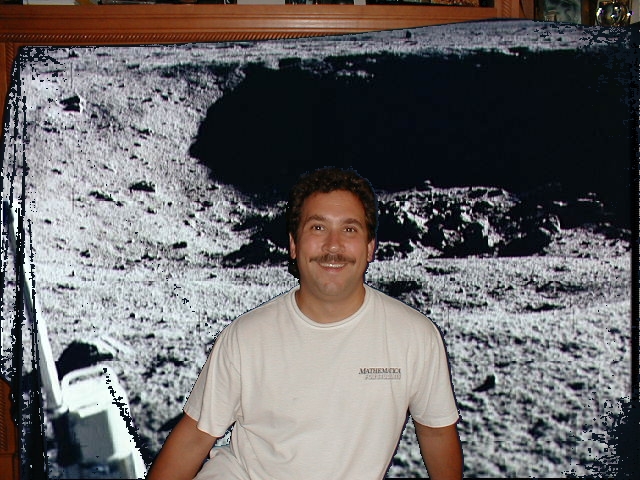
But using the chroma-key technique (e.g., mapping from a new background toeverything blue in the original picture) works REALLY well. I took my son's blue sheet, attached it to the entertainment center, then took a picture of myself in front of it (timer shots on a digital camera – ain't technology grand?). Then I ran this code.
def chromakey(source,bg):
	# source should have something in front of blue, bg is the new background
	for x in range(1,source.getWidth()):
		for y in range(1,source.getHeight()):
			p = getPixel(source,x,y)
   # My definition of blue: If the redness + greenness < blueness
			if (getRed(p) + getGreen(p) < getBlue(p)):
     #Then, grab the color at the same spot from the new background
				setColor(p,getColor(getPixel(bg,x,y)))
	return source
Amazingly how well it works! Of course, there are no folds in the real moon (see the lower left hand corner), nor is the entertainment center visible on the moon, but maybe George Lucas started like this...:-)
I found that this can also be written like this:
def chromakey2(source,bg):
	for p in pixels(source):
		if (getRed(p)+getGreen(p) < getBlue(p)):
			setColor(p,getColor(getPixel(bg,x(p),y(p))))
	return source
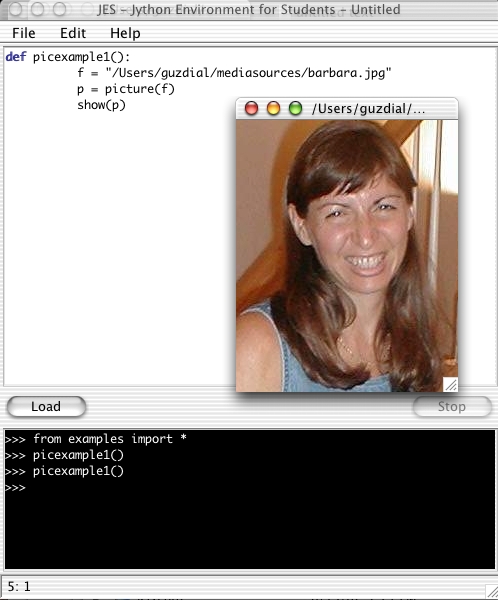
How hard is it to manipulate pictures? Here's live code in JES for opening and showing a picture file:
Sounds are also pretty easy. Here's the simplest opening and playing a sound.
def example1():

	f = '/Users/guzdial/mediasources/Elliot-hello.wav'

	s = sound(f)

	play(s)
What do you do if a sound is too quiet? Say it's like this: Elliot-softer.wav
You can make it louder, like this:
def louder(sound):
	for s in samples(sound):
		setSample(s,2*getSample(s))
The result is: Elliot-hello.wav (Might not work in your version of Windows Media Player – need to regenerate in JES 2.0.)
Let's say that you record yourself saying the preamble to the United States Constitution, at least the first couple sentences:
Some more sound examples: preamble.wav
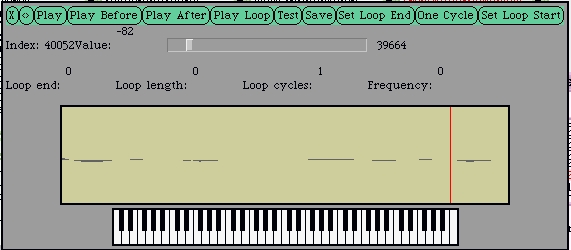
Using a sound editor that we provide you can figure out what the sample indices are where the various words end. "We the people of the United States" ends at sample number 55510.
So, let's create a sound with just that part.
#Segmenting
# Here's what I got from exploring with the editor
# Word		Endpoint
# We		15730
# the		17407
# People	26726
# of		32131
# the		33413
# United	40052
# States	55510

def segmentMain():
	# Grab the sound JUST up to "We the people of the United States"
	fs="/Users/guzdial/mediasources/preamble.wav"
	s=sound(fs)
	nfs = "/Users/guzdial/mediasources/sec1silence.wav"  #An empty sound
	ns=sound(nfs)   # This is where we'll build the new sound
	nsi=1 # New sound index, starting from 1
	for si in range(1,55510):	# Where the samples are in the sound
		setSampleAt(ns,nsi, getSampleAt(s,si))
		nsi = nsi + 1
	play(ns)
	writeSoundTo(ns,"preamble-start.wav")
Now we get this file: preamble-start.wav (Might not work in your version of Windows Media Player – need to regenerate in JES 2.0.)
But say that you really always wished that it said "We the UNITED people of the United States." Heck – when everything is digital, that's easy!
# Splicing
# Using the preamble piece, making "We the united people"
def spliceMain():
	fs="/Users/guzdial/mediasources/preamble-start.wav"
	s=sound(fs)
	ns=sound(fs)   # This is where we'll build the new sound
	nsi=17408     # New Sound Index starts at just after "We the" in the new sound
	for si in range(33414,40052):  # Where the word "United" is in the sound
		setSampleAt(ns,nsi, getSampleAt(s,si))
		nsi = nsi + 1
	for si in range(17408, 26726): # Where the word "People" is in the sound
		setSampleAt(ns,nsi, getSampleAt(s,si))
		nsi = nsi + 1
	for index in range(1,1000):		#Stick some empty space after that
		setSampleAt(ns,nsi,0)
		nsi = nsi + 1
	play(ns)	#Let's here and return the result
	return ns
Here's the new invented sound: preamble-start-new.wav (Might not work in your version of Windows Media Player – need to regenerate in JES 2.0.)
Want to know how a sampling keyboard works? Grab a sound, like a croaking frog (croak.wav) and play it at different rates:
def sampleDifferentMain():
	fs = "/Users/guzdial/mediasources/croak.wav"
	s = sound(fs)
	play(s)		# Just to hear the original
	playBitAtRate(s,2.0)
	for r in [0.5, 1.0, 1.5, 2.0, 2.5, 3.0]:
		print "Playing at rate "+str(r)
		playBitAtRate(s,r)

def playBitAtRate(sound,rate):
	sound.blockingPlayAtRateDur(rate,8000)
Here's another example of when programming is useful.
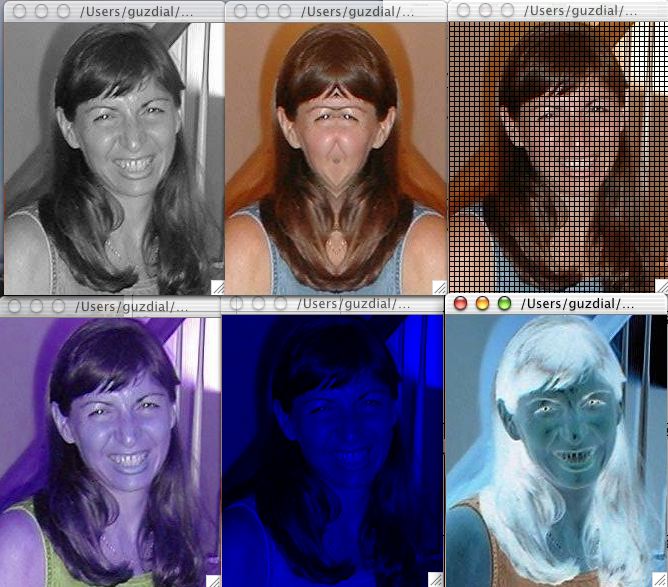
Let's say that you want to put some kind of text on a picture – for example, a copyright statement. That's not hard to do in something like Photoshop, but it's also not hard to do with a program. The program testTitle below gets a single picture and calls the title function to put the title on it at location 30,30 on the picture.
#
# Try titling
#
def testTitle():
	f = "/Users/guzdial/mediasources/barbara.jpg"
	newpic = title(f,"Copyright 2001 Mark Guzdial")
	writePictureTo(newpic,"/Users/guzdial/mediasources/t-barbara.jpg")

def title(fname,string):
	p = picture(fname)
	drawText(p,30,30,string)
	show(p)
	return p
Here's the Before and After
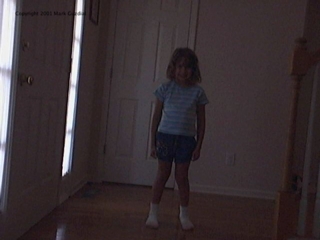
But what if you had 122 frames of a picture to title? I had a movie of my daughter that I burst into single frames. How do I title all of those without lots of work? Turns out that I can use the title program from above, and add only a slight bit more – using a predefined Jython function called walk that walks a directory and collects all of its files.
#
# Try titling a whole directory
#
def testTitling():
	import os.path
	os.path.walk("/Users/guzdial/mediasources/kid-in-bg-seq/",titleEach,"")

def titleEach(arg,dir,files):
	for f in files:
		newpic = title(dir+f,"Copyright 2001 Mark Guzdial")
		writePictureTo(newpic,dir+"t-"+f)
Here's the before and after (scaled down a bit) of only the first frame. You'll have to trust me that the other 122 look the same...
Matt Wallace just assembled a set of examples that look really great together.
Here is the code for the examples mattw.py, uses the example.py and media.py files.
Matt Wallace
Link to this Page
- Technology last edited on 23 April 2004 at 12:02 am by syr-24-58-94-89.twcny.rr.com